If you walk into a high end audio dealer’s showroom, notice if they start asking you questions about your music tastes and listening room. If given a chance to and they still just point you straight at their latest shiny new component and ask, “what’s your budget”, walk out. Or… know that you are going to have to work with a very limited knowledge based and/or a profit motivated sales person.
This may sound harsh, but all the shiny objects in their listening room mean nothing as compared to the knowledge of how to set up the gear matched to your room and music preferences (Why do speakers need to be matched to room acoustics?…). I went into a dealer of Martin Logan ESL’s in Calgary and they had a pair of their high end CLX’s (MSRP starts at $25k USD) just a few inches from the back wall in a large listening room, so I said, “let’s pull them out and give them a listen”. The sales person gave me a blank stare in return then said, “why would we do that?” By that time I had already noticed many unaddressed deficiencies in the entire set up, but was incredulous that they were honestly unaware that this fine set of planar speakers needed to be placed well into the room (at least two feet, probably more in this case) in order to image properly. I glanced at the source components available, saw only a Redbook quality CD player, then replied, “never mind”, and walked out. Granted, this particular dealer was more about Home Theatre installations. But, still…
So here’s “the goods” on a few simple (and free) things you can do at home to get the most out of your system (if you have bookshelf speakers you will need floor stands):
- For most speakers, start out by setting up an equilateral triangle between your listening chair and your left and right speaker.
- Listen a bit, then start to experiment. Look at your speaker manual and see what they recommend. Most speakers like to be at least a couple feet off the rear wall. Many planar speakers need more, some box speakers less. Move your listening position if needed (and possible) to accommodate how far your particular speakers like to be out. Also consider how far your listening position is from the wall behind it. If it’s around five feet or more it can probably be ignored, but less than that and you will have significant room reflections reaching your ears from that wall. If you’re in a rectangular room, be aware of the obvious room resonant frequencies based upon wave lengths that equal the dimensions of the room and therefore correspond to and reinforce specific bass frequencies.
- From there, start to experiment with how far the speakers like to be apart from each other. You may be limited by side walls and/or furniture on the sides. As a general rule, most speakers perform best when at least two feet from any side walls. If this isn’t possible for your room, do your best then work on it some more in step six below.
- Play around with the toe-in. This drastically effects high frequencies and the stereo image. Most speakers like to be pointed directly at you, but some like to be pointed straight ahead. I was amazed at the difference it made for my Kef 104/2’s (The venerable Kef 104/2) when I discovered they were of the latter variety.
- Next experiment with the height of your ears in the listening position. You can do this by sitting up or slouching down. This is one of the easiest ones to dial in because you don’t need to get out of your chair and move things around to do it.
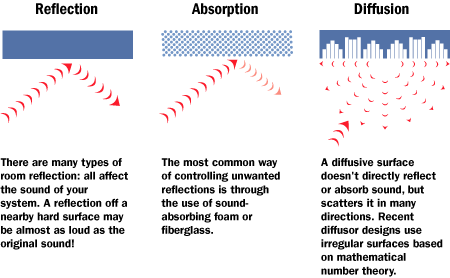
- OK… so now that you’ve got your speaker placement as best as possible “as is”, it’s time to work with the room. Consider the following diagram:

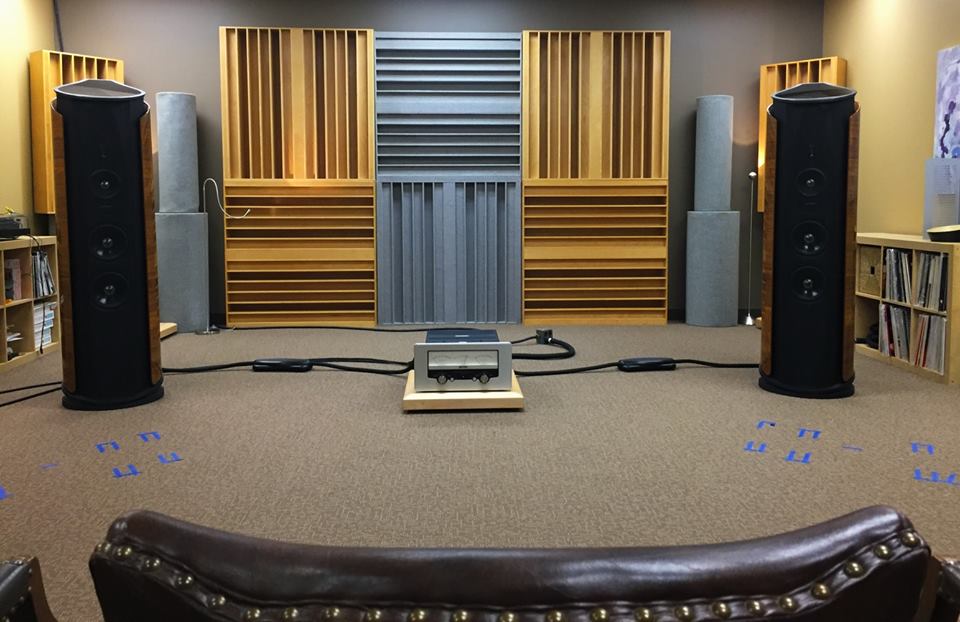
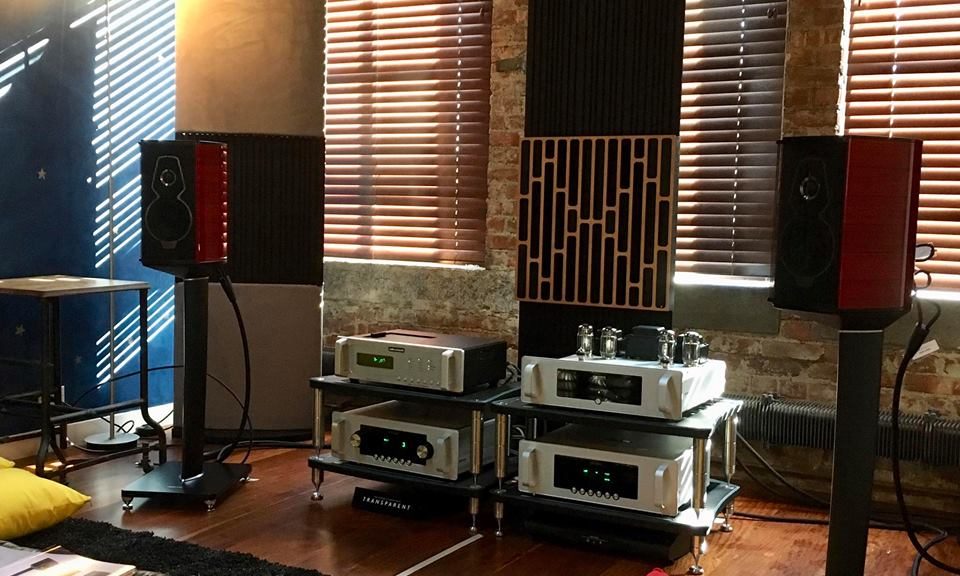
Reflection, absorption, and diffusion in various materials. Your room is likely to be a combination of all three. The first place to turn is any windows and/or mirrors in the room. These are high acoustically reflective materials which will have a dramatic effect on sound quality. If you have a huge glass window on the rear or side wall(s) for example, you will need to decide whether it is enhancing or detracting from sound quality (it’s almost never neutral, especially with planar speakers and a reflective surface on the rear wall). If you have blinds, listen to one of your references (What is a “reference”?) with them both open and closed, If you have no blinds or metal blinds, maybe temporarily hang a blanket and do the same thing. If your system sounds better with the blanket there, you may be able to effect a more permanent solution with fabric blinds that accomplish much the same thing. I’ve seen many, many home theatre installations with a huge flat screen located directly between the two front speakers. Makes sense for HT?… sure. But if you’re also listening to two channel audio on your system you will want to consider the effect this is having on your stereo imaging. It’s almost certainly scattering and destroying it. Solutions include in-wall screen installations with roller blinds or slides that offer a more suitable material for your music listening sessions. It’s difficult (to say the least) to incorporate HT and 2 ch audio into a singular system, but that’s another topic (The most obvious difference between 2 channel audio and 5.1 home theatre.). After working with all obviously highly reflective surfaces, turn to some of the more subtle room acoustics. If you’ve got resonant bass frequencies, try to find ways to break up the wavelength. This can be accomplished by moving furniture or even large plants around. If you have disparate materials on your side walls you may want to find a way to address that with a bookcase to absorb side reflections or glass framed artwork or a mirror to enhance them. Play around and have fun while thinking of all the money you are saving by working with what you’ve already got sitting around the house. However, it’s important to keep in mind the importance of sound proofing for moveable walls in order to minimize noise and disruptions between rooms. There is certainly a more acoustically engineered approach (using sound spectral analysis and expensive acoustic treatment panels), but it ultimately boils down to what sounds best to you anyway. Unless you have a completely dedicated sound room you’re likely working with household furnishings that dramatically effect your sound quality anyway, so why not use them to your advantage? If you’re finding very significant improvements to your sound quality based on this step, you may want to play around with steps one through five again. This isn’t necessarily a linear process. You may even find that after many hours in the listening chair you want to play around with all the above steps again. I’m usually not completely satisfied until I’ve listened to references from all genres of my music collection. That’s why it’s best to wait a while for steps seven and eight. As a side note you may also want to wait to buy high end speaker cables (Speaker Cables) until you’ve got your speaker position nailed down.

- Now that you’ve got the optimal speaker positioning based upon all the variables, mark it somehow – perhaps blue tape under the speaker outline on a hardwood floor. I line up mine with the grooves in the hardwood. If you have carpet, get creative.
- Finally you will need to figure out the best way to couple the speakers to the floor. For floor-standing models it’s simple, spikes for carpeted floors and rubber feet or spikes on small circular plates (about the size of a penny) for hardwood. This is saved for last since moving heavy spiked speakers around on hardwood floors and protecting them at the same time is a real pain in the ass. And… this only serves to tighten the bass frequencies and therefore has little to no effect on steps one through six above. If you have bookshelf speakers on stands, they won’t have much bass to start with, and even less if they aren’t coupled to the floor somehow. For my LS3/5As (What is it about the Roger’s LS3/5A?…), I found speaker stands with spiked feet that I could fill with sand for mass loading (Acoustic isolation for turntables – to couple or decouple?…). Not as good as a well coupled floor standing speaker, but the LS3/5A was originally designed as a studio monitor. It was only later discovered and adopted by audiophiles as a go-to speaker for high quality sit-down-and-listen music reproduction.
I find that it definitely takes a while to dial in the sweet spot of all the above, but it’s so, so worth it. On Maui I need to move one of my speakers into place each time I sit down to listen to music. Small price to pay (even though it weights 70 pounds). In Canada I’ve been able to locate the Maggies in their “sweet spot” and leave them there without detracting from my living room view and esthetics, at least in my opinion.

