Category Archives: Product Reviews

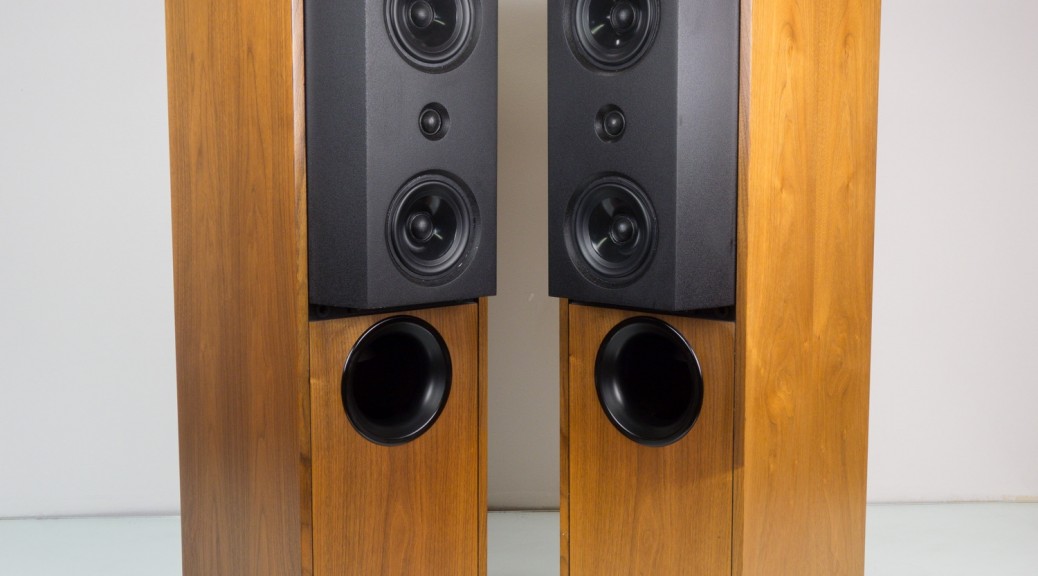
The Venerable Kef 104/2

What can I say.  I purchased these speakers off Craig’s List on Maui and talk about a “gem in the rough”!  I am very, very happy with them, especially the more I play them.  So much so that I’m on the hunt for another pair for Canada.  They are something worthy of growing into.  I found them early on in my return to my love for high end music reproduction, so they started out playing SACDs coupled with a nice warm Marantz preamp and an utterly competent vintage SAE power amp.  They immediately started to reveal the weaknesses in my system in other areas, such as that of my SACD player’s DACs (Op Amps are holding back my digital quest).

But the real magic started to happen once I got my vinyl signal path going with the Denon 103R moving coil phono cartridge (The formidable Denon 103 vs. 103R low output moving coil phono cartridges – is there really a difference?…) , the right preamp for the job of handling said phono cartridge (The Nakamichi CA-5A preamplifier), and the perfect power amp to drive these amazing loudspeakers (The Audionics of Oregon CC-2. More distortion, more better.).

At the risk of using superlatives, the 104/2’s are visceral in the best sort of ways, vs. the analytical qualities of “Maggies” (In a nutshell, the big Maggies (3.7Rs) are a fantastic speaker, but are very dependent upon room acoustics).  It seems strange to call these seemingly mutual exclusive qualities both good, but they are!  All I can say if you seek perfection in the plucking of a string as part of an acoustic performance, go for the Maggies.  But if you want to rock your world like you are at a live show of your favourite classic rock band, the 104/2’s will absolutely steal the show every time.

When setting these up, it was immediately apparent that my room is by far my biggest limitation (Why do speakers need to be matched to room acoustics?…).  Very early on I discovered a dramatic improvement in imaging by not toeing them in (as you do most speakers) and much tighter bass just by moving the them about 6” further out from the rear wall.  My room is gonna resonate at around 75 Hz no matter what, since the “long” dimension is 15 feet long.  But there are still ways to work with that, especially with an acoustic suspension vs. bass reflex design.  Interestingly, the 104/2s are neither.  They are about the most clever design to get exemplary bass out of a relatively small cabinet I’ve ever seen.  The key to their success is two vertically firing woofers that combine their output to a port of exactly the same diameter as the B110 mid-range drivers, a design Kef calls “Coupled Cavity Bass Loading”.

The CC-2 powering the Kef’s is a marriage made in heaven (after all, the designer of the CC-2 was working alongside Lynn Olson who was designing speakers spec’d with Kef drivers).  As a side note, the CC-2 is also a perfect match for the 15 ohm LS3/5As I built in Canada (What is it about the Roger’s LS3/5A?…).  How do I know this?…  I listened to them together back when they came out in the 70s – another audiophile magic combination (Why do power amps need to be matched to speakers?…).

Vintage preamp shoot-out, tubes vs. solid state

So, after having the Acoustic Resarch SP-9 (I may be a purist, but…) in my system for about a week, then the Threshold FET Nine (Threshold FET 9 Preamplifier) for about a week, I finally did an A/B  comparison into my Maggie MG-12s – which are frigging PERFECT for my room (w/o tweeter attenuation) driven by the Nak PA-7.  The front end was reference quality vinyl and both preamps got proper warm-up  times..  The Acoustic Resarch SP-9 beat the FET Nine hands down (for my speaker/room combo anyway).  Subtle, but very significant differences.  Still need to do the A/B of the line stages with an SACD source, but the phono stage of that Acoustic Research is pure magic.

The Nakamichi CA-5A preamplifier

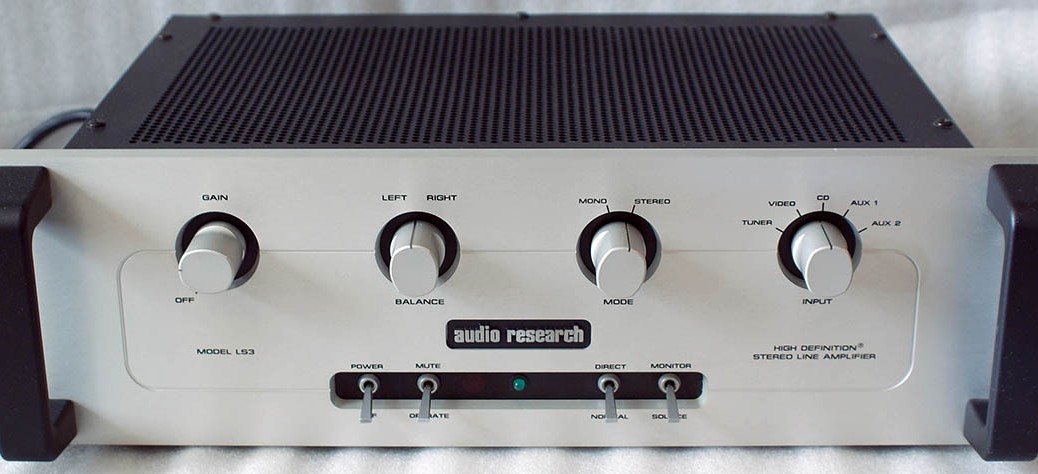
This legendary solid state preamplifier is the mate for the Nak PA-7 power amp (The Nakamichi PA-7 power amplifier).  It is also designed by Nelson Pass and follows the same precepts as his Threshold (and later Pass Labs) preamps and power amps, which is simple, short circuit topology with nothing but the highest quality fully discrete components in the entirety of the signal path.  It lacks anything non-essential to that end, including tone controls of any kind (Why I prefer analog preamplifiers that lack tone controls).  Nakamichi later released the CA-5AII, replete with tone controls, which makes the original CA-5A widely recognized as “the one to get”, even though the CA-5AII has a defeat switch it still adds additional, sound sucking and sound altering tone control circuitry.

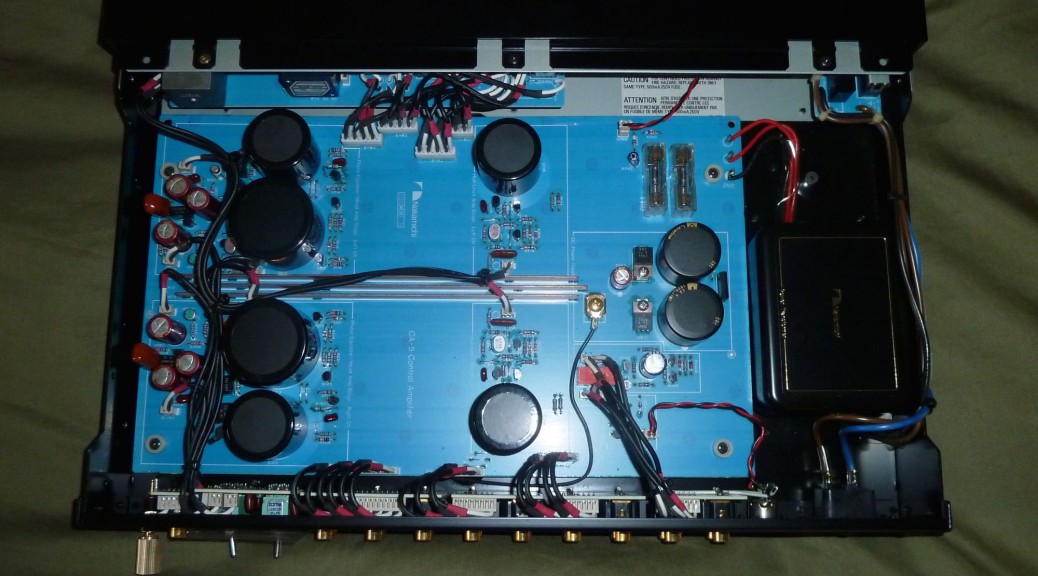
One look at a “nude” photo of the CA-5A tells the whole story.  Three beefy copper power rails running down the middle of it’s “dual mono” circuit board (which is important to reduce crosstalk between left and right channels, which compromises the stereo imaging), very short wire runs, very few circuit board traces, and nothing but top quality parts, including all ALPS for the controls (ALPS analog volume controls and rotary switches), and you can really feel the quality when you use them.  Nelson Pass went on to separate the power supply into a separate chassis, which is the design in his Threshold FET 9 preamp.

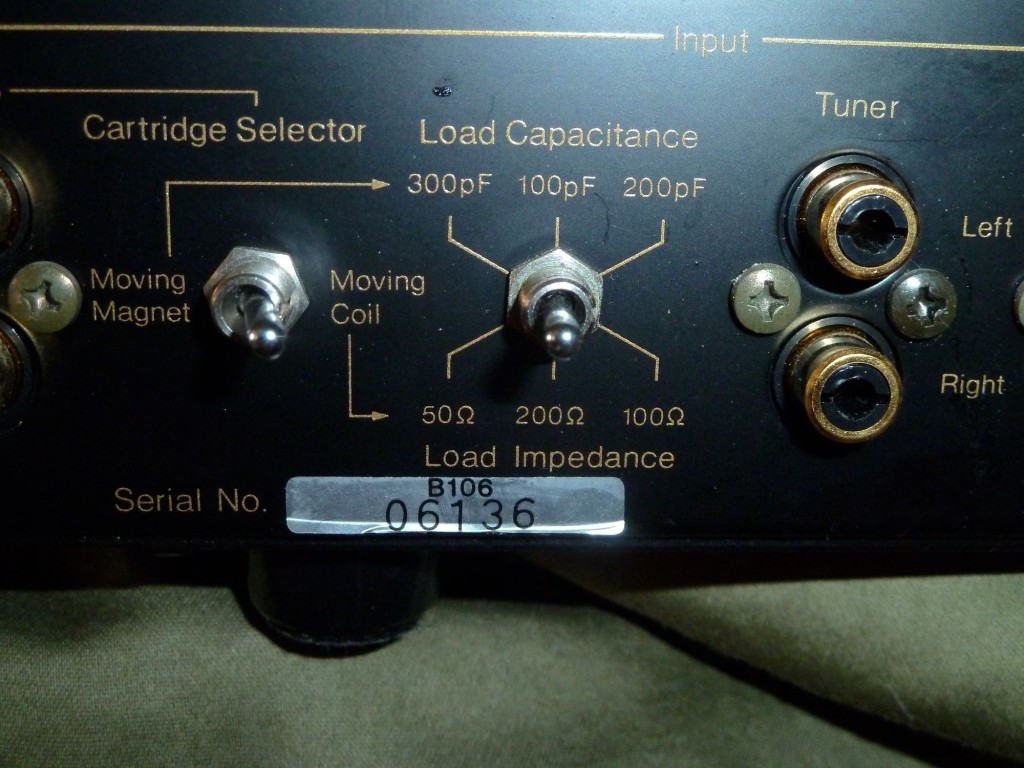
The Nakamichi CA-5A cartridge loading options

The photo above shows the cartridge loading options I look for, including provisions for moving coil cartridges such as the Denon 103R (The formidable Denon 103 vs. 103R low output moving coil phono cartridges – is there really a difference?…).  In fact, cartridge loading is the only slightly complex circuitry in this entire preamp, but is essential to top notch phono playback.  Audio Research went so far as to eliminate the cartridge loading circuitry entirely in their SP9 Mk II preamplifier (I may be a purist, but…).  Instead they, ship the resistors and capacitors necessary to change it with the preamp itself.  While I agree with this approach in theory, in practice it’s a real pain in the ass to have to remove and replace (by soldering and desoldering) resistors and capacitors just to optimize your phono section for your chosen cartridge.

Beauty in simplicity best describes the Nakamichi CA-5A circuit topology

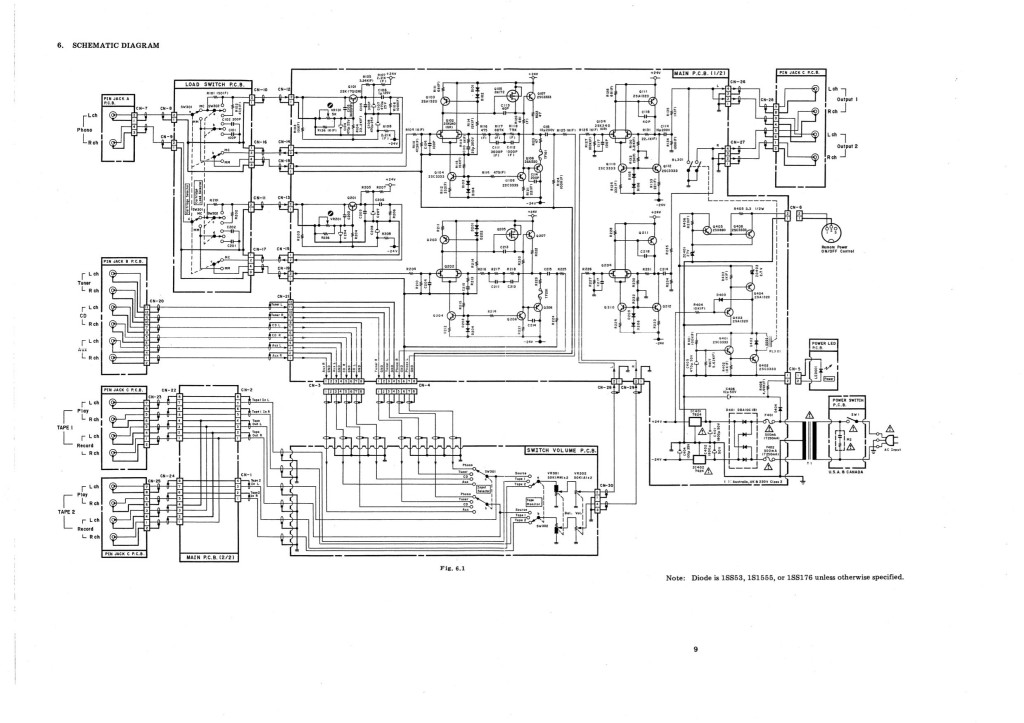
If you look at the schematic in the photo above you can immediately see how simple the circuitry in the Nak CA-5A is.  The blocks labeled on the schematic diagram are even labeled on the PCB (Printed Circuit Board) itself.  The Nakamichi CA-5A clearly subscribes to the “less is more” approach.

The Nakamichi PA-7 power amplifier

I’ve lusted after this power amplifier ever since it came out in 1988.  It just looked so damn sexy.  It originally retailed for $1,595 which isn’t a lot by today’s standards but certainly was back then, especially for a recent college grad trying to get ahead in San Francisco.   So I never owned it and instead settled on the lessor Nelson Pass design in the form of the Adcom GFA-555II to power my Martin Logan Sequel IIs at the time.  Well, I ultimately ended up with two GFA-555s powering those Sequel IIs and still wasn’t satisfied, but that’s another story (It’s all about reducing mass for the transducers).

So fast forward 26 years and I’m on the hunt for an appropriate  power amplifier for my chosen Maggie MG-12s.  This baby had been on Kijiji (Canada’s Craig’s List) for a few weeks for exactly half the original retail price, not bad 26 years later but still a friggin bargain for anyone comparing it to present new offerings.  But it was in Edmonton, a 3.5 hour drive from Canmore.   I ultimately decided to make the trip to have a look at the PA-7 as well as a couple other vintage high end audio components, which I also purchased (An Edmonton audio-venture (names changed to protect the guilty)).

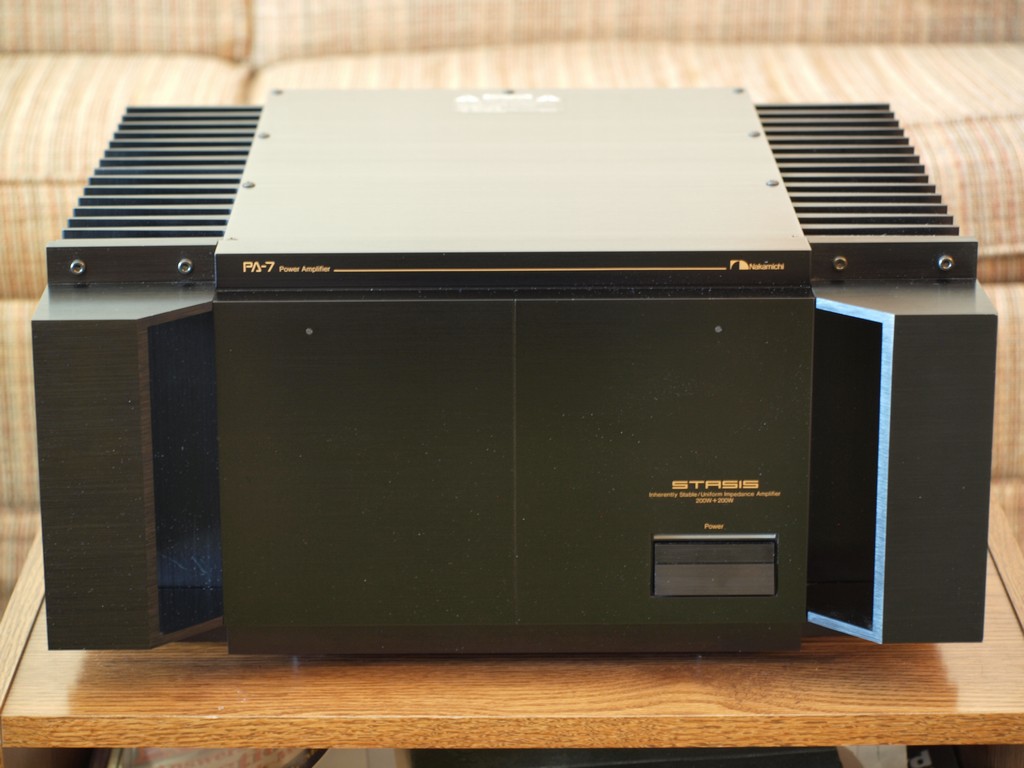
So what first caught my attention about the PA-7 was it’s gorgeous build quality and industrial design, a fine example of industrial art (thank you Nakamichi).

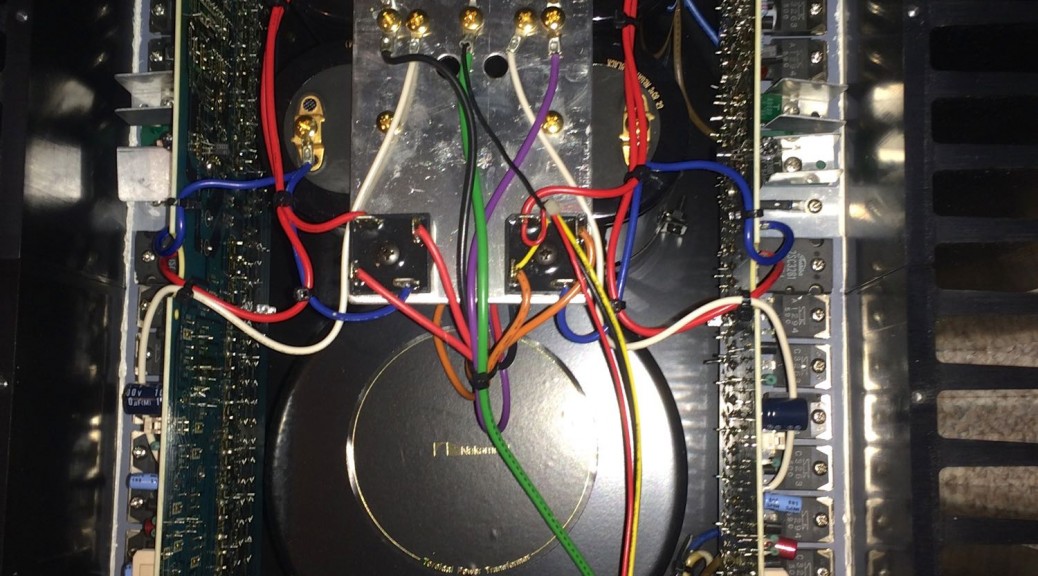
The Nakamichi PA-7 power amplifier - amazing circuity topology and components meet gorgeous industrial design.  Beauty and the (high current) beast.
The Nakamichi PA-7 power amplifier – amazing circuity topology and components meet gorgeous industrial design. Beauty and the (high current) beast.

I can remember like it was yesterday the first time I set eyes on this baby.  It’s mesmerizing and belongs in a museum of industrial design.  Let’s face it, brute strength power amps aren’t usually a thing of beauty, but this one is truly “beauty and the beast”.  Everyone already knows that Nakamichi made it’s name on the very best quality home audio cassette decks in the late 1970s.  So they had cash to burn, and wanted to become a major player in the high end audio market, which was dominated by US designers and manufacturers.  So what do they do?…  They recruit Nelson Pass (of Threshold) as a “hired gun” and combine his designs and circuit topology with their deep pockets and efficient production techniques.  The result?…  What is essentially a Threshold power amplifier but way better looking and less than half the price.

They were supposed to just license his STASIS technology, which combines the benefits of Class A amplification without the drawbacks (runs stupid hot = very low reliability) into a hybrid Class A/Class AB power amplifier with optical bias.  Well, they didn’t just license STASIS.  Rather, the first generation of the PA-7 is a direct copy of the equivalent Threshold amp.  A lawsuit ensues, then Nakamichi releases the PA-7II with an altered design providing 25 more WPC (watts per channel) and a higher price tag.  But everyone knew then and knows now that the original PA-7 was, “the one to get”.  As a side note I also sourced a Nakamichi CA-5A pre amp of the same era which was also designed by Nelson Pass and executed by Nakamichi for my Maui system (The Nakamichi CA-5A preamplifier).

I found an interesting review on the now legendary PA-7 in Tone Publications, an online magazine I’d never heard of but certainly agree with the author’s findings.  It’s interesting, since he ended up pairing the PA-7 with an Audio Research SP 9 Mark II preamp and a pair of Magnepan loudspeakers, just as I did.  It all makes perfect sense in retrospect.  I found myself there by time spent in the listening chair, not reading reviews, much as I suspect he did…

http://www.tonepublications.com/old-school/nakamichi-pa-7-amplifier/

In a nutshell, the big Maggies (3.7Rs) are a fantastic speaker, but are very dependent upon room acoustics

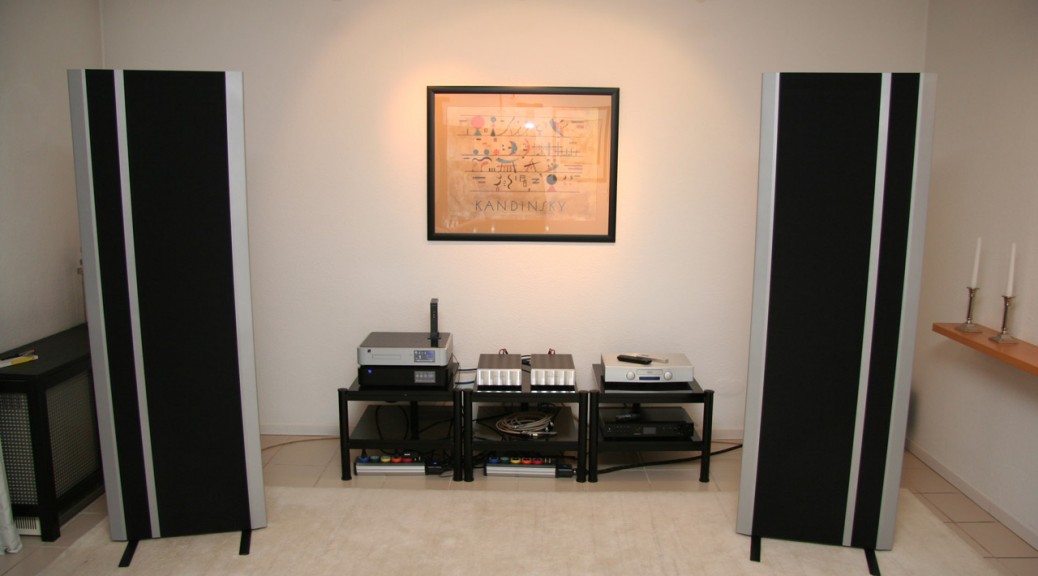
So I made a trip to Calgary to give the Mangepan 3.7Rs a listen.  The “R” stands for “ribbon tweeter panel”, indicative of high end Mangepans.  In a nutshell, the big maggies (3.7Rs) are a fantastic speaker, but wouldn’t be right for my room.

I had figured out a way to accommodate these gorgeous sounding speakers (and for some, gorgeous looking too but the WAF often factors in on these babies).  I had even 3D modeled my Canmore listening room with them in it with architecture software just to make sure they would fit.   As such, I was very excited to audition them at a high end dealer in Calgary.  But after listening to them in a room with almost exactly the same dimensions as mine in Canmore and playing around a great deal with positioning, even from what the very knowledgeable advisor thought was best, I continually felt like their performance was being compromised dramatically by being too close to the side walls of the room.  And… if you move them farther from the side walls then they are too close together, so it’s a no-win scenario.

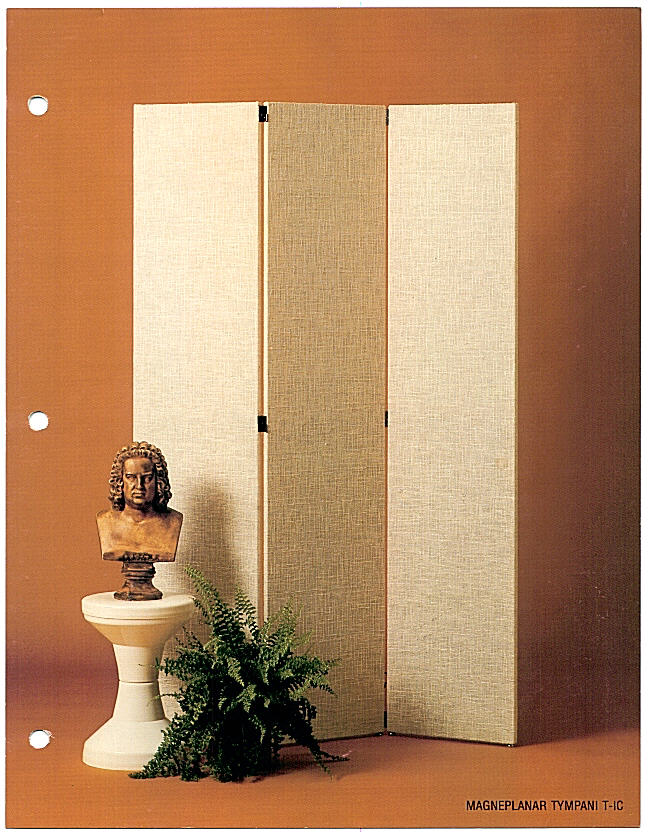
I went in with great expectations.  Having owned a pair of Tympani 1Ds in the past, I couldn’t wait to hear the modern day equivalent, and the 3.7Rs simply fell flat on their face in those terms.  To be fair, I only ever listened to my 1Ds with a very high end vinyl front end, but none-the-less, these just didn’t make it worth compromising my room only to have my room compromise their sound quality.  As I’ve always said, the room is the most important component in any audio system, and this proved true once again.

The dealer had nothing but high end turntables in their main listening room (I counted a total of nine set up to demo), and he personally shared my love for the Denon 103R phono cartridge and it’s what he runs at home.  But ironically the room that I wanted to listen to the Maggies in, since it has very similar dimensions to mine, only had a SACD player.  So that’s what I brought with me for listening tests, three of my favorite reference SACDs.  I did a total of 4 listening sessions, as follows:

Listening Session Number One – Magnepan 1.7s.  I basically walked out right away and said, “this just isn’t doing it for me”.  Like i said, I went in with high expectations from past Magnaplanars owned.

Listening Session Number Two – 3.7Rs.  Those ribbons are simply amazing.  So accurate.  But, unforgiving almost to a fault.  You better up your game in all respects if you’re gonna own these babies otherwise they will be a constant reminder of what else is amiss in your signal path.  And  i suspect they would be far better paired with a tube pre-amp.  Overall, they are very impressive but not the speaker for me at this stage of the game and they never did their sound staging properly since the room was too small – so obviously not the right speaker for my listening room in Canmore.  While the bass isn’t pronounced I found it satisfying for my listening taste.  Though not as satisfying as my Kef 104/2s which are only rated to go down to 50 Hz (the 3.7Rs are rated to go down to 40 Hz), but sound much tighter due to the very well engineered cabinet resonance that obviously doesn’t exist with the 3.7Rs since there is no cabinet to resonate (Planars… The room is the enclosure).  Bass response has never been a strong suit of Maggies, but I do remember having more bass with my Tympani 1Ds from 35 years ago.  But that just makes sense, the 1Ds had more planar surface area dedicated to bass response (they had three panels in total vs. the two of the 3.7Rs).

The original Mangepan Tympani 1D.  A revolutionary loudspeaker to say the least.
The original Mangepan Tympani 1D. A revolutionary loudspeaker to say the least.

Listening Session Number Three –  A little disappointed, I suggested  we try the Magnepan MG-12’s.  These weren’t on my hit list, but I was 0 for 2 so far and figured, “you never know…”   Bingo!  All of a sudden I was immersed in all that famous sound staging and Maggie sound I was craving.  These were the right Maggie for the room dimensions, period.  Could I hear what the ribbon’s on the 3.7Rs were capable of?…  Sure!  Did it make for a better sounding experience overall with the room (relatively small) and source (SACD so digital) I was auditioning?  No, I’d venture to say just the opposite.

Listening Session Number Four – I gave the 3.7Rs one more listen just to be sure.  I really did want to love them and had high expectations, and I could tweak away to my hearts content with their external crossovers allowing me to passively or actively bi-amp their panels.  But the answer remained the same.  I think if I were a classical music buff the outcome very well may have been different due to their extraordinary dynamic range.  But, much as I like listening to classical music on occasion, I am not and likely never will be a classical music buff.  And no matter what music you listen to, I’d venture to say the 3.7s are too big for my Canmore listening room (and the room I auditioned them in).  Or perhaps better to say the room is too small for them to breathe.

So I walked in to that Calgary high end audio store wanting to love the $6K 3.7Rs and walked out loving the $1.3k MG-12s.  Sometimes less is more and it just goes to show, you’ve gotta audition gear live rather than trust what you read.  And when auditioning speakers you’ve gotta do so in a room very similar to the one at home you will be listening to them in.  Or better still, take them home on a trail basis.

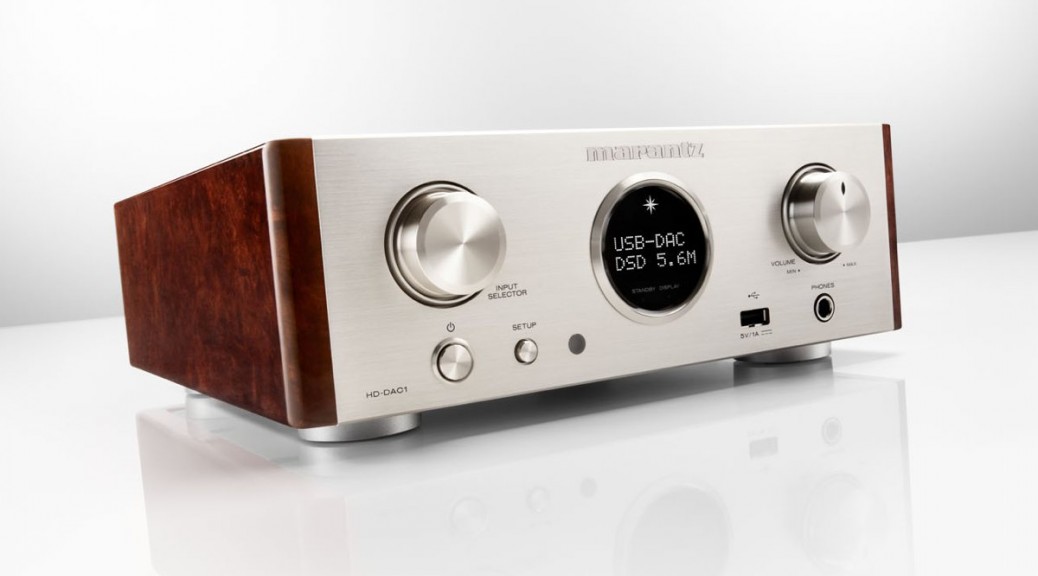
Marantz HD-DAC1 DSD DAC

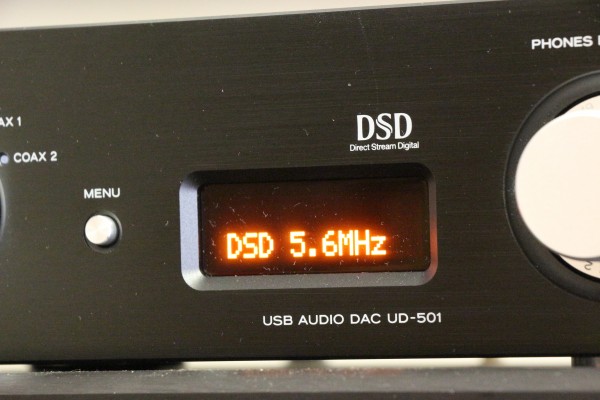
So I’ve had my eyes on DSD DACs for sometime, and realized long ago that $500 to $1,000 would be the sweet spot on quality for price.  I waited about a year and sure enough, the DSD DAC market heated up as Acoustic Sounds, Blue Coast,  and other music vendors starting singing the praises of DSD.  And the prices of high quality DSD DACs came down from prices in the thousands to well under four digits for the same goods dressed up differently.

Thankfully down into the realm I was looking for, I pulled the trigger on a Teac DSD DAC that offered promise and by virtue of being DSD it was the best sound quality I’ve heard from a music server, but I still found it lacking in some areas of nuance.  And isn’t nuance what this all about, especially at this level of the game?…

So I waited patiently whilst listening to vinyl for the next DSD DAC player to come onto the scene.  And when Marantz stepped up with their recently released HD-DAC1, I figured it held promise since I had already noticed the superior sound of their SACD player to my Teac DSD DAC, which came as a surprise (DSD Music Server project).  I later attributed this to the Op-amps in the Teac vs. discrete circuitry of the Marantz in the form of their HDAM circuits (Op Amps are holding back my digital quest).

And, the Marantz has a remote control, a luxury my Teac lacked but I was willing to forego to prevent some crappy volume control IC (Integrated Circuit) messing with my fastidiously preserved signal path (Why audiophiles don’t get to have a remote control).  So I almost held my breath to figure out how the Marantz was pulling that one off, since more likely than not it would be a deal breaker.  To my delight I discovered it utilized an ALPS motorized POT (ALPS analog volume controls and rotary switches), and with that I would finally have remote volume control whilst streaming DSD music from my Mac Mini music server (Mac Mini as a Music Server).  PCM files have digital volume control, but not DSD (the less digital processing the better, just the digital to analog conversion thank you very much).

So I purchased the HD-DAC1 and had it shipped to Maui, where I could do an A/B test against my Teac prior to bringing it to Canada.  Sure enough, unquestionably better sound quality.  I forget all the subjective terms some use to describe the differences: warmer, more transparent, airy, full-bodied (are we tasting wine here?), etc.  I’ll just say that if you ever have the opportunity to hear the two DACs side-by-side you will hear the difference and leave you to come up with your own accolades.

Off the HD-DAC1 went to Canada (it still wasn’t available for sale in Canada when I purchased it in the USA) to perform for my mostly digital music collection serving my Magnepans.  As you have probably gathered if you’ve read much of this blog, I have two very different reference systems in the works.  My Canadian system is digitally oriented with planar speakers and the amps to drive them whilst my Maui system is analog (vinyl) oriented with Kef speakers that love everything analog (The venerable Kef 104/2).  They will both be overlapping in time, but that’s how things sit as I write this.

So I had great expectations as to what the HD-DAC1 would do for my digitally oriented Canadian system, and it didn’t disappoint.  I grabbed a few reference recordings (What is a “reference recording”?) and nearly giggled when I heard them.  My only regret was that I didn’t have more time to listen to it.  Something to look forward to next time I go back.  And, just in case I ever capitulate to listening to music with headphones?…  (Headphones, Earspeakers, or whatever you want to call them…) I’m set!

Time for new tonearm cable?

So anyone who’s read a bit in this blog knows that I prioritize and match when it comes to optimizing my signal path, whether it’s analog or digital.  The first priority for me is the quality of the music (i.e. recordings) then shortly after that the quality at the opposite ends of the signal path which is the transducers, meaning the phono cartridge for analog (The formidable Denon 103 vs. 103R low output moving coil phono cartridges – is there really a difference?…) and the speakers (It’s all about reducing mass for the transducers), which are of course dependent upon room acoustics (Why do speakers need to be matched to room acoustics?…).

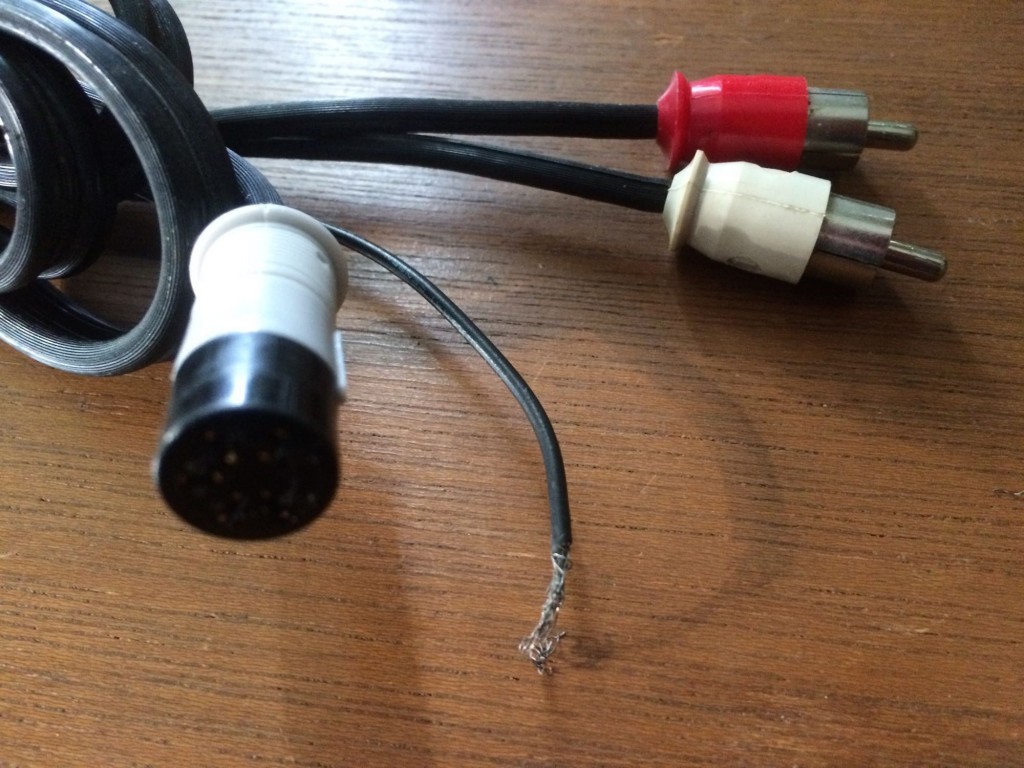
Following that comes the amplification of the signal path, and finally the interconnects used between the various stages to accomplish this.  When I purchased my vintage Denon direct drive turntable (Denon DP-790W turntable review) the tonearm cable was an obvious candidate for replacement.  Not only was it 40 years old but even when new it was of average quality at best by today’s standards.

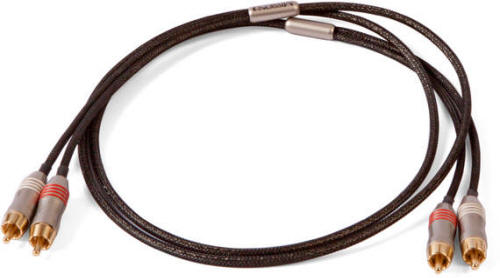
In my discussion of interconnects (a couple good examples of fact vs. fiction in the high end audio world) you will note that I’ve found great sound quality from quality interconnects selling for under $50.  And, I’m hard pressed to hear an improvement when spending more than that, even when listening to my reference recordings (What is a “reference recording”?).  But… one look at this original Denon tonearm cable will tell you it was sub-par, even by those standards.

Original Denon 5 pin DIN tonearm cableAnd thus began the quest to find a suitable replacement.  Unfortunately, being firmly planted in the realm of modern high end audio due to the fact that I’m seeking an esoteric tonearm cable, I was lost in a quagmire of highly overpriced options (ranging from around $500 and up to $2k) claiming to, once again, defy the laws of physics and perform some sort of voodoo magic on any music played (Speaker Cables and The quest for some bang for the buck in interconnects and speaker cables).

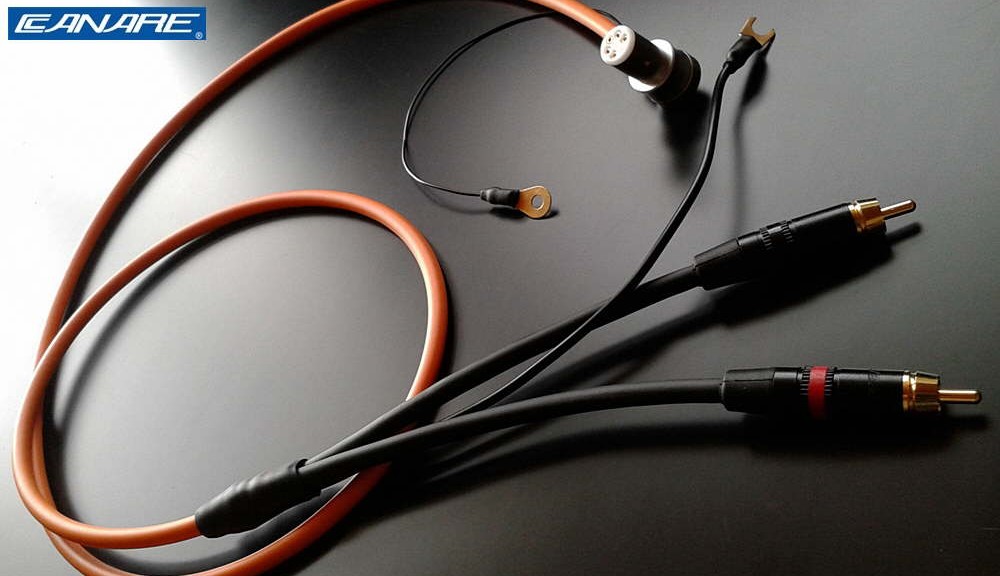
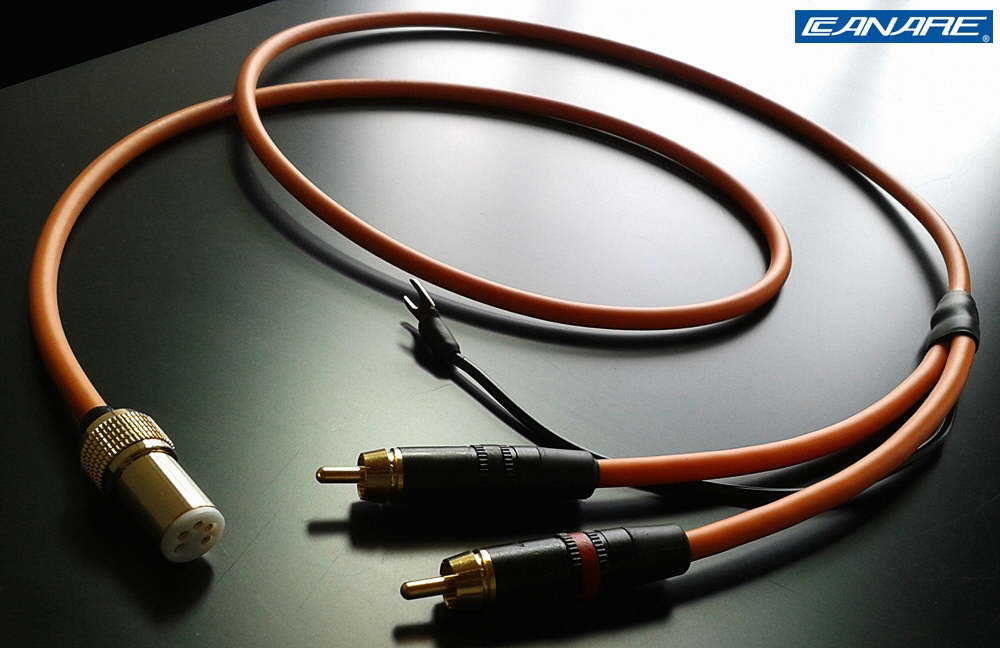
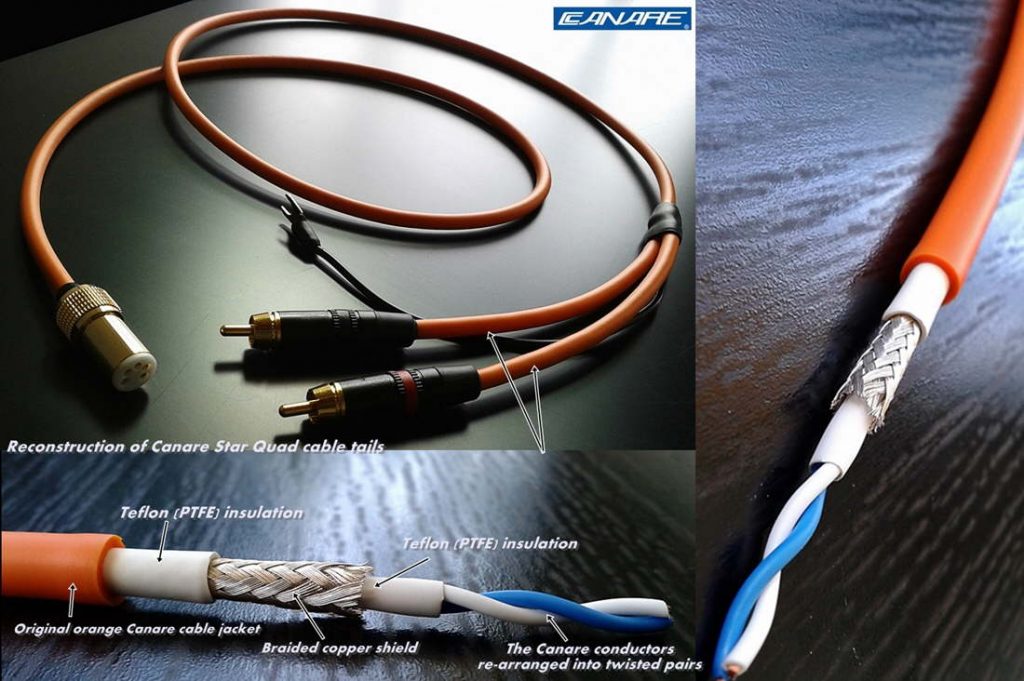
Enter the DIY cable market.  Yes, I could buy the materials and make the cables myself, but I figured there must be someone out there who is way better at it and doing just that for resale, and thus the eBay search began.  Of course, this search was exasperated by the fact that my tonearm used a five pin DIN connection, circa 1970s.  The first “homemade” set I purchased for around $60 used Belden cable and Cardas terminations (including the five pin DIN) so should have done the job nicely, but unfortunately they had untenable hum so back they went.  I kept poking around on eBay to no avail until I started looking internationally and then… bingo, I found a couple options.  So I pulled the trigger on the Canare tonearm cable shown below and couldn’t be happier.

Zero hum and noticeable sonic improvement immediately, even prior to burn in.  These are simply gorgeous handmade cables that sound every bit as good as they look.  You can see and feel the quality of the craftsmanship, and the attention to detail is suitably reflected in their sound quality.

CanareTonearmCable-Straight-Construction

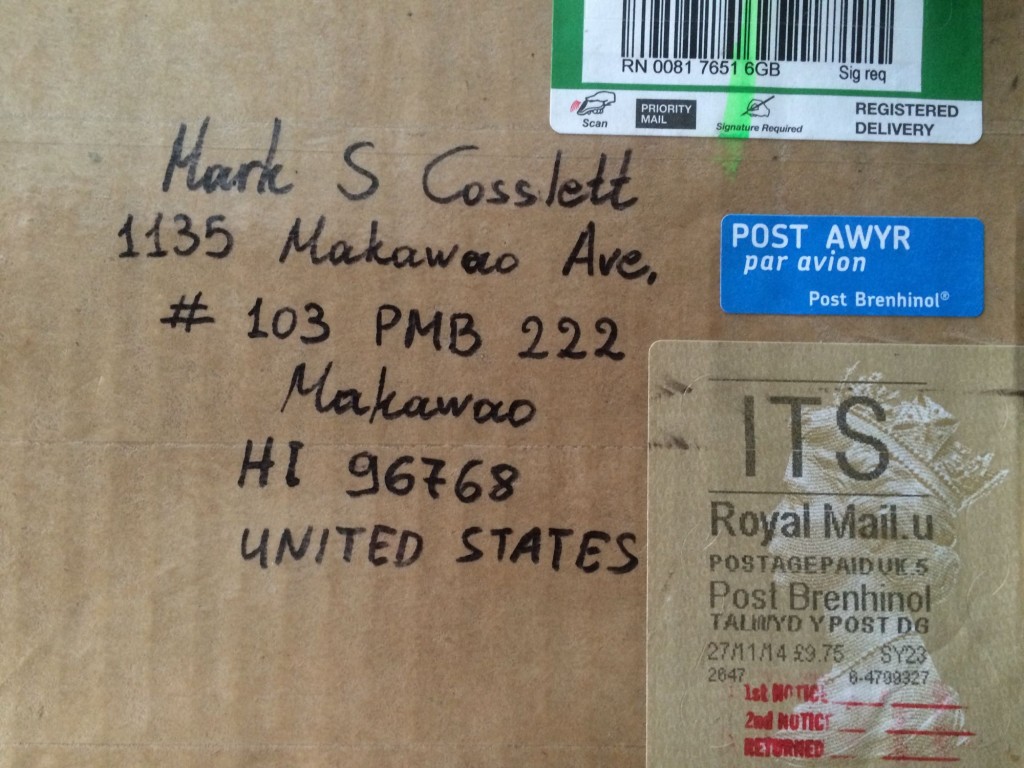
Even when the package showed up, all the way from the UK, I could tell this guy was a meticulous craftsman by the packaging and hand written labelling.

Oh yeah, and the price?…  Great value at $85 plus $6 priority shipping from England.  And when I finally upgraded my turntable in Canada to a Denon direct drive, I purchased another one (custom length this time) to replace it’s original tonearm cable as well.


DSD DACS… affordable at last.

23Jan2014 – “I won’t (spend $1.5k on a DSD DAC).  I guess you didn’t read through my email, where I suggested to wait for the DSD/PCM combo DACs to come down to $500 or less, which they will within a year:)  It’s highly unlikely I’ll spend more than that on a USB DAC for my digi signal path.”

Review of the UD-301 here


17Feb2014 – and, i now have nearly 100 titles of my SACDs for the time when the DSD music server becomes a reality.  i would estimate that to be at least a year away since it will take that long for DSD DACs to become main stream and hence more reasonably priced.  once again, worth the wait for the pursuant quality.  shootz, i’ve already waited over 20 years for quality music again (i.e. since the day when 44.1/16 bit CDs took over), what’s a little more?…

I just got the Zu Audio Wyle interconnects.

I just got the Zu Audio Wyle interconnects, so I couldn’t wait to hook them up and listen. I’ve spent enough time listening to vinyl on my system and the system is now good enough (playing vinyl anyway) to start to hear the differences the tweaks will make.

New 180g Fleetwood Mac Tusk was already on the turntable so I dropped the needle on it after hooking up the Zu Audio interconnects. First impression was that there was an appreciable improvement, but that isn’t one of my reference albums so I went straight to some of my reference vinyl to check.  Steely Dan Aja…  No, not there. MFSL of the Kinks, Misfits…  Still nothing I could notice (and I wanted to..). Then I grabbed NIN, which isn’t a long time reference for me but all the NIN vinyl is off the charts good sound quality so it immediately became one.  Yep,  similar improvements to the mid and high definition and even tighter bass.  So… Just to make sure, one of my all-time references went on – Pink Floyd, DSOTM, which I just listened to recently.  Yep, subtle but same improvements as previously noted.  More pronounced on the classic measure of the track with the alarm clocks going off.

As for where the interconnects fit into the equation of a high end system, the following quote is what i’ve been saying all along.  But it’s a pleasant suprize to hear it from Zu Audio, who sells high end interconnects, which is very different than the “snake oil” pitches of other companies (A few good examples of fact vs. fiction in the high end audio world:):

“Get the right loudspeakers for your sense of music and sound, find the happy amp that feeds ‘em; then get busy on your analog and digital source needs. Fill your room with a bunch of albums and books and stuff. And once you have a hi-fi rig you like, start messing with cable.  And careful not to use cables as tone controls to fix a loudspeaker or setup issue—it’s a trap that will have you spending more money on accessories than on music.”


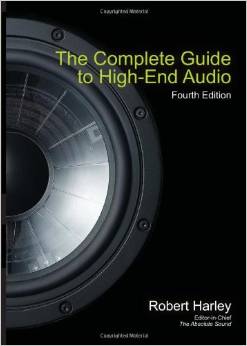
Book (yes… book) review

just sent you a copy of this.  thought you might not be in the mood to spend more $$$ at this juncture and this is an absolute “must read” (at least the first couple of chapters) before you go much further so i didn’t want to wait until christmas ;-).  i learned this stuff as an inquisitive high school kid and it took several years (and still learning of course) and there wasn’t a book like this out at the time that i’m aware of.  or maybe i was just having so much fun (and making so much money) by learning it through trial and error that i didn’t care.

it is written by the editor in chief of The Absolute Sound, the undisputed best source of reviews in the 70s.  Stereophile was also quite good.  Absolute Sound had no advertising and was quite expensive to subscribe to back then.  Came in a small book form, wish I’d saved copies 😉  Not sure if they exist in the same capacity today, but it is immediately apparent when you start to read this book that these values are of the same ethos.

i got through the first 36 pages, they were remedial but very interesting and fun to read, before i started to jump forward to get to some answers to some of my (long standing) unanswered questions.  in those first 36 pages he has already addressed almost all of what i put into my emails to you, such as:

– it’s all about loving the music, not the gear.
– pay attention to the people who love listening to music and therefore do reviews on gear that does it best, not the techies
– pay attention to reviewers who like the same music and have similar taste as you (or better still, do lots of critical listening and form your own preferences)
– don’t forget to take your reviewer’s hat off once you are satisfied and enjoy the music again.  this is what i’m suggesting you do for a while… it’s the reward!  this is also why i prefer to upgrade one component in the signal path at a time and listen to a lot of music with the upgrade before moving on.  how else can i really appreciate the difference?  over several years in the late 70s i did this until i ended up with the ultimate system (for me). then i fully relaxed and looked for new music to enjoy.  my reviewer’s hat was off for good at that point.  that is the system i am seeking to recreate now.  it’s funny, i collected the music long before the gear this time around.  there is so much in my collection that i can’t wait to hear!!!
– it’s all about matching your gear to your wishes, i.e. do you sit down and listen to music or do you watch movies where the sound takes second stage?
– it’s all about matching each component (including your room) in the signal path. i.e. your music can sound worse with a better quality reproduction system if the quality of the source is inferior, for example.  now one is just hearing more of the original deficiencies.  i believe i am running into this now with the DACs on my Denon, but won’t know for sure until i can play vinyl to compare, might just be the nature of digi (even SACD), which is well known for some of the deficiencies i’m hearing.  or my tweeters might need to be overhauled (refill the fluid in the voice coils, they are 25 years old after all).  you know me, i’ll find out 🙂

i could extract countless quotes for you from this book, reinforcing things i’ve written in my prior emails to you, and started to do so until i realized the entire thing was just so quotable and thought…. no, Dave just needs to own this book.

I would suggest reading the first two or three chapters and put it down and enjoy your music for a while.  Of course jump ahead to anything of particular interest (such as bi-amping, for example).  But then consider it as a reference when you want to know more cause you are starting to notice things from listening to music.  This is sure to come and these things are far more interesting to read about when you’ve already noticed them first hand than when you just read about them in theory.

i would skip over much of the “budgeting” and “relationship with your dealer” sections as they don’t fit how both you and i acquire our audio gear.  in an ideal world where money is no object i would do this.  but so far i’ve been pretty good and making money on audio gear rather than spending it and getting to listen to music along the way!  (now i’m even making money on the music itself, on paper anyway)

i also like the way he gives digi and vinyl equal play,  it becomes quite clear early on that he likes them both for what they have to offer, much as i do (or i wouldn’t have a huge SACD collection).  he clearly and very correctly states the pros and cons of both on page 234.  i like how he puts it… “LPs distortions are periodically apparent, but separate from the music, digital’s distortions are woven int the music’s fabric” – well said! (p234)

and…  what are those unanswered (or me) gems i’ve already looked up?…

– why did i immediately hear something magic in my Denon 103R phono cartridge (in the late 70s) , which shipped directly from Japan with a hand tested/plotted/signed frequency response curve that was flat from 5 Hz to 50 kHz, even though the human ear can only hear up to 20 kHz?
– how exactly do SACDs work and why do they sound so much better than other digi formats?
– how do i use a music server to grab high-def digi audio via download off the internet?

and…  just gotta send you this quote in the interim, since it is not only exactly what i was saying on the phone to you yesterday, but even uses a motor-sport analogy to do it, much as I did:

“I once read that a motorcycle manufacturer attempted to quantify the ‘feel’ by…  putting the motorcycle on a dynamometer in a wind tunnel (with sensors attached).  …  After much money spent, the company went back to relying on the comments of experienced test riders who could describe the experience in subjective terns.” (p. 28)

http://www.amazon.com/gp/product/0978649311/ref=oh_details_o00_s00_i00?ie=UTF8&psc=1

Denon DP-790W turntable review

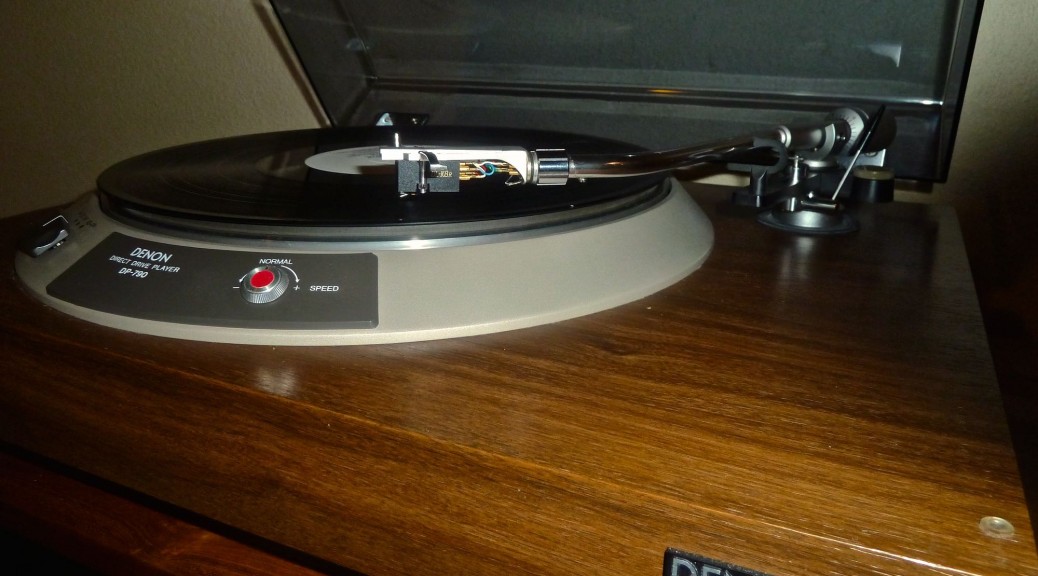
So I’ve owned and cherished this vintage turntable for over a year now.  It’s circa 1978 and I purchased it in absolute mint condition from a very friendly and interested budding audiophile in Calgary.  I drove there in -20 degree weather to go pick it up.

I’ve upgraded the phono cartridge with my beloved Denon 103R.  That is in fact, a big reason I purchased it, since I knew the tonearm compliance is a perfect match for my favourite LOMC (Low Output Moving Coil) phono cartridge.  I’ve also always preferred direct drive turntables to belt driven ones.  Yes, I know that will open a can of worms that I’ll address in another post (Turntables – Direct Drive vs. Belt Drive), but I will always remain an advocate of direct drive turntables ever since owning one of the finest direct drive turntables ever made, the Techniques SP-10 MkII back in the 1970s.  And when searching for a mate for for my Denon 103R matched to the Nelson Pass phono stage found in my Nakamichi CA-5A preamplifier, this was an obvious choice.

I carefully packed it to travel as checked baggage on my flight to Maui (How to pack a vintage turntable) and when I unpacked the box I was pleased that the precautions I had taken resulted in safe passage.  Needless to say, high quality audio gear is neigh on impossible to find on Maui.  So I imported.  

It took me a while to set it all up since it had been years since I had properly set up a turntable.  Azimuth, overhang, accurate stylus force, leveling, VTA, cartridge loading, were all tweeted (How to set up your turntable for your phono cartridge).  Then, I found this otherwise fantastic turntable’s achilles heel.

Virtually all turntables use one of two methods to deal with acoustic feedback (vibrations from the speakers returning back to the phono cartridge to be re-amplified in a positive feedback loop), either suspension (sprung turntables) or mass loading (Acoustic isolation for turntables – to couple or decouple?…), and this one has neither.

The plinth, while solid, is certainly no example of mass loading, but it also lacks any form of suspension.  The only attempt Denon made at acoustic isolation were four grossly inadequate rubber feet.  Thus began a quest that lasted weeks – how to isolate this otherwise exemplary turntable.

It was immediately obvious that vibrations from my “equipment rack” (which is an ordinary teak shelving unit that is almost seemingly designed to mechanically amplify vibrations but I like it’s esthetics and know I can do what it takes to modify ordinary furniture to my needs, right?) would be a deal breaker.  No problem I thought, just hang the turntable off the wall so that’s exactly what I did and expected good results.  Not.

The trouble was the tight bass of my Kef 104/2s was so well coupled to my wood-over-concrete slab floor (coupling is exactly why the bass is so tight) that it transmitted very efficiently and effectively to the wall studs from which my precious turntable was hanging.

What ensued was a methodical study of acoustic isolation techniques.  I didn’t really want to re-plinth the deck, it is a frigging perfect example of it’s original glory (or lack thereof in the isolation department).  So I experimented with various methods to build an isolation platform for it to sit on.  I started with a couple pieces of the hardest and densest wood I could find (they almost feel like granite they are so heavy) then various methods between them in the form of ball bearings (which virtually eliminate horizontal vibration transfer – they now sit under my power amplifier), bicycle inner tubes (don’t over-inflate or it defeats the purpose), Sorbothane feet, spikes (coupling the extra mass to the plinth), and every combination thereof.

What I ended up with is three (in order to offset them from the four feet of the turntable plinth) Vibrapod cones, stacked into three Vibrapods that are rated for the weight of my turntable between the two massive wood platforms, a bicycle  inner tube directly under the platter assembly with a straw to let it breathe, along with four Sobrbothane feet under the original feet with reasonably good results.

“Reasonably good?!” I’m sure many of you are asking.  Anyone who knows me or reads this blog knows that “reasonably good” is far from good enough.  So the quest continues.  I plan to further experiment with granite slabs and boxes full of sand (Maui beach sand of course) before I feel I have fully exhausted acoustic isolation techniques.  I might still hang the platform from the ceiling but I’m hoping to not resort to such drastic measures.  And that’s certainly part of the fun, discovering what works and what doesn’t.

I presently have the acoustic isolation tamed to where it is below maximum listening levels, but barely so.  If I “crank it” on some of my fav music that, well… I just love to “crank it” on I’m sort of “dancing with the acoustic feedback devil.”  Still… in spite of all my methods.  Under the limits test – phono cartridge sitting on non-spinning vinyl, it is unquestionably still there, and rages out of control a mere notch or two above my maximum listening levels.  Of course, it’s drastically reduced on spinning vinyl since that presents a “moving target” for the positive feedback loop to occur.

So what started as a turntable review has evolved into a study of acoustic isolation.  As for the rest of the turntable attributes?…  It is the perfect example of everything I love about direct drive turntables: massive platter, precision speed control (not tied to the frequency of the power outlet as are so many of the lessor belt drive turntables), and virtually non-existent wow and flutter.  Also, being that it’s fully manual, the gorgeous tonearm is like a separate component, and shares no circuitry or mechanics with the rest of the turntable.  The now upgraded (Time for new tonearm cable?) five pin DIN tonearm cable connects directly to my Nak CA-5A without electrical or mechanical interference of any kind, which is extremely important to me for obvious reasons.

Of course, this means that this remains a fully manual turntable.  You cue it up by hand and you get up and pick up the stylus at the end of each side of your vinyl or you are serenaded by that methodical clicking of the stylus on the run-out track.  And I wouldn’t have it any other way.  If you’re listening to vinyl you’ve already made the choice of superior sound quality over convenience.  If you play vinyl with an automatic turntable you might as well fire up your music server and indulge in the full-service (and compromises) that automation offers.

Does anyone else remember the turntables that used to stack multiple records to drop onto the platter in succession?…  Just load up a few records and you’ve got a vinyl iPod.  That was how it was done back in the 1970s.  That is, if not getting out the listening chair was more important than sound quality (and preserving your vinyl).

All-in-all, I couldn’t be happier with this turntable.  With Denon’s original direct drive technology, which arguably hasn’t improved since the “golden age” of vinyl, combined with around $100 to $150 spent on my DIY (do it yourself) turntable isolation platform, I have a deck to rivals that of $30k decks today.

Incredulous?…  Yes, direct drive turntables, which I’ve been “singing the praises” of for years are coming back in vogue, and selling for $30k.  Just have a look at VPI’s (a long time advocate of belt drive turntables), newest addition to their product line, a “classic” direct drive turntable starting at $29,999:

http://www.musicdirect.com/p-157642-vpi-classic-direct-drive-turntable.aspx

Postscript: December, 2014:  I’ve used a massive granite slab coupled to the Denon with spiked feet, sitting on a bed of sand in a nice wood box, that sits atop my existing double wood slab isolation platform and have finally accomplished the desired result.  Altogether, it weighs in around 150 pounds, which is hung off the wall by two very sturdy brackets.  Total cost of the modifications?..  Less than $200.  Total cost savings vs. purchasing a modern day equivalent of this turntable?…  At least $5k.