Category Archives: Cables and interconnects

How to upgrade your existing system without spending a nickel.

If you walk into a high end audio dealer’s showroom, notice if they start asking you questions about your music tastes and listening room.  If given a chance to and they still just point you straight at their latest shiny new component and ask, “what’s your budget”, walk out.  Or… know that you are going to have to work with a very limited knowledge based and/or a profit motivated sales person.

This may sound harsh, but all the shiny objects in their listening room mean nothing as compared to the knowledge of how to set up the gear matched to your room and music preferences (Why do speakers need to be matched to room acoustics?…).  I went into a dealer of Martin Logan ESL’s in Calgary and they had a pair of their high end CLX’s (MSRP starts at $25k USD) just a few inches from the back wall in a large listening room, so I said, “let’s pull them out and give them a listen”.  The sales person gave me a blank stare in return then said, “why would we do that?”  By that time I had already noticed many unaddressed deficiencies in the entire set up, but was incredulous that they were honestly unaware that this fine set of planar speakers needed to be placed well into the room (at least two feet, probably more in this case) in order to image properly.  I glanced at the source components available, saw only a Redbook quality CD player, then replied, “never mind”, and walked out.  Granted, this particular dealer was more about Home Theatre installations.  But, still…

So here’s “the goods” on a few simple (and free) things you can do at home to get the most out of your system (if you have bookshelf speakers you will need floor stands):

  1. For most speakers, start out by setting up an equilateral triangle between your listening chair and your left and right speaker.
  2. Listen a bit, then start to experiment.  Look at your speaker manual and see what they recommend.  Most speakers like to be at least a couple feet off the rear wall.  Many planar speakers need more, some box speakers less.  Move your listening position if needed (and possible) to accommodate how far your particular speakers like to be out.  Also consider how far your listening position is from the wall behind it.  If it’s around five feet or more it can probably be ignored, but less than that and you will have significant room reflections reaching your ears from that wall.  If you’re in a rectangular room, be aware of the obvious room resonant frequencies based upon wave lengths that equal the dimensions of the room and therefore correspond to and reinforce specific bass frequencies.
  3. From there, start to experiment with how far the speakers like to be apart from each other.  You may be limited by side walls and/or furniture on the sides.  As a general rule, most speakers perform best when at least two feet from any side walls.  If this isn’t possible for your room, do your best then work on it some more in step six below.
  4. Play around with the toe-in.  This drastically effects high frequencies and the stereo image.  Most speakers like to be pointed directly at you, but some like to be pointed straight ahead.  I was amazed at the difference it made for my Kef 104/2’s (The venerable Kef 104/2) when I discovered they were of the latter variety.
  5. Next experiment with the height of your ears in the listening position.  You can do this by sitting up or slouching down.  This is one of the easiest ones to dial in because you don’t need to get out of your chair and move things around to do it.
  6. OK… so now that you’ve got your speaker placement as best as possible “as is”, it’s time to work with the room.  Consider the following diagram:
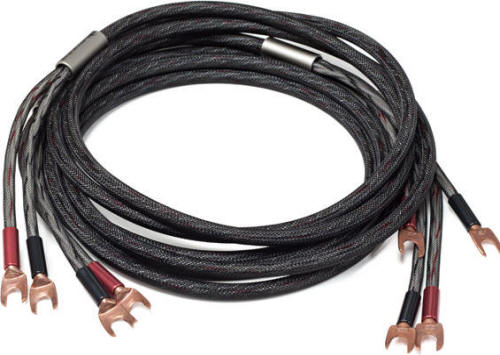
    Reflection, absorption, and diffusion in various materials.

    Your room is likely to be a combination of all three.  The first place to turn is any windows and/or mirrors in the room.  These are high acoustically reflective materials which will have a dramatic effect on sound quality.  If you have a huge glass window on the rear or side wall(s) for example, you will need to decide whether it is enhancing or detracting from sound quality (it’s almost never neutral, especially with planar speakers and a reflective surface on the rear wall).  If you have blinds, listen to one of your references (What is a “reference”?) with them both open and closed,  If you have no blinds or metal blinds, maybe temporarily hang a blanket and do the same thing.  If your system sounds better with the blanket there, you may be able to effect a more permanent solution with fabric blinds that accomplish much the same thing.  I’ve seen many, many home theatre installations with a huge flat screen located directly between the two front speakers.  Makes sense for HT?… sure.  But if you’re also listening to two channel audio on your system you will want to consider the effect this is having on your stereo imaging.  It’s almost certainly scattering and destroying it.  Solutions include in-wall screen installations with roller blinds or slides that offer a more suitable material for your music listening sessions.  It’s difficult (to say the least) to incorporate HT and 2 ch audio into a singular system, but that’s another topic (The most obvious difference between 2 channel audio and 5.1 home theatre.).  After working with all obviously highly reflective surfaces, turn to some of the more subtle room acoustics.  If you’ve got resonant bass frequencies, try to find ways to break up the wavelength.  This can be accomplished by moving furniture or even large plants around.  If you have disparate materials on your side walls you may want to find a way to address that with a bookcase to absorb side reflections or glass framed artwork or a mirror to enhance them.  Play around and have fun while thinking of all the money you are saving by working with what you’ve already got sitting around the house. However, it’s important to keep in mind the importance of sound proofing for moveable walls in order to minimize noise and disruptions between rooms. There is certainly a more acoustically engineered approach (using sound spectral analysis and expensive acoustic treatment panels), but it ultimately boils down to what sounds best to you anyway.  Unless you have a completely dedicated sound room you’re likely working with household furnishings that dramatically effect your sound quality anyway, so why not use them to your advantage?   If you’re finding very significant improvements to your sound quality based on this step, you may want to play around with steps one through five again.  This isn’t necessarily a linear process.  You may even find that after many hours in the listening chair you want to play around with all the above steps again.  I’m usually not completely satisfied until I’ve listened to references from all genres of my music collection.  That’s why it’s best to wait a while for steps seven and eight.  As a side note you may also want to wait to buy high end speaker cables (Speaker Cables) until you’ve got your speaker position nailed down.

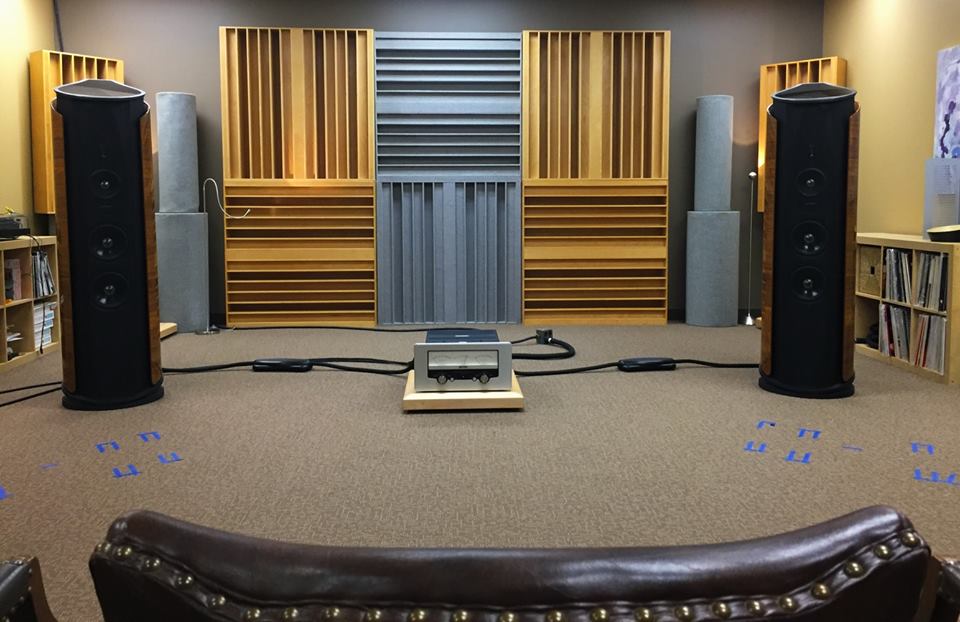
  1. Now that you’ve got the optimal speaker positioning based upon all the variables, mark it somehow – perhaps blue tape under the speaker outline on a hardwood floor.  I line up mine with the grooves in the hardwood.  If you have carpet, get creative.
  2. Finally you will need to figure out the best way to couple the speakers to the floor.  For floor-standing models it’s simple, spikes for carpeted floors and rubber feet or spikes on small circular plates (about the size of a penny) for hardwood.  This is saved for last since moving heavy spiked speakers around on hardwood floors and protecting them at the same time is a real pain in the ass.  And… this only serves to tighten the bass frequencies and therefore has little to no effect on steps one through six above.  If you have bookshelf speakers on stands, they won’t have much bass to start with, and even less if they aren’t coupled to the floor somehow.  For my LS3/5As (What is it about the Roger’s LS3/5A?…), I found speaker stands with spiked feet that I could fill with sand for mass loading (Acoustic isolation for turntables – to couple or decouple?…).  Not as good as a well coupled floor standing speaker, but the LS3/5A was originally designed as a studio monitor.  It was only later discovered and adopted by audiophiles as a go-to speaker for high quality sit-down-and-listen music reproduction.

I find that it definitely takes a while to dial in the sweet spot of all the above, but it’s so, so worth it.  On Maui I need to move one of my speakers into place each time I sit down to listen to music.  Small price to pay (even though it weights 70 pounds).  In Canada I’ve been able to locate the Maggies in their “sweet spot” and leave them there without detracting from my living room view and esthetics, at least in my opinion.

Why are most of the full page glossy ads in the audio magazines for cables and interconnects?…

The answer to this question is (per usual), “follow the money”.  Most uber high-end audio components have commensurate high mark-ups and there is usually a “sweet spot” as far as “bang for the buck” goes, witness the Denon 103 phono cartridge (The formidable Denon 103 vs. 103R low output moving coil phono cartridges – is there really a difference?…) and the Marantz DSD DAC (Marantz DSD DAC).

But interconnects and speaker wires are in a different league entirely as far as profit margins go, and they generally rely on (often false) marketing claims in expensive ads to sell their wares.  Sort of like the car dealer who pushes the high profit margin undercoat when closing the deal, your local high end audio shop will almost certainly pitch some over priced interconnects and/or speaker wires when you go to check out for the purchase of your latest (carefully auditioned) turntable, power amplifier or other significant upgrade to your system.

I call it the “popcorn analogy” in light of the fact that movie theaters wouldn’t be in business if they were simply movie theaters and didn’t have the high profit sales from their concessions of overpriced popcorn, sodas, and candy.  Some estimates say that these concessions comprise 85% of their profits:
Movie Theaters Make 85% Profit at Concession Stands

While I’m certainly not “dissing” the necessity of quality speaker cables and interconnects, I am suggesting the buyer beware of marketing claims and sales tactics in support of some of their highly inflated profit margins.  In fact, you could just as easily degrade your signal path in such fashion as upgrade it (Speaker Cables).

I suggest (as do most others who “tell it like it is”) that you leave your interconnects and cables as your last acquisition in your audio system – after you’ve selected the right speakers for your room acoustics and musical taste, the right recordings and source components to “deliver the goods”, and the right amplifiers for your chosen signal path.  The goal for your interconnects and speaker cables is to be neutral.  If you suddenly hear a big difference over your basic ones, this is probably not a good thing (even though the high end marketing would like you to perceive it as such) as they are likely adding colouration to your signal path.  You are going for purity here, not ketchup on the finest quality steak already cooked to perfection.

Many listeners jump the gun too early on their cable/interconnect purchases since they are frustrated with their inferior sources (either the recordings or the front end playback components) and are looking for a “silver bullet” fix.  Let’s face it, it’s far easier to replace cables then an entire music collection.  But such half measures only avail further demise of the signal path and are at best shots in the dark attempting to address latent inferiorities and/or mismatches in acoustics (Why do speakers need to be matched to room acoustics?… and Why do power amps need to be matched to speakers?…and The Classically Mis-matched High End Audio System).

Banana plugs or spades for speaker cables?

So I’m gonna come straight out the gate by saying that I’ve never done any listening tests on this one, and I probably never will.  Why?  Because I’ve used both for so many years and never noticed the slightest difference.  So my discussions herein are based upon theory rather than empirical discoveries.  And, to further cloud the discussion, manufacturers of both power amplifiers and speakers that are some of the best I’ve ever heard seem to differ on this subject, although most offer both options.  Magnepan would be the most notable exception, offering only banana plug connections for their planar speakers (in a nutshell, the big maggies (3.7Rs) are a fantastic speaker, but wouldn’t be right for my room.)  The folks at Zu Audio (The quest for some bang for the buck in interconnects and speaker cables) favor spade connections whenever possible, and I agree with them in theory.

This goes back to physics 101 in regard to contact resistance and it’s relation to the surface area as well as the pressure imparted upon the mechanical junction.  If you look at the photo of a banana plug termination you will notice that it likely offers less surface area than that of one made with a spade.  But more importantly, the pressure of the junction is limited to the amount of outward force created by the spring effect of the bent metal, whereas with spades one can impart far more pressure on the junction, which can offer higher conductance.  Also, many banana plugs are user-installed with some sort of a screw on system that is highly prone to error, meaning you could have 12 AWG wire with a weak link of just a few strands at the banana plug.  By contrast most spade terminations, even when user installed, are soldered.

In either case, the most important thing is full contact for the termination method used which is ideally made by cold forging, a method which pretty much rules out user installation.  Second best would be a high quality solder connection (just like inside the amplifiers themselves), and a distant third would be user-installed mechanical connection, such as spades with screws on them or banana plugs with screw down connections on the wire.  In fact, if it would be far better not to terminate your wire at all and properly connect the bare wire than to add an inferior user-installed banana or spade termination.

Some purists go so far as to eliminate the mechanical interface altogether by soldering their speaker wires directly to the amplifier outputs, but this is definitely on the extreme side and inconvenient to say the least.  I say any of the above methods can offer comparable sound quality, as long as care is taken to maximize contact area and pressure and all mechanical contacts are kept clean of course.

Speaker Cables

So “back in the day” (i.e. the 1970s –The “golden age”) we hooked up speakers with ordinary “line cord” or “lamp cord”.  And we’re not talking about ordinary speakers, amplifiers, or source components…  we’re talking about some of the best the world has ever known (that’s why it was the golden age).  We used high quality,  heavy gage, braided copper wire and kept the runs as short as possible and made sure that both speaker wires were the same length, and the buck stopped there.

Yes, all the laws of physics still applied back then, and we followed them religiously.  Overall resistance  is the key factor for “transparency” in speaker cables, and that is an extraordinarily simple task to address.  Claims of superior sound quality from exotic materials and wire configurations are just that… claims.

In fact, a listener is far more likely to adversely affect their sound quality due to inferior or improper speaker cable terminations and/or connections than the speaker cables themselves (see Banana plugs or spades for speaker cables?).  To that end, raw wire was always the preferred connection method, one less link in the signal path chain.

Enter the 1980s, the digital era, and the era of highly expensive speaker cables which has survived to this day.  Listeners knew something was lacking from their music and a plethora of exotic “high end” speaker cables and interconnects ensued.  Of course what was missing was all that analog goodness lost forever on the PCM 16 bit sampling floor (The “Dark Ages” of High End Audio), but it’s simply easier to look to the wire than to replace an entire music collection and go back to vinyl.  And remember, high definition digital wasn’t available for many years to come.

So now that I’ve got two very different reference quality systems, I decided to go back to the speaker wire question.  Both reference systems have exemplary front ends, but my Canada reference system has  a tube pre-amp (Vintage preamp shoot-out, tubes vs. solid state) driving a high current power amp (The Nakamichi PA-7 power amplifier) into planar loudspeakers (In a nutshell, the big Maggies (3.7Rs) are a fantastic speaker, but are very dependent upon room acoustics) whereas my Maui system has a Nelson Pass solid state preamp (The Nakamichi CA-5A preamplifier) driving a high slew rate power amp (The Audionics of Oregon CC-2. More distortion, more better.) into box speakers (The Venerable Kef 104/2).  These are very, very different systems, I love them both for different reasons, and they would reveal any improvements, no matter how subtle they may be, in speaker cables in very different ways.

So speaker cables were the last thing I upgraded in my signal path, having used 12 AWG hardware store copper wire up to that point.  I kept the lengths long (but the same left to right) so I could dial in my speaker placement and once I got that nailed down, I pulled the trigger on high-end cables that offered good value and made no false claims.  I bought the same ones for both Canada and Maui systems, and even the same length, as it turns out.

They are Zu Audio’s Libtec Cables and are made of oxygen free copper, have cold forged terminations, and are of gorgeous build quality.  They sound great!  Better than my hardware store copper wire?…  I honestly can’t tell.  They don’t sound any worse 🙂  I can hear the difference a bad (i.e. highly resistive) cable or interconnect makes in an instant, but hearing the difference between these and the best quality my local hardware store has to offer…  not so much.  I tried to postpone any critical listening until after the break-in period suggested by the manufacturer (200 to 300 hours), but even then I’d be hard pressed to hear the difference without double-blind A/B listening tests.  Would love to do that sometime, but that’s a very elaborate set-up to do properly for speaker cables.

Then there’s the subject of capacitance.  While this factors in far less than resistance in the speaker cable arena, it can make a significant difference.  Capacitance is an unwanted presence in the accurate transmission of audio signals.  Think of it like a small battery in the form of your wire storing an electrical charge.  Ironically, many expensive high end speaker cables have relatively high capacitance, which alters the sound accuracy.

Why?…  because the elaborate wire cross sections and mix of materials create it.  Nothing will have lower capacitance per foot than plain copper wire, and only pure silver will have higher conductance (i.e. lower resistance – but it would be a waste of money to use silver for it’s slightly lower resistance when you can just jump up to the next size of copper wire for far less cost).  So how can these high end cables be selling if they have higher capacitance than regular copper wire?  The fact is that higher capacitance wire is typically heard as “brighter”, which can be interpreted as an improvement in sound quality rather than the departure from signal accuracy that it actually is.  This can be especially true if there is an expectation, due to marketing hype (see Trust your ears…) or even just the impressive esthetics of the wire itself, for better sound quality.  This can also be true if there are deficiencies elsewhere in the signal path that the extra capacitance is compensating for, sort of like a fixed curve equalizer.

So what I’m left with is a couple pair of speaker cables that are made of  the purest oxygen-free copper and are hand crafted in the USA to the exact length I require and are terminated perfectly for my amplifier and speaker combinations.   I know they are unlikely to degrade over time and they look great on my floor, they really do.  Having the proper terminations for my amplifiers and speakers makes connections a lot simpler than they would be with bare wire and I know the manufacturer of these cables has done a far better job at making these terminations than I ever could (of course I could never cold forge them myself).  I’m happy with my purchase, first and foremost to see if I noticed an immediate sonic improvement (I didn’t) but mainly because I didn’t overpay for what I got and I know these cables will last a lifetime.

Oh yeah, specifications of my speaker cables (including terminations) vs. 12 AWG, unterminated copper wire?…
Copper wire: resistance = 0.002 ohms/foot, capacitance = 15 pF/foot
Speaker cables: resistance = 0.003 ohms/foot, capacitance = 61.25 pF/foot

And… lest you think I’m overly critical of the cable industry, have a look at this link, written by a former Director of Acoustic Research and Head of Loudspeaker Design at McIntosh, one of the most respected companies in the business.

http://www.roger-russell.com/wire/wire.htm

Time for new tonearm cable?

So anyone who’s read a bit in this blog knows that I prioritize and match when it comes to optimizing my signal path, whether it’s analog or digital.  The first priority for me is the quality of the music (i.e. recordings) then shortly after that the quality at the opposite ends of the signal path which is the transducers, meaning the phono cartridge for analog (The formidable Denon 103 vs. 103R low output moving coil phono cartridges – is there really a difference?…) and the speakers (It’s all about reducing mass for the transducers), which are of course dependent upon room acoustics (Why do speakers need to be matched to room acoustics?…).

Following that comes the amplification of the signal path, and finally the interconnects used between the various stages to accomplish this.  When I purchased my vintage Denon direct drive turntable (Denon DP-790W turntable review) the tonearm cable was an obvious candidate for replacement.  Not only was it 40 years old but even when new it was of average quality at best by today’s standards.

In my discussion of interconnects (a couple good examples of fact vs. fiction in the high end audio world) you will note that I’ve found great sound quality from quality interconnects selling for under $50.  And, I’m hard pressed to hear an improvement when spending more than that, even when listening to my reference recordings (What is a “reference recording”?).  But… one look at this original Denon tonearm cable will tell you it was sub-par, even by those standards.

Original Denon 5 pin DIN tonearm cableAnd thus began the quest to find a suitable replacement.  Unfortunately, being firmly planted in the realm of modern high end audio due to the fact that I’m seeking an esoteric tonearm cable, I was lost in a quagmire of highly overpriced options (ranging from around $500 and up to $2k) claiming to, once again, defy the laws of physics and perform some sort of voodoo magic on any music played (Speaker Cables and The quest for some bang for the buck in interconnects and speaker cables).

Enter the DIY cable market.  Yes, I could buy the materials and make the cables myself, but I figured there must be someone out there who is way better at it and doing just that for resale, and thus the eBay search began.  Of course, this search was exasperated by the fact that my tonearm used a five pin DIN connection, circa 1970s.  The first “homemade” set I purchased for around $60 used Belden cable and Cardas terminations (including the five pin DIN) so should have done the job nicely, but unfortunately they had untenable hum so back they went.  I kept poking around on eBay to no avail until I started looking internationally and then… bingo, I found a couple options.  So I pulled the trigger on the Canare tonearm cable shown below and couldn’t be happier.

Zero hum and noticeable sonic improvement immediately, even prior to burn in.  These are simply gorgeous handmade cables that sound every bit as good as they look.  You can see and feel the quality of the craftsmanship, and the attention to detail is suitably reflected in their sound quality.

CanareTonearmCable-Straight-Construction

Even when the package showed up, all the way from the UK, I could tell this guy was a meticulous craftsman by the packaging and hand written labelling.

Oh yeah, and the price?…  Great value at $85 plus $6 priority shipping from England.  And when I finally upgraded my turntable in Canada to a Denon direct drive, I purchased another one (custom length this time) to replace it’s original tonearm cable as well.


Opps! your phono cartridge

This is a really interesting article (to me anyway) about polarity. Back in the 70s we used to “opps” (reverse) only one channel of our phono signal polarity at the cartridge then reverse it back at the same channel at the speaker terminal. It therefore put once channel 180 degrees out of phase with the other through the entire, fully analog signal path until it got to the speakers.  It was purported to speed up the amplification circuits. May have been smoke and mirrors  or not, don’t remember, just remember doing it…

Click here to open article on polarity in new tab.

Losing the forest through the trees?…

First let me clarify that I’m an old school audiophile from back in the days of, “stick with the things that don’t claim to defy the laws of physics”.  Having said that, I was very much looking forward to experimenting with “modern” cables and interconnects once I’d built my reference systems.  Those now built, I’ve tried my share and, surprisingly but maybe not so surprisingly, haven’t found them to add sonic improvements over their solid quality and reasonably priced equivalents, much the same as used before the advent of esoteric (i.e. expensive) cables and interconnects (see Speaker Cables).

After listening to CDs yet again on a six digit reference system in Edmonton (with thousands of dollars worth of interconnects and cables) and doing A/B comparisons on my own reference systems at home, I can’t imagine why anyone listening to “Redbook” (44.1k/16 bit) compact discs would fuss over their cables or interconnects, which would be “losing the forest through the trees” in my opinion.

I performed extensive listening tests on a reference system at a high end dealer in Seattle around 8 years ago, including a DVD-A (PCM @ 96k/24 bit) release of George Benson’s “Breezin” vs. the same album on Mobile Fidelity Sound Labs (MFSL) Original Master (OM) vinyl.  If the vinyl was a 10/10 I gave the DVD-A a 4/10 (I later discovered that this particular DVD-A was a very poor recording).  I also did an A/B comparison of Pink Floyd’s “Dark Side of the Moon” on SACD (a very good recording) vs. the MFSL OM vinyl release and gave it an 8/10.

I’ve subsequently done many more A/B comparisons of high quality vinyl vs. high definition digital recordings on my (far better) home reference systems and have found that, while there are certainly many exceptions (If one format is better than another, why doesn’t the music always sound better?…), my initial observations were essentially correct.

Don’t get me wrong, I’ll sit down and listen to any of the music I like in the highest quality I can get it.   Vinyl if available and the analog signal path has been fully preserved (see What a pity… ), otherwise SACD, otherwise 24 bit PCM.  And, if all else fails, even Redbook PCM at 44.1k/16 bit.  But I doubt I’ll be inclined to sit down and listen to music recored that far down the quality chain since I experience listening fatigue pretty quickly with Redbook quality CDs (I was already experiencing it within the first 10 or 15 minutes on the reference system in Edmonton).  Whereas I find just the opposite to be true with music recorded via DSD, vinyl, or 24 bit PCM – I just want to keep listening and turning it up.  As for MP-3s, I listen to them too, all the time!  I just don’t sit down and listen to them.  See…  What I love about MP3s.

I just got the Zu Audio Wyle interconnects.

I just got the Zu Audio Wyle interconnects, so I couldn’t wait to hook them up and listen. I’ve spent enough time listening to vinyl on my system and the system is now good enough (playing vinyl anyway) to start to hear the differences the tweaks will make.

New 180g Fleetwood Mac Tusk was already on the turntable so I dropped the needle on it after hooking up the Zu Audio interconnects. First impression was that there was an appreciable improvement, but that isn’t one of my reference albums so I went straight to some of my reference vinyl to check.  Steely Dan Aja…  No, not there. MFSL of the Kinks, Misfits…  Still nothing I could notice (and I wanted to..). Then I grabbed NIN, which isn’t a long time reference for me but all the NIN vinyl is off the charts good sound quality so it immediately became one.  Yep,  similar improvements to the mid and high definition and even tighter bass.  So… Just to make sure, one of my all-time references went on – Pink Floyd, DSOTM, which I just listened to recently.  Yep, subtle but same improvements as previously noted.  More pronounced on the classic measure of the track with the alarm clocks going off.

As for where the interconnects fit into the equation of a high end system, the following quote is what i’ve been saying all along.  But it’s a pleasant suprize to hear it from Zu Audio, who sells high end interconnects, which is very different than the “snake oil” pitches of other companies (A few good examples of fact vs. fiction in the high end audio world:):

“Get the right loudspeakers for your sense of music and sound, find the happy amp that feeds ‘em; then get busy on your analog and digital source needs. Fill your room with a bunch of albums and books and stuff. And once you have a hi-fi rig you like, start messing with cable.  And careful not to use cables as tone controls to fix a loudspeaker or setup issue—it’s a trap that will have you spending more money on accessories than on music.”


The quest for some bang for the buck in interconnects and speaker cables

well…  i’ve finally got the main components of my system on Maui in place, so it’s time to start auditioning interconnects.  I e-spied a new pair of these beauties for $50 (they run about $500 retail):

how did i choose these you may ask?…  the same company does nude mods for my Denon 103R:

http://aperionaudio.typepad.com/the_sound_room/2009/04/all-things-vinyl-march-18-2009-zu-audiodenon-dl-103.html

so i’m hoping they have similar taste.  will be interesting to see if the interconnects make any difference at all.  i know one thing for certain, if it’s there, i now have a system fully capable of revealing it…

and, i’ll be running my CC-2s as mono blocks so needed longer interconnects anyway.


A few good examples of fact vs. fiction in the high end audio world:

Is a power conditioning necessary for audiophile quality sound reproduction?  Yes, most of the time.   Is it worth spending big bucks on an uber high end power conditioning unit in order to improve sound quality?  Never in my experience.  (Should I spend (waste?) money on power conditioning?)

Do RCA interconnects (I just got the Zu Audio Wyle interconnects. and The quest for some bang for the buck in interconnects and speaker cables) make a big difference in signal quality?  Not really…  unless you use uber-cheap ones running critical analog signal paths, like pre-amp to amp or SACD to pre-amp.  Is it worth spending more than about $100 on them?…  Probably not.  If carefully chosen you will get the maximum quality you can at that price point and any additional $$$ spend will be wasted.  Same applies to speaker cables.  Physics is physics (Speaker Cables).

Does the quality of your source make a difference to sound quality?  Absolutely.  Do you get big improvements in sound quality with superior source recordings and carefully upgraded playback components?  Positively.  Along with your speakers, that’s where you get the most “bang for your buck”.  The rest of the equipment has a very important but also very simple task – amplification, and amplification only (Why I prefer analog preamplifiers that lack tone controls and Doing a little research on vintage Sansui… and Circuit topology, why less is more).  With the exception of digital audio reproduction of course, which adds Digital to Analog Converters (DACs) to the signal path.

It really is pretty easy to steer clear of the B.S. and avoid wasting money on glittery “upgrades” that don’t improve sound quality and may on occasion even detract from it.  There are two different types of audiophiles: those that love the music and those that love the gear.  I am the former and as such I invested thousands of dollars collecting music before I spent a nickel on high end gear.  In order to bring out the best in those carefully chosen and cared for recordings I seek out the purest signal path possible to bring the “music to my ears”, which involves getting to know the gear as well.