I’ve been into high end audio since the mid 1970s, just a teenager at the time. I had numerous reel to reel tape decks through my home stereo business at the time, and always marveled at their ability to faithfully record any audio source, whether live or from vinyl records.
I’ve been into high end audio since the mid 1970s, just a teenager at the time. I had numerous reel to reel tape decks through my home stereo business at the time, and always marveled at their ability to faithfully record any audio source, whether live or from vinyl records.
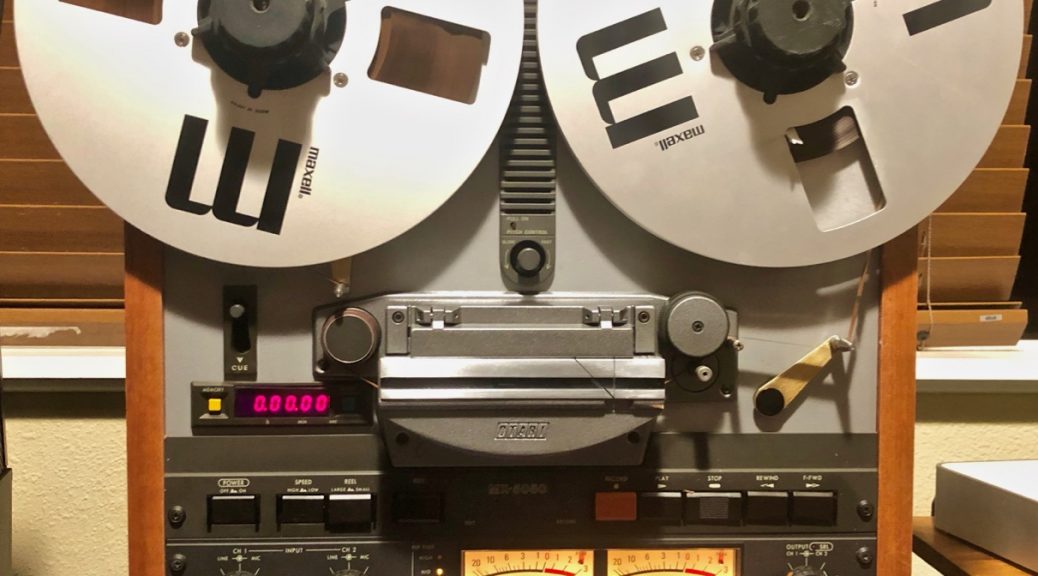
Nearly 50 years later, the time came to get “back in the game” and pick up a serious, prosumer deck and in my search I stumbled upon the folks at Reel To Reel Heaven (www.reeltoreelrestoration.com). We chatted a great deal and became friends due to our shared passion long before I pulled the trigger and purchased one of their fully restored Otari MX-5050BII-2 machines. Ryan and Ozzie have been absolutely fantastic in regard to customer service and their depth of knowledge is impressive. Being able to chat with Ozzie directly about setup and calibration has proved invaluable. The unit was meticulously packed for safe transport to Maui, Hawaii and arrived in perfect condition. Their attention to detail was immediately evident and I can’t wait to get this deck into the studio with some local bands and start showing them why tape is (still) king.
It’s a real crap shoot out there in the used reel to reel tape deck market, in regard to the condition of the machine you might be buying and how much work it may require, as well as proper packing and shipping methods to get it to you safely. Working with Reel to Reel Heaven (www.reeltoreelrestoration.com) took the guess work and uncertainty out of my purchase and they back their machines 100% with amazing customer service. I’m so happy I went with them to get a restored, reliable machine into my hands to start pursing my passion again, recording music!
It’s a real crap shoot out there in the used reel to reel tape deck market, in regard to the condition of the machine you might be buying and how much work it may require, as well as proper packing and shipping methods to get it to you safely. Working with Reel to Reel Heaven took the guess work and uncertainty out of my purchase and they back their machines 100% with amazing customer service. I’m so happy I went with them to get a restored, reliable machine into my hands to start pursing my passion again, recording music!
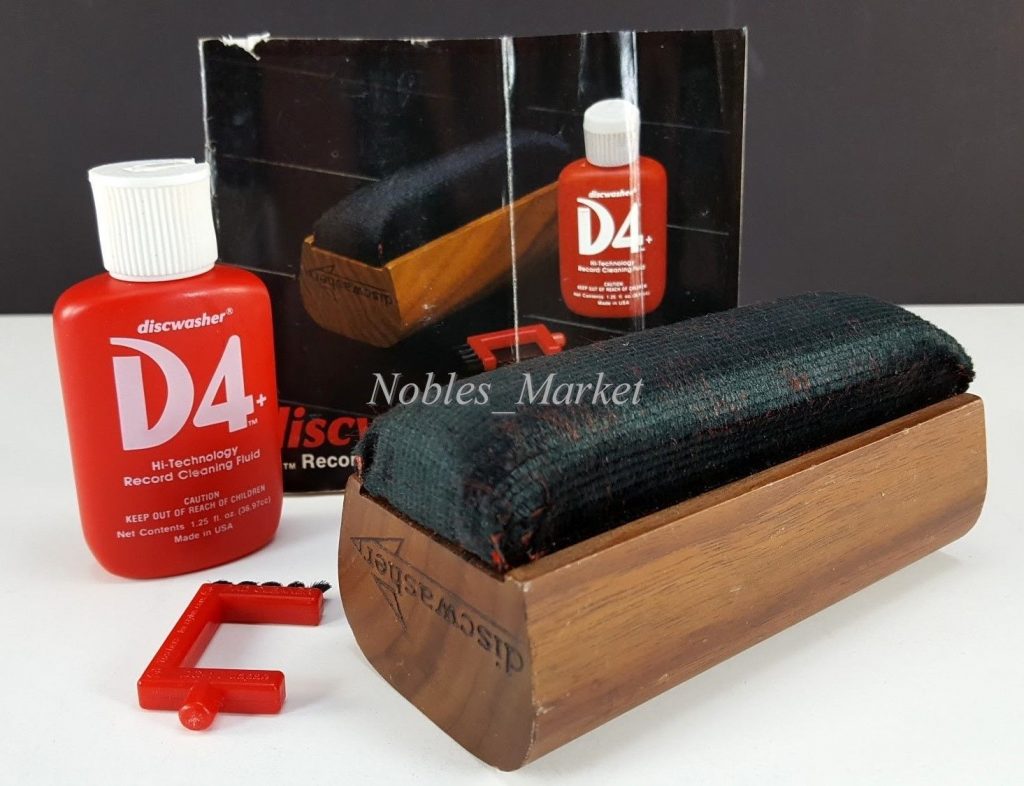
Who else remembers the original Discwasher setup? A great brush with a wood handle that contained a small bottle of the record cleaning solution inside it.
The original Discwasher record cleaning system.
I can’t tell you how many vinyl aficionados who, when speaking of their original record collection have proudly stated, “I took great care of my vinyl, I always cleaned it with the wood brush with the little red bottle inside”. While this is better than no cleaning at all, it pales in comparison to using a proper record cleaning machine. Why? One word: vacuum.
Without a vacuum record cleaning machine all you’re really doing is pushing the dirt around in the grooves and hoping some of it sticks on the brush. While the original Discwasher brush was particularly good at extracting and retaining what dirt and grime it was able to find in your grooves (beware of imitations that came later, the material of the brush itself pales by comparison to the original Discwasher), it still begs the question of it’s fans, “How often did you clean the brush itself?” Unless the answer is “Every time” it’s a fail and what was mostly happening was the sharing of the dirt and grime with other records in your collection. And properly cleaning the brush was no easy task, even with the brush supplied to clean the brush. Which of course leads to the question, “How often did you clean the brush that cleans the brush?” Point is, the dirt and grime never really gets removed without fastidiously cleaning brushes every time a record is cleaned. And even then, the brush itself isn’t extracting the dirt and grime from the record grooves by vacuuming them, but rather by using the stiff bristles of the brush itself and friction and is therefore less efficient and harsher on the vinyl record itself.
I must confess that in my early days of high end audio I was guilty of using a Discwasher, much to the ultimate demise of much of my record collection. I was a teenager and the thought of spending nearly as much for a record cleaning machine as for my turntable instead of, well… buying more records, was a difficult one to get my head around. But without proper vacuum cleaning right from the start, even before the first time playing a record (yes, records ship with residue, dirt, and grime straight from the factory, usually left over from the pressing process itself), the irreparable damage has already begun. Fact is, once the needle hits that tiny spec of dust, dirt, or grime in the groove for the first time, it tends to implant it there, making it that much more difficult to remove the next time the record is cleaned.
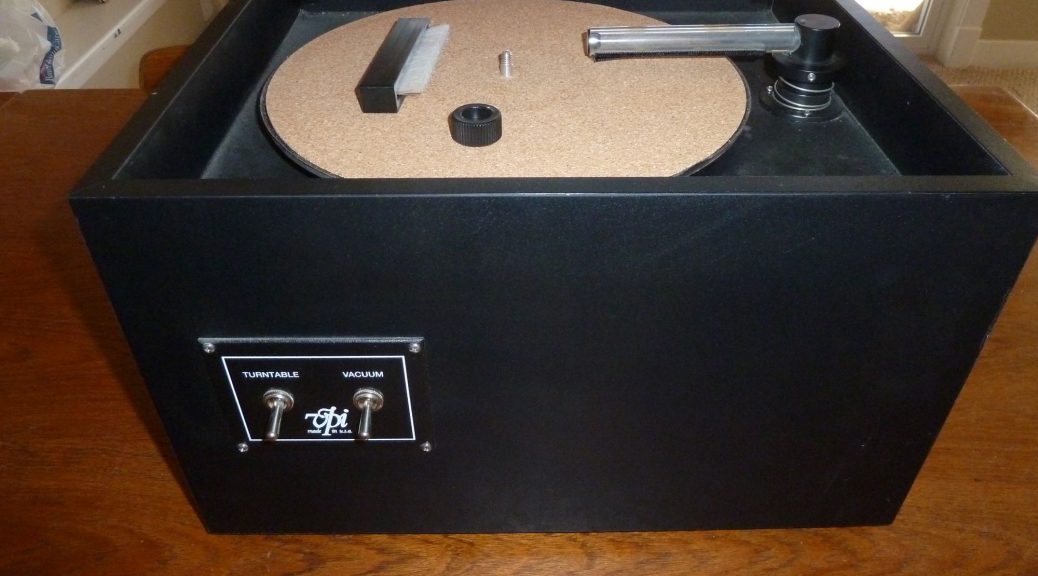
So the only way to go for an analogue audiophile, or even just avid record collector, is a vacuum record cleaning machine such as the one show in my Canada system below.
The venerable VPI HW-16.5 Record Cleaning Machine
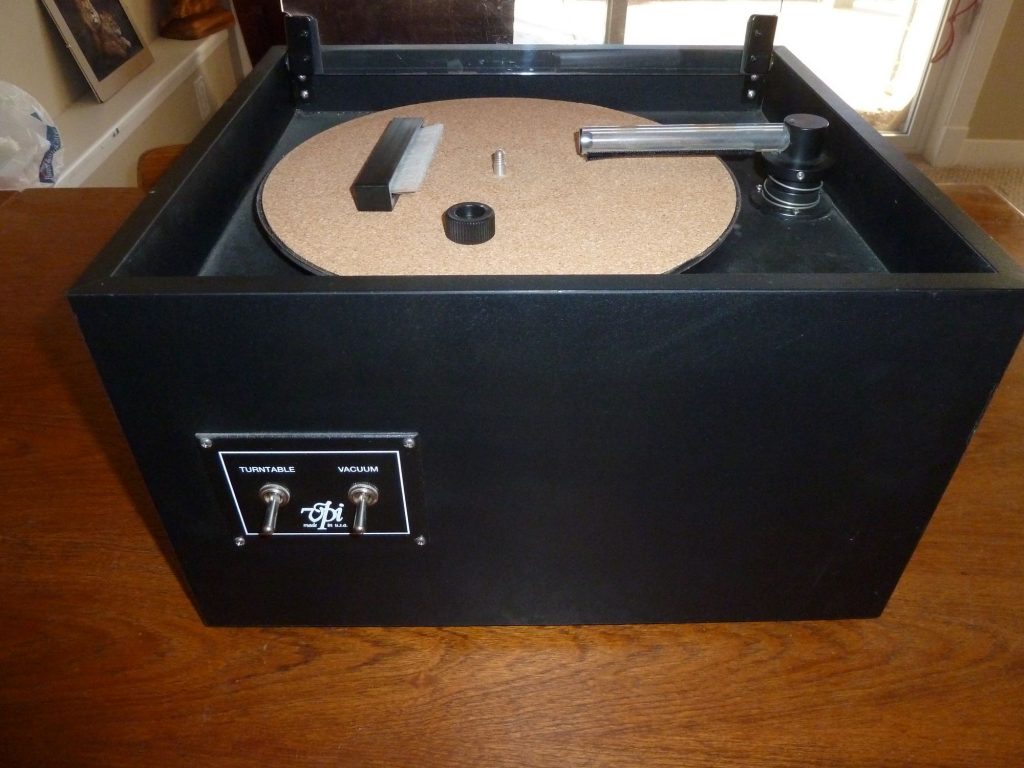
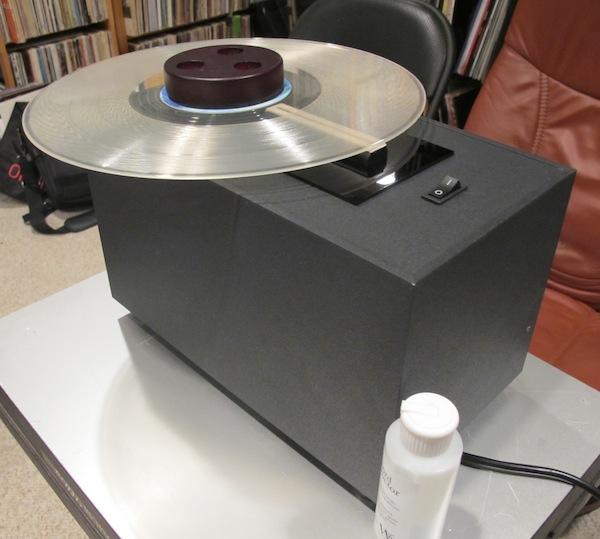
It’s not a complicated machine, just a platter, vacuum tube, and a couple of switches; but they still aren’t cheap with retail prices starting at $500 and rapidly going up from there. The VPI 16.5 shown above is still sold, unchanged and retails for $899. The key to satisfactory results is a high torque motor so you can press fairly hard with the brushes and a high powered vacuum system to remove all that dirt and grime you’re breaking free. I experimented with cheaper ($250 USD), hand-driven record cleaning machine on Maui, the Record Doctor V shown in the photo below, but found it cumbersome to use and difficult to get good results with. This was mostly due to the inconsistent speed due to manual operation combined with the fact that I only had one hand free to apply fluid and brushes to the surface of my vinyl. And, it was such a PITA to use that I found myself not cleaning my records with it before every play, which is step one to record care.
The manually operated Record Doctor Model V
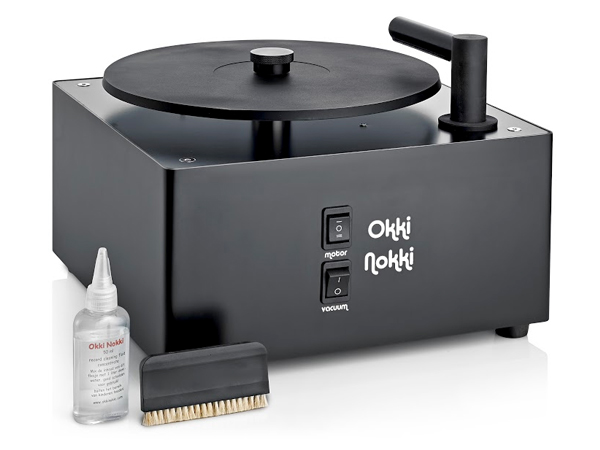
I later replaced it with a great little machine for the money (retails for $500), the Okki Nokki Model RMC. It has a high torque motor, strong vacuum, and reversible operation which I’ve never viewed and essential but hey, it can’t hurt to stroke your vinyl in both directions.
The Okki Nokki Model RMC record cleaning machine
You can spend a great deal more money on record cleaning machines, but all they offer for your extra hard-earned cash is more automation such as wands that apply fluid for you, fixed brushes that spread fluid and others that clean, extra vacuum tubes and fixed brushes on the bottom side so you don’t have to flip the record, and quieter motors (all the machines above are very noisy). All of these niceties are nonessential if you know how to properly clean a record with one of the machines above. So… how is that accomplished? More on that in the next blog.
Ok… So this is a large, complicated topic that I’m tackling here but I’ll try to break it down to the basics without going down too many rabbit holes, many of which can be debated ad-infinitum.
Wether you buy your turntable new or used, vintage or modern it will need to be set up properly for good results. I’ll preface this discussion by assuming you have a reasonably good quality turntable which is capable of the most basic setup options. This isn’t bargain basement territory, but then little found on this blog is. Sure, there are some inexpensive ways to improve sound quality found on these pages (How to upgrade your existing system without spending a nickel.), but most discussions are catered towards high end gear. So if you have recently joined the vinyl revolution (The new (old) gear coming out) with a vintage or modern low-fi turntable, have fun but don’t expect audiophile sound quality just because you’ve got vinyl. And… unless you properly clean your vinyl before every play (yes, including the first one – new records are full of grime from the pressing process) expect any records you buy to be forever lost to audiophile sound quality in rapid order (Record Cleaning). Of course people are having fun listing to records on vinyl again for reasons that have nothing to do with sound quality, which is great. It’s just not the crowd this post is written for.
So any reasonably good quality turntable will provide many ways to set it up for your listening environment and your chosen phono cartridge. Let’s progress from the most common to the more esoteric tasks at hand:
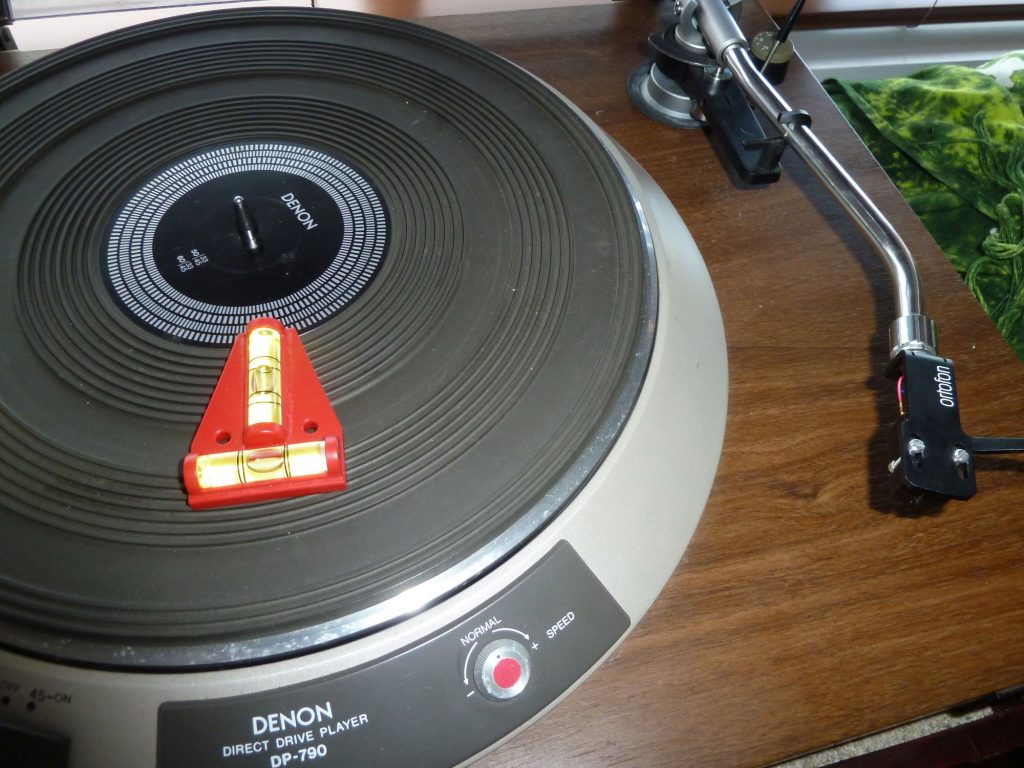
Leveling – Most any turntable will provide methods to level the platter. Variable height feet are probably the most common and simple. Throw a small hardware store level on your platter and keep working it until it’s nearly spot-on level in all orientations. All good? Time to move on.
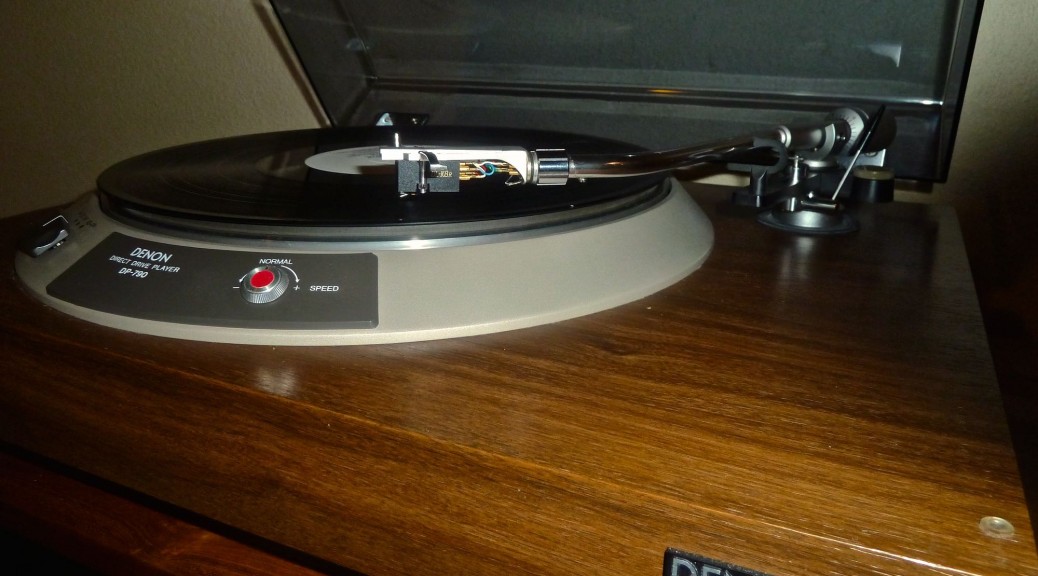
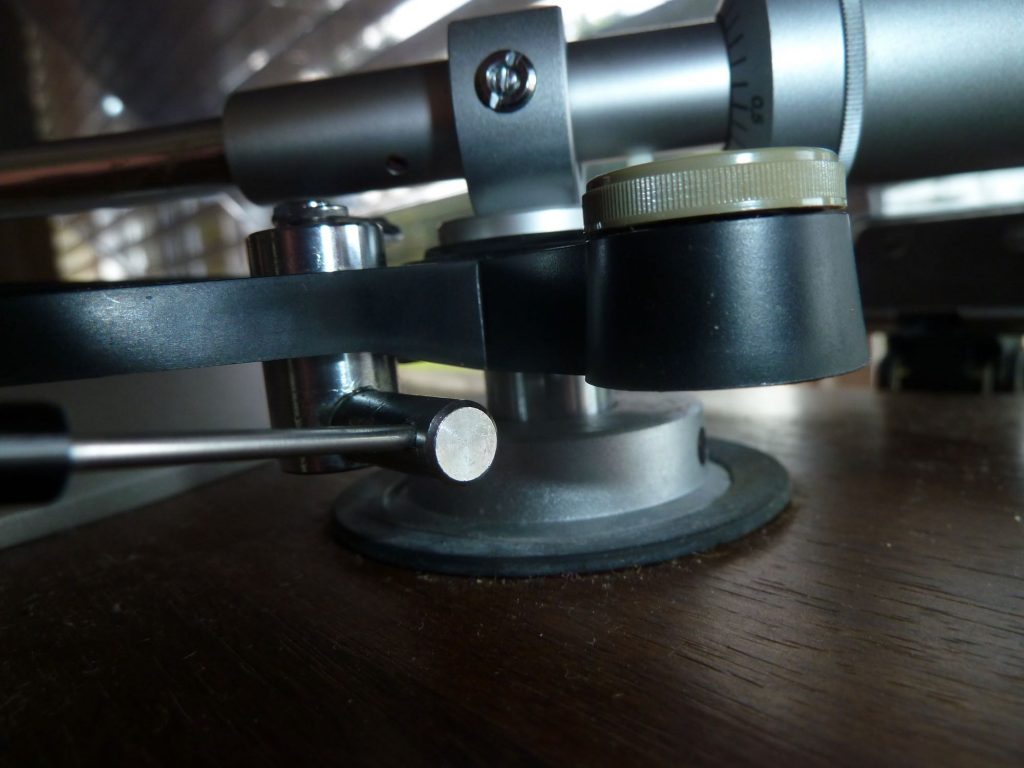
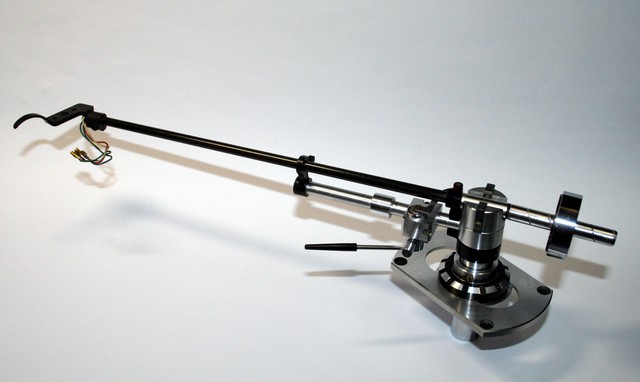
Vertical Tracking Angle (VTA) – To adjust your VTA, you need to find the adjustment on the base (where the arm is mounted to the turntable) of your tonearm that allows you to raise or lower it, as shown here. If there is no adjustment available here, you’re already hitting the limitations of your tonearm/turntable but just might get lucky with with the height it’s fixed at.
A good turntable tonearm will have a provision to adjust vertical tracking angle of the phono cartridge, as shown by the set screw in this photo.
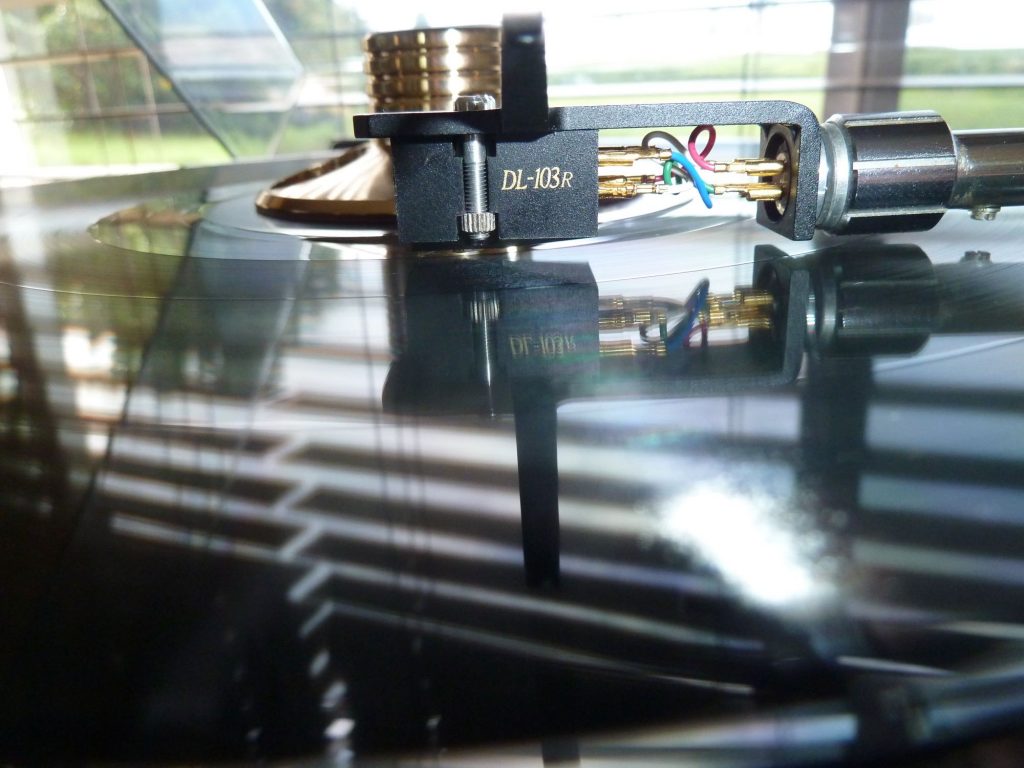
To set up the VTA properly, you want to set it up so the tonearm and cartridge body is as parallel as possible to the surface of a medium thickness record when the stylus rests on it, as show in the photo below.
Properly set up VTA shown here.
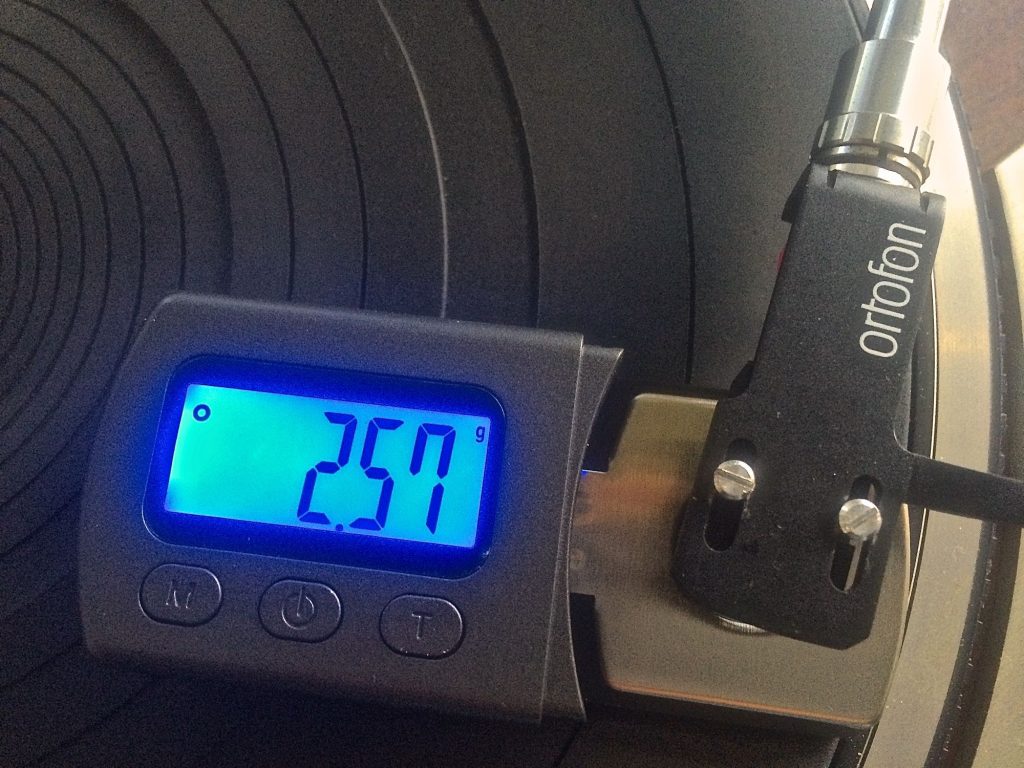
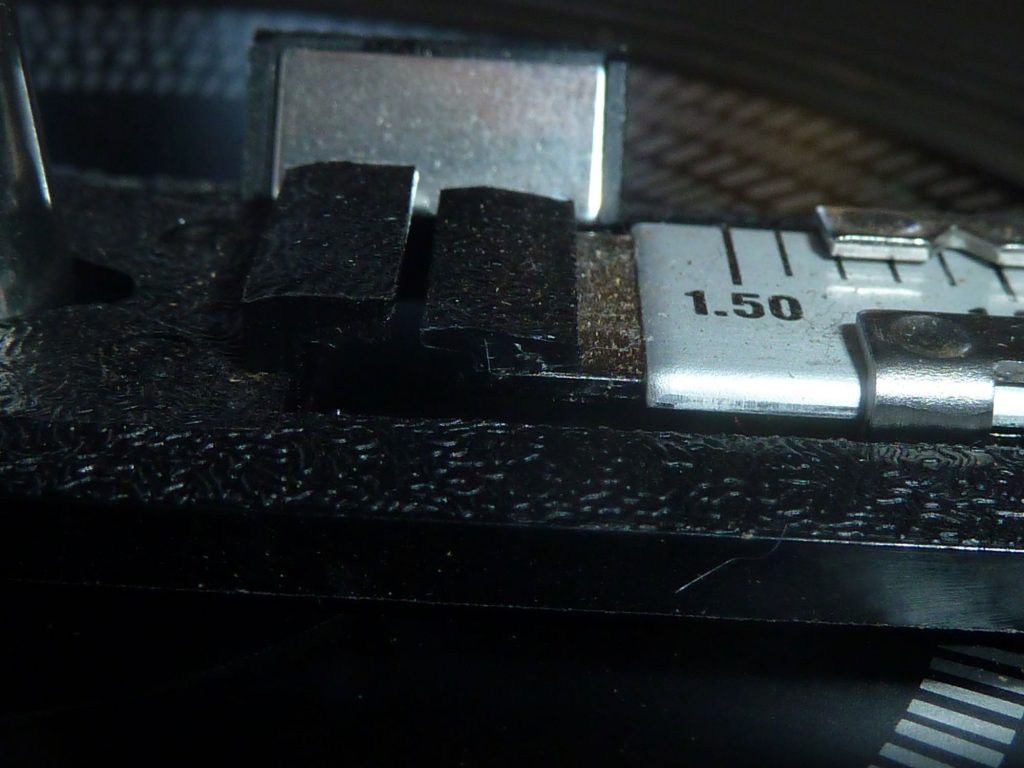
Stylus Tracking Force – After leveling and VTA, this is the most basic of a turntable’s tonearm functions. Many vintage turntables have tracking force in grams stenciled onto the tonearm counterweight itself and you start by zeroing the tone arm where it is perfectly horizontally balanced and then you dial in the recommended stylus force shown on the counterweight. But I’ve never found this method to be accurate enough and sometimes it’s so far off that it could damage your stylus and/or records so… you’re gonna have to purchase another item for your turntable setup kit – a good quality stylus force gage. I’ve tried the digital ones and find them to be a real pain in the ass since they must be calibrated prior to use, batteries must be replaced, and… yes, recalibrated yet again after doing so.
Typical digital stylus force gauge.
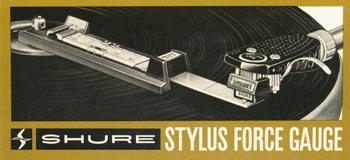
I suppose it should come as no surprise from an analogue guy such as myself that I’m going to prefer the likes of the non-digital Shure stylus force gauge shown below (circa 1972).
The original Shure stylus force gauge, circa 1972
I find it to be simple to use, reliable, and infallible. What more can you ask for? Zoomed in photo of the mirror for accuracy shown below, and a youtube video of it’s operation can be found at: https://www.youtube.com/watch?v=qP_YjhGT0SE
The tried and true Shure stylus force gauge.
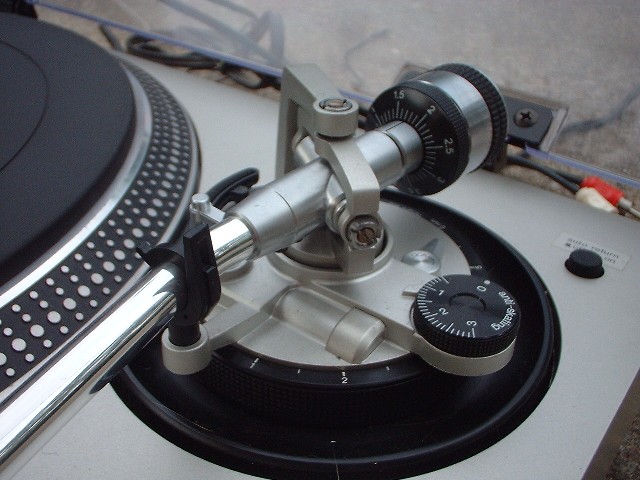
Anti-Skating – The force applied (through friction) to the cartridge by the rotating record tends to draw the tonearm toward the center of the record so an equal and opposite force is required to offset it, which is called “anti-skating”. This is usually the easiest one of all since it’s typically applied with a dial on the tonearm and you simply set it to match your tracking force.
Tonearm with anti-skating dial shown.
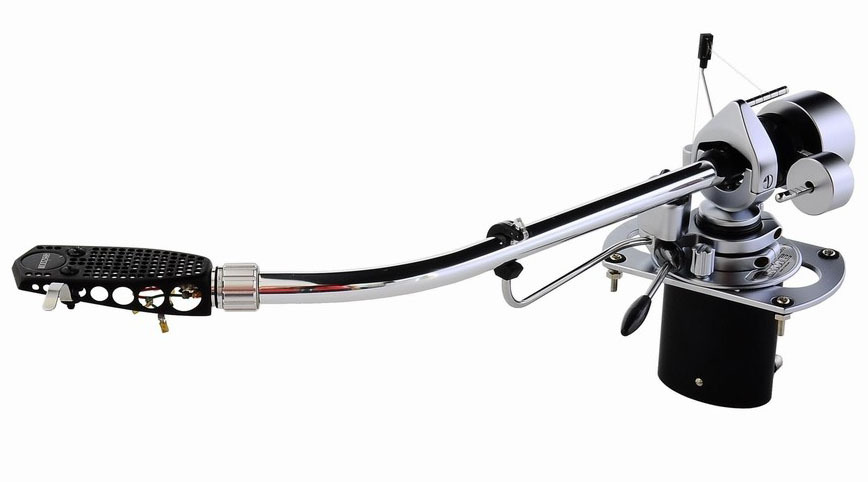
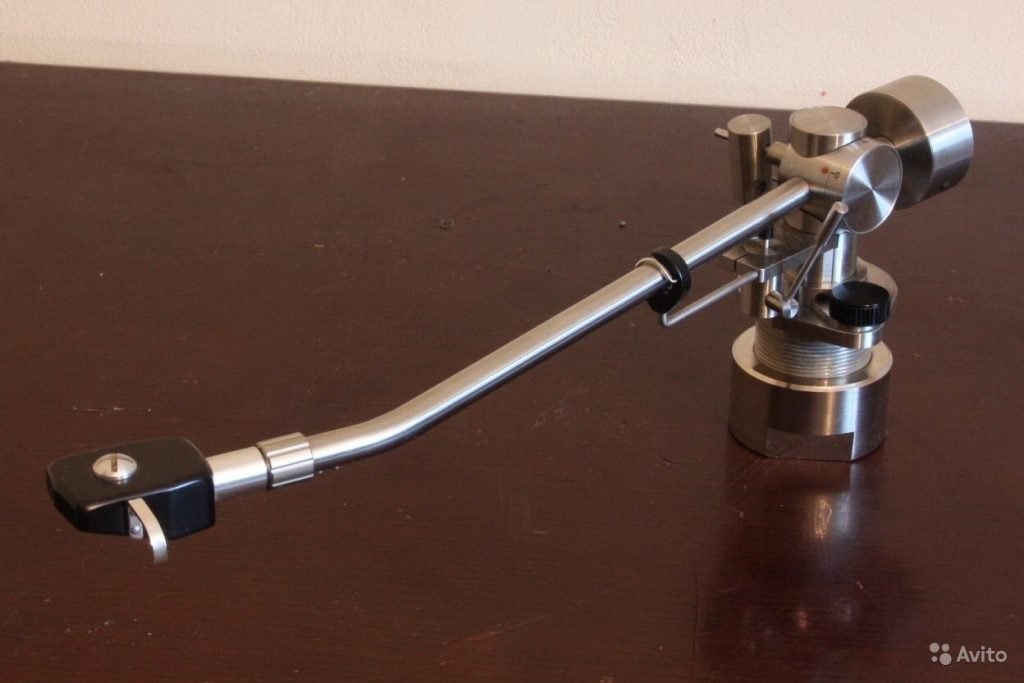
That said, some tonearms, such as the Shure SME 3009 shown below, use a counterweight threaded over different notches to apply the correct anti-skating force. This is one of the best low-compliance tonearms of all time (How do I choose a turntable?), but not for the faint hearted when it comes to setup.
The Shure SME 3009, a good example of a vintage, low compliance tonearm.
A great way to double check your anti-skating is to find a record with a long run-out groove (or better yet a fully blank record without grooves at all made for this purpose), place the stylus between the well spaced out grooves, and check if it “skates” towards the middle or not. If you are spinning by hand, only check this by rotating the record in the intended clockwise direction as spinning in the reverse direction could damage a delicate audiophile phono cartridge. Of course DJs do this all the time but they have cartridges and turntables designed for that purpose.
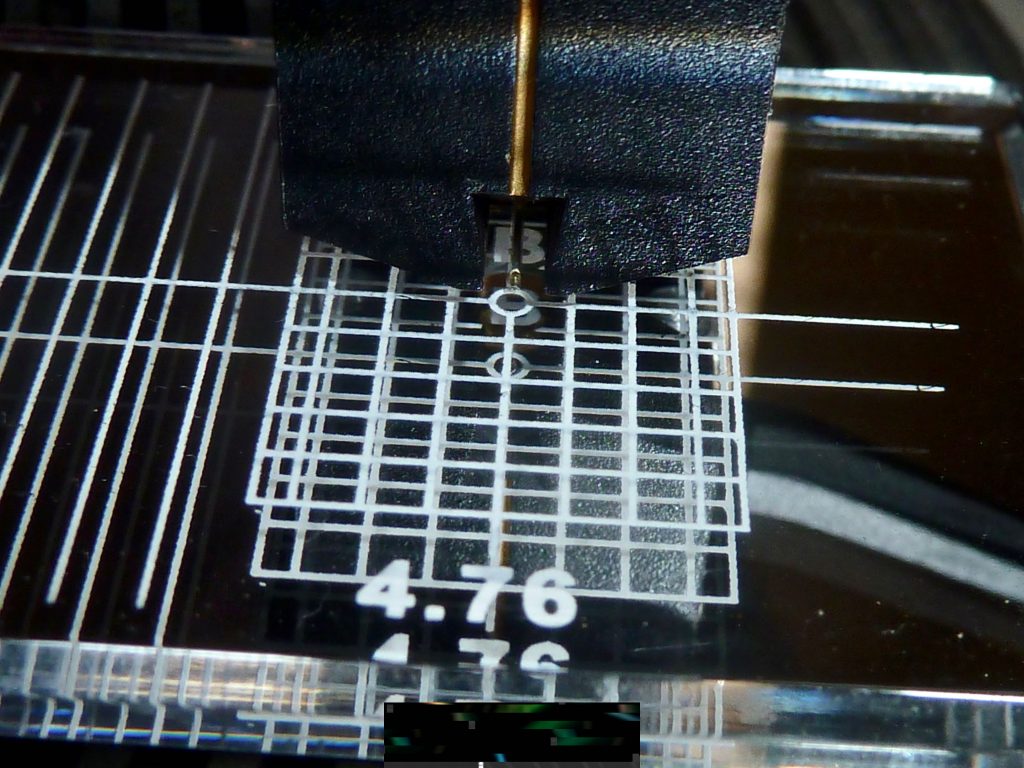
Overhang and Azimuth – OK, so you’re almost done. The last adjustments are deceivingly simple and intuitive, though volumes have been written on both. I’ve combined them here since you typically use the same tool for both, a stylus alignment protractor tool, as sown below.
Mirrored Overhang and Azimuth Adjustment Tool
Denon makes this task far easier with it’s squared off cartridge body and vertical line on the front, which is designed for use with just such a tool. For correct offset adjustment, view the cartridge body from the top at the two “null points” shown on the mirrored tool and adjust it in the head shell to be as squared off as possible with the grid. This can be a back and forth process. For correct azimuth adjustment, view the cartridge from the front and line it up to be as vertical as possible with the center grid line, as shown. Once again, easy when you have a vertical line on the front of the cartridge to gauge by.
That’s it! Now go plant your butt in the sweet spot in front of your speakers and reap the rewards of you efforts. Will your cartridge occasionally mis-track? Sure, the world of analogue audio is full of imperfections (Pleasure And Pain Ben Harper & Tom Freund). But when it all comes together it’s absolutely magic and even when things are off a bit, it still walks all over 16-bit digital audio sound reproduction. Every day, all day.
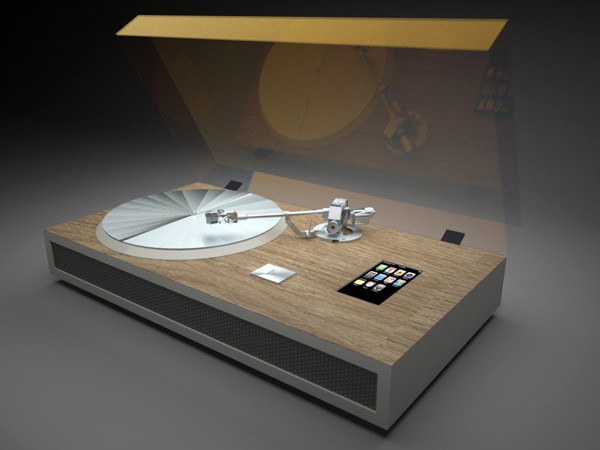
This image with an iPod installed in the plinth of a seemingly high-end turntable made me chuckle, and inspired this post. Anyone reading this blog would think I’m an “analog snob”, but the truth is I like every format for what it offers and seek to find the best in each.
Sure… when I sit down in front of my speakers in the sweet spot, turn off the lights, and settle in for a full-immersion audio experience I nearly always go for vinyl and an all-analogue signal path. It’s funny how I never mind getting up, cleaning records, flipping through albums on the shelf, cleaning the stylus, etc. when that’s all I’m up to. Sitting down for a full-immersion music listening session is not a time for multi-tasking anyway. It’s one thing at a time and when the needle is tracking the groove all the digital devices are off, including the laptop computer I’m writing this on now as I listen to music.
“Wait a sec,” you may say… “I thought you were describing dedicated music listening sessions?” Truth is I typically play high-def digital files off my music server to warm up my amps and my ears. Yes, I find my ears need a good warm up as well, or maybe it just takes a while to shut off my mind to focus entirely on the music. The music server is great for these purposes, and sometimes I even do my full-immersion listening from some of the better high definition digital recordings I have there, just as I do when I drop the needle on a nice slab of vinyl.
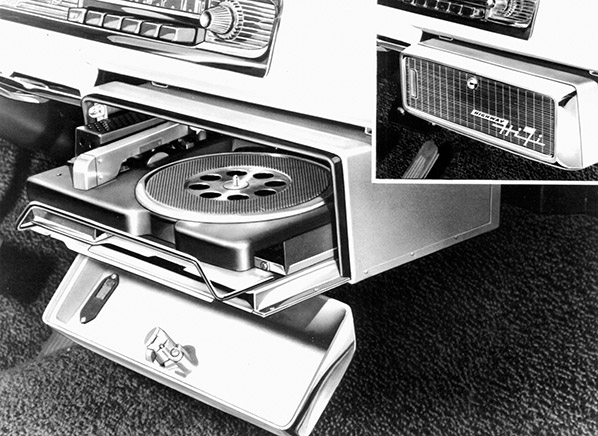
But… Fact is I love listening to music and like to enJoy it most of the time, doing what ever I may be up to. So when driving I’m listening to CDs or MP3s from a collection of over 5,000 on a hard-wired iPod. Great sound quality?… Definitely not. But hey, I’m driving and I’m not about to go for full immersion listening (i.e. lights off, eyes closed) anyway. I also love listening to music while engaged in just about every sport I do (with the exception of free diving) with a pair of ear buds, or helmet speakers in the case of downhill mountain biking, snow boarding, or snow kiting. Amazing really, how we can have our own personal music collection accessible to us nearly anytime, anywhere. Now try that with records. Guess what, Chrysler did! (for a car stereo anyway)
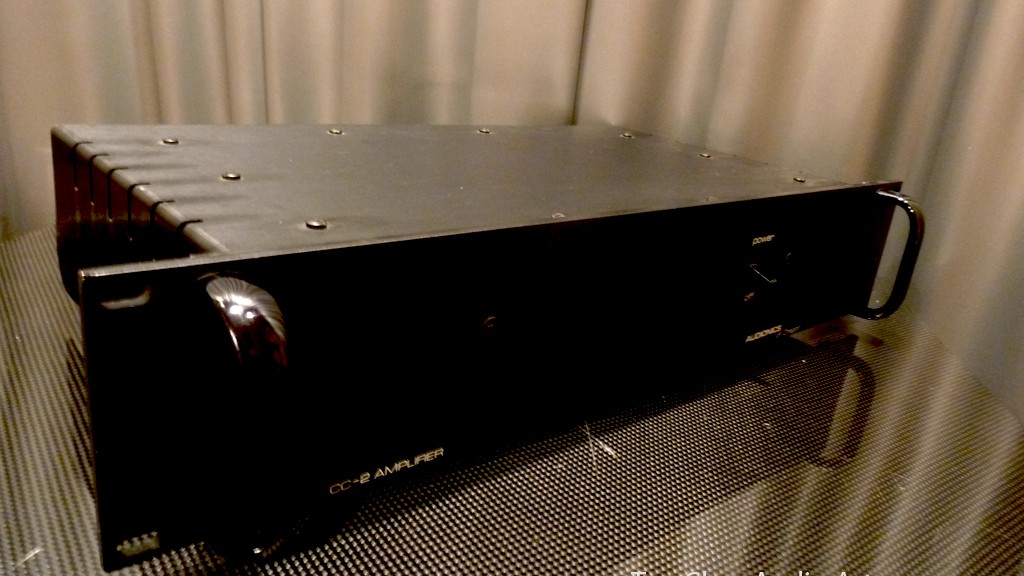
I worked at Audionics of Oregon as a summer job back in 1978. My duty was final assembly and packaging of their components, including their most successful power amplifier during their brief tenure on top of the solid state, high-end audio world, the CC-2. I would lock-tight a few nuts that clamp the power supply caps in place, hook up a few wires here and there, apply a silicone heat transfer compound to the heat sinks, screw on the lid (which also formed part of the heat sink), and the front panel (yes… also part of the heat sink) as well as the handles then box the whole thing up with a manual for shipping. Of course, one of the perks of working there was great employee pricing, so I got to own a couple of these beauties in my home audio system. And this 70 watts-per-channel “giant slayer” has never ceased to amaze me ever since.
I ran all sorts of different speakers with them, using them to show off the capabilities of speakers I had at the time in my home audio business. They ultimately found a home driving my “keeper” loudspeakers, the now legendary Magneplanar Tympani 1Ds (It’s all about reducing mass for the transducers). While the very difficult low-impedance load of the Tympani’s certainly made my CC-2s sweat, they always handled the task with aplomb, granted in the small listening room afforded by a teenager (Why do speakers need to be matched to room acoustics?…). One of the many, many things I learned while at my apprentice of sorts at AofO was how important the oft-overlooked amplification specification of “slew rate” (What is “Slew Rate” and why does it matter?…) was in order to properly drive most speaker designs without the decidedly unmusical effect of intermodulation distortion. AofO was the first US manufacturer to take a serious look at this and sacrifice their THD specs whilst many of their competitors ignored how their amplifiers actually sounded in order to participate in the “THD Wars” (The THD Wars – why lower distortion often doesn’t equal better sound quality.).
In my quest for audio nirvana in my Maui system, I was on the hunt for a CC-2 to drive my beloved Kef 104/2s (The Venerable Kef 104/2), which had already blown two vintage power amps in spite of their essentially benevolent character, albeit a bit on the low impedance side at 4 ohms (nominal). So I picked up an Audionics of Oregon CC-2 in Vancouver and disassembled it (because I know how they are built) into pieces that would fit into my carry-on bag for the flight. Yes, strange looks at security, but they let me through.
I honestly don’t think I’ve ever pushed an amplifier as hard as I have my now 40 year old CC-2 driving my Kef’s on Maui. I bought a spare for parts (cause you’re never gonna find the original Motorola power transistors on eBay) and with two CC-2s I had to try bridging them into mono, one per speaker. But that gave them fits as they don’t like the 4 ohm load when bridged in mono so I just choose the better of the two, left it in stereo, and have the other in storage just in case.
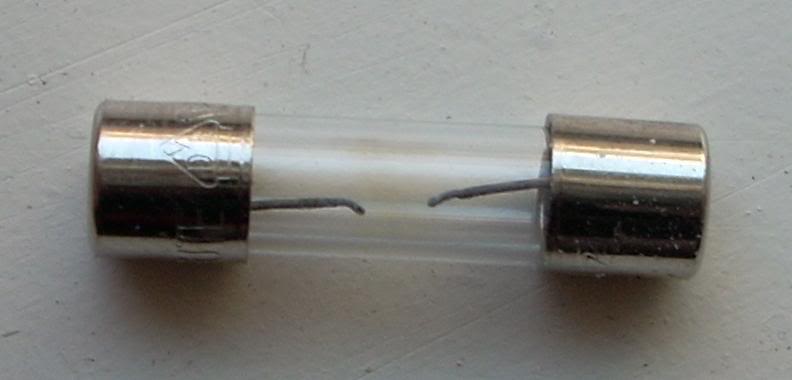
The CC-2 runs hot. And remember, the entire chassis is the heat sink for the power transistors so it can get so hot that you can barely even touch it. Yes… we’re talking frying pan hot, you could cook your eggs any way you wish on top of it. But this amp likes it hot. It actually sounds better that way. If it’s not breaking a sweat, it’s not happy. Not bad for an un-modified 40 year old, eh? I knew this about this amp from days past, but was still cautious at first. Then I was like, “it’s got this” and next thing you know I’m blowing fuses right and left (literally). Then… I remembered, the fuses are under-rated for what this little trooper of an amplifier is capable of and replaced them with higher rated ones (Blown fuse amplifier woes.)
The CC-2 was a break-through design in the 1970s, whose merits endure to this day. It defied the THD wars during the era of it’s creation, and has stood the test of time for that very reason. It was created during the vinyl era and, not surprisingly, it excels in a purely analog signal path starting with my Denon 103R low output moving coil (LOMC) phono cartridge (The formidable Denon 103 vs. 103R low output moving coil phono cartridges – is there really a difference?…) running in a vintage turntable capable of handling it’s low compliance requirements (Denon DP-790W turntable review). Then this delicate, very low voltage signal runs through an upgraded tonearm cable (Time for new tonearm cable?) into my Nelson Pass designed phono stage (The Nakamichi CA-5A preamplifier) and is transferred to my CC-2 via Zu interconnects (I just got the Zu Audio Wyle interconnects.), and finally to the Kefs with a fine pair of Zu Audio Libtec speaker cables (Speaker Cables). In a purely analog world, the CC-2 is a super-star.
If this amplifier was a person, it would be Clint Eastwood at his best, “Go ahead punk, make my day”. And in it’s “golden years” still Clint Eastwood but in Gran Torino style (an old, grey-haired guy who you underestimate at your own risk). All I know is there is no other power amplifier I’d rather have driving my Kef’s. All day, every day. The CC-2 and Kefs just dance so well together (Why do power amps need to be matched to speakers?…), which makes sense since Kef drivers were utilized in the speakers released by Audionics of Oregon at the time the CC-2 started production.
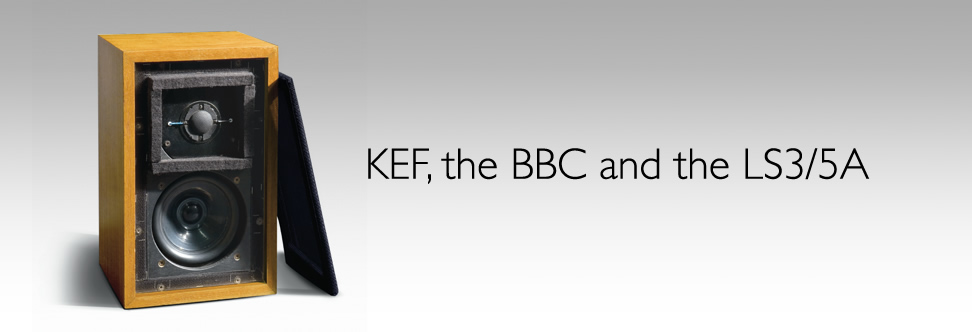
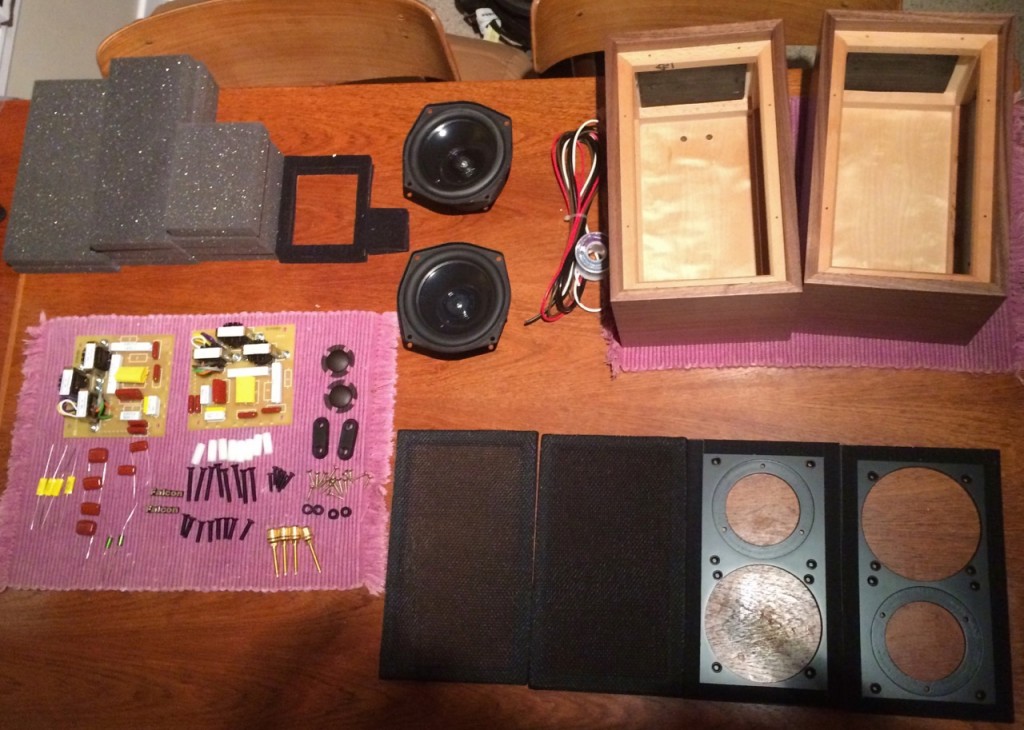
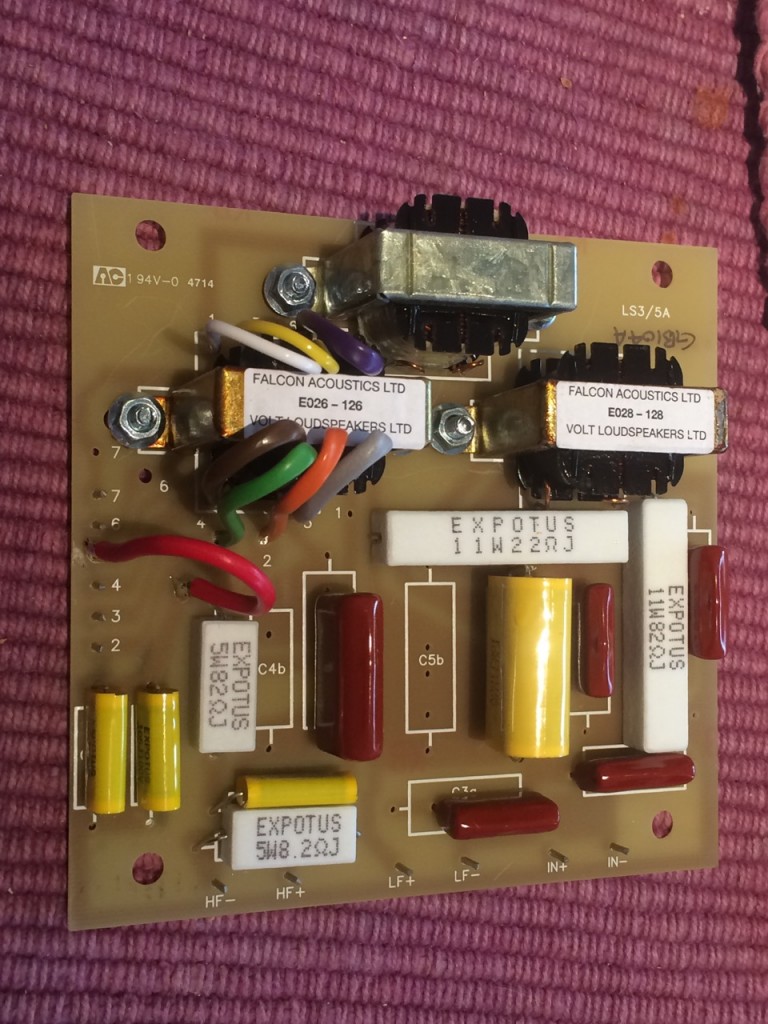
The CC-2 is also a perfect match for the 15 ohm Rogers LS3/5As (What is it about the Roger’s LS3/5A?…) I built in Canada, which also use Kef drivers (Kef T-27 tweeters and Kef B110 midranges). How do I know this?… Because I owned a pair of LS3/5As and listened to my CC-2 driving them back in the late 1970s – a legendary audiophile magic combination that most certainly wasn’t replicated with at least $10k worth of Bryson amps driving modern planars in a listening room at a dealer recently.
Who remembers how the THD (Total Harmonic Distortion) wars of days past nearly killed sound quality in power amplification circuits?… This was a far more insidious and localized demise than the certain-death sentence imparted by 16-Bit CDs. But it was an infections, tone-sucking demise none-the-less. So how can lower distortion be a bad thing? That requires a closer look at two things – what is being measured and how it’s reduction is being accomplished.
Harmonic frequencies (also referred to as “harmonics”) of a periodic voltage or current are components in the amplified signal that are at integer multiples of the frequency of the original signal. Harmonic distortion in audio circuits is the deviation of the amplified signal due to the presence of these harmonics.
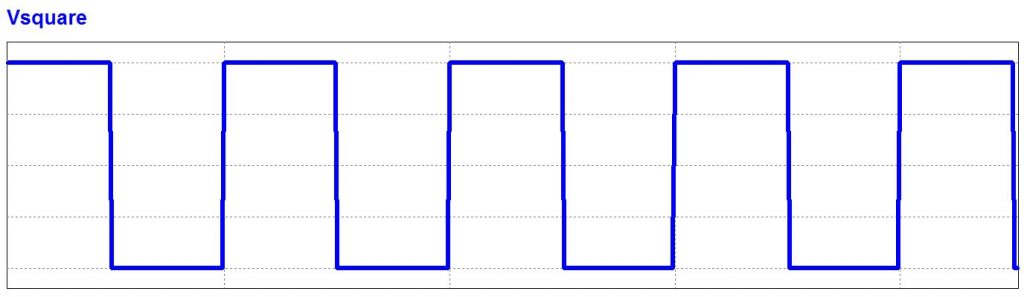
In a perfect world (or in engineering terms a “perfectly linear amplification” world), a voltage or current that is purely sinusoidal has no harmonic distortion because it consists of a single frequency whereas a voltage or current that is periodic but not purely sinusoidal will have higher frequency components which result in harmonic distortion. In general, the less a signal resembles a sine wave, the stronger the harmonic components will be and the more harmonic distortion it will have. So a purely sinusoidal signal has no harmonic distortion while a square wave will have lots. Musical signals are never pure sine waves or pure square waves so… per usual, “the truth lies somewhere in the middle” of these two extremes.
A pure sine wave will have no harmonic distortion.
A pure square wave will have dramatic harmonic distortion.
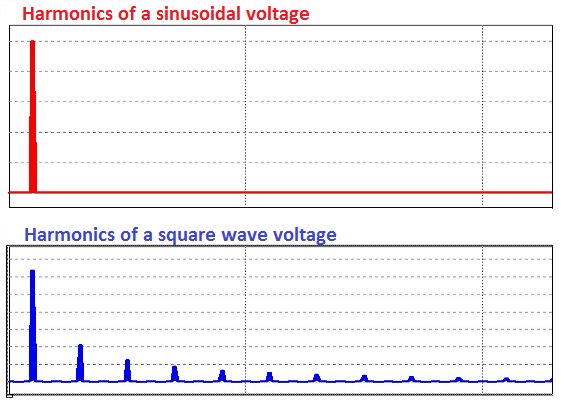
Now let’s look at the harmonic distortion of these two waves.
So all the subsequent peaks at the harmonic frequencies of the square wave (blue) are distortions of the original signal and a bad thing. The total harmonic distortion (THD) is the additive effect of all these peaks so getting rid of them in audio amplification circuits must be a good thing… right?
The answer is yes, to a point. Part of the trouble with this method of measurement of THD is that it doesn’t account for how the human brain perceives it and account for the fact that the order of the distortion (which multiple of the fundamental frequency it represents) has a far more audible effect than its absolute magnitude. When three or more fundamental tones of distortion are present (in the illustration of a square wave above there are 10), the distortions represented by the higher orders are far more audible and undesirable, mainly due to intermodulation distortion (more on that later). This was first discussed by Norman Crowhurst and D.E.L. Shorter of the BBC back in the mid 1950s. They even advised a weighted measurement where the higher order harmonics accounted for more of the THD value, though this was never adopted.
Back in the days of tube amplifiers, THD was a very real measurement of sound quality and had a correspondingly high value by todays standards, often around 1% (the iconic Dynaco/Dynakit ST-70 tube amplifier was rated at <1% for example) . But with the advent of solid state electronics , it became far easier to introduce large amounts of negative feedback (60 dB or more) in order to drastically reduce THD, and many manufacturers did exactly that. Comparisons became more infinitesimal and the “THD wars” to drive it lower resulted in values below 0.1%, then below 0.01%, then even below 0.001% using op-amps (Op Amps are holding back my digital quest). In order to understand how this can be a bad thing, let’s take a look at how a simple negative feedback loop works.
According to Wikipedia, “A negative-feedback amplifier is an electronic amplifier that subtracts a fraction of its output from its input, so that negative feedback opposes the original signal.” In other words, it compares the output signal to the desired input signal and subtracts out any extraneous information (i.e. distortion). Sounds good… right? In a perfectly linear world, it would be. But real life isn’t perfectly linear and power amplifiers are no exception.
Negative feedback principles have been around for a long, long time and moderate amounts were implemented to good effect in tube amplifiers to some degree. But the over-application of NFB in audio amplifiers only became standard practice because transformerless transistor amplification circuits enabled its easy use. In the tube amplifier era it was the output transformer which, due to its complex transfer function, limited the amount of NFB in power amplifiers to around 20 dB.
So introducing strong negative feedback into inherently non-linear transistor audio amplification circuits has two significant flaws – far lower gain (often overcome by cascaded amplification) and the complications of transient intermodulation (TIM) distortion, especially in slow (low slew rate) circuits. Simply put, if a burst of a fixed frequency is input into a transistor amplifier with strong negative feedback, additional (unwanted) frequencies will be found on the output due to TIM distortion.
To obtain ultra-low THD specifications, manufactures of power amplifiers thereby killed the audio quality of their products. This explains why a low-fi Audio/Video Receiver (AVR) full of integrated circuits (ICs – Nude photos of analog gear usually tell a big part of the story) has a far lower THD specification than the best-regarded triode (i.e. tube) amplifier, even though any listener would invariably hear the better sound quality of the latter. In a sense, overuse of NFB in transistor power amplifiers was the beginning of the end of high end audio, followed by limiting the source material itself to 16 Bit PCM digital, then compressing this already inadequate signal to MP3 files as the final blow to music’s destruction (The “Dark Ages” of High End Audio).
This brief discussion is intended to point out how some traditional measurement results (such as THD) can result in unwise decisions for amplifier design. Unfortunately the THD wars of days past steered the designer, the reviewer, the dealer, and the consumer away from good sound. Nelson Pass, one of the very best amplifier designers of all time, has very strong beliefs with respect to how an amplifier should be designed, chief among these being that it is far more important to limit higher order harmonic distortion than it is to seek artificially low overall distortion levels. He also debunks the watt per channel (WPC) wars, but that’s another topic (Why it’s not about watts per channel).
Back in the 1980s, at the height of the THD wars, Nelson Pass developed a clever way to create a highly linear solid state power amplifier with his “Stasis” circuit topology and thereby was able to eliminate the use of negative feedback entirely while maintaining a THD spec of just 0.1%. Much higher than competitor’s offerings at the time but still inaudible and he thankfully stood fast against the overuse of negative feedback just to participate in the battle. Stasis was subsequently licensed by Nakamichi and implemented in their venerable PA-7, one of the best power amplifiers to come from the era (The Nakamichi PA-7 power amplifier). Audionics of Oregon is credited with producing the first US built low negative feedback, low TIM distortion solid state power amplifier with it’s CC-2 (The Audionics of Oregon CC-2. More distortion, more better.), which had a THD rating of 0.18% (0.35% when bridged into mono) and utilized only 23 dB negative feedback (very low by the standards of the time). This amplifier was based on the research of Matti Otala of The Netherlands, who pioneered the concept in 1973 and produced a prototype with a high slew rate of 100 V/microsecond, only 20 dB of negative feedback, low TIM distortion value of only 0.15%, and not surprisingly high THD of 0.2% (more info here).
“The bottom line is the ear is not a microphone, the brain is not a tape recorder, and measurements are limited in describing subjective quality. I like to have low distortion and so on, but these things take a back seat to what I experience when I listen. There are plenty of products which have great specs – I will not be offended if you buy those.” – Nelson Pass
Interestingly, the THD Wars have finally come full circle and many manufacturers of high end audio amplifiers (Audio Research, for example) are now advertising their products as having “no negative feedback” and their THD specifications are correspondingly much higher than their low-fi competitors. This is why it’s important to audition the audio gear you are considering, since the specifications are only an attempt to measure sound quality and… in the case of THD specifications that are driven artificially low with the overuse of negative feedback, a very poor one at that.
Even newcomers to the world of high end audio usually realize that when purchasing speakers, they need to find the right power amplifier to drive them. But when listeners shop for power amplifiers their main criteria is typically “watts per channel” and “total harmonic distortion” (THD – The THD wars. Why lower distortion often doesn’t equal better sound quality) and when they shop for speakers they often look at their power handling ability and/or what their rating is in “Ohms”. If speakers are rated for X watts/channel and they buy a power amplifier that is rated to produce X watts/channel than everything must be good in the world, right?… As usual, the specifications that are thrown around the most don’t tell the whole story.
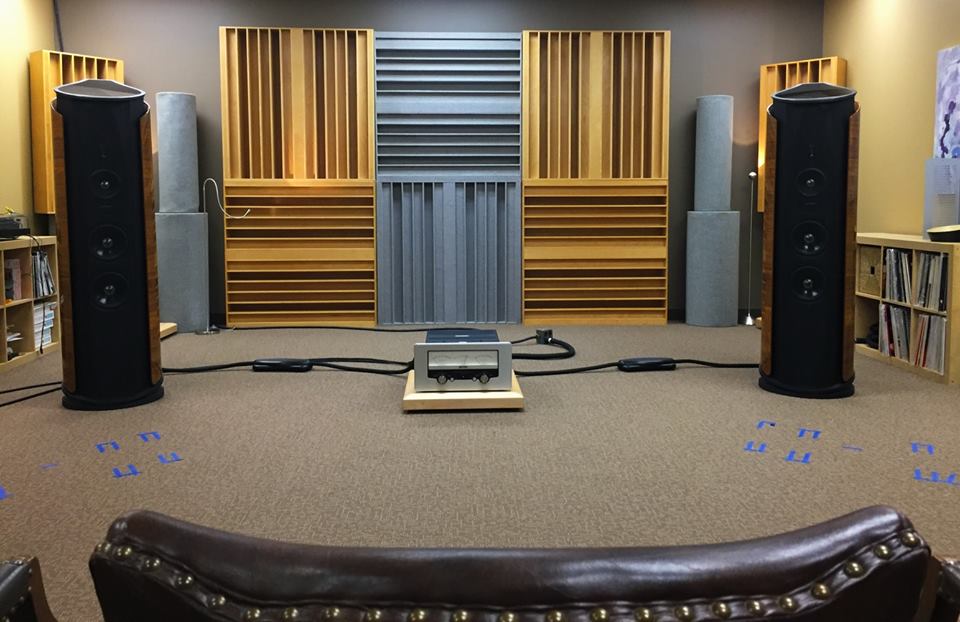
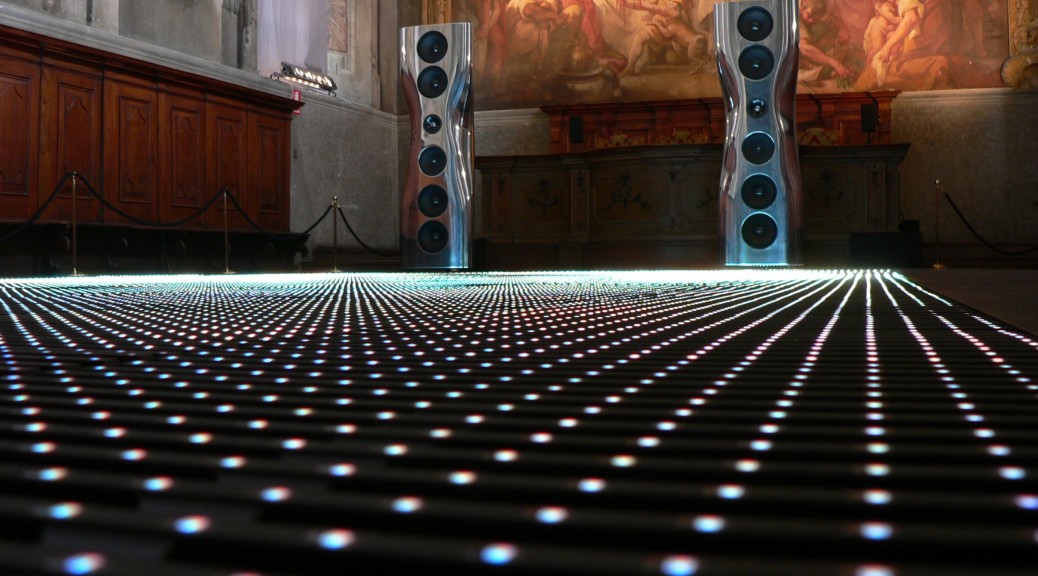
So what do you look for when shopping for a power amplifier to drive the speakers you’ve chosen for your listening room and musical tastes (Why do speakers need to be matched to room acoustics?…)? Start by looking at the basic physics involved. If you have very large planar panels such as ESLs (Electrostatic Loudspeakers) or “Maggies” (In a nutshell, the big Maggies (3.7Rs) are a fantastic speaker, but are very dependent upon room acoustics) you are gonna need a massive, high-current power amplifier to move these panels. Why? Because these speaker designs do nothing to help with efficiency in creating sound waves, such as horn loading for mid and high frequencies and/or box enclosures with a tuned bass reflex port or transmission lines for mid to low frequencies. They are engineered for complete, no-compromise accuracy and the room is the speaker enclosure (Planars… The room is the enclosure). When you think of it in this context, the enormity of the task at hand becomes apparent, especially for larger rooms. It’s no wonder you will need a colossal power amplifier (or two – Horizontal bi-amping with non-matching amplifiers and Why bi-amping isn’t always what you may think) to make your chosen speaker “sing”. I’ve got modest sized Maggies (MG-12s) in a small and efficient listing room in Canada and still often drive my 70 pound, high current Nakamichi PA-7 (The Nakamichi PA-7 power amplifier) to the verge of clipping whenever I feel like “cranking it”.
Loudspeakers with a low “Ohm” rating are known to be difficult to drive, but how does this explain why the Rodger’s LS3/5As (What is it about the Roger’s LS3/5A?…) which are rated at 15 ohms and are very small “bookshelf” speakers will make a power amplifier sweat far more than a pair of 4 ohm large, floor standing Kef 104/2s (The Venerable Kef 104/2)? The answer is it doesn’t, there is far more to the story. In this case the 104/2s are a relatively efficient loudspeaker in spite of their large size and the LS3/5As are notoriously inefficient in spite of their small size.
Some speaker manufacturer’s have decided the power amplifier/speaker matching for you by including power amplifiers in their designs. Meridian is well know for this, for example. While this is a good approach in theory, it often falls short in execution and it limits the listener to their particular choice in speaker drivers. As far as I know, there are no self-powered planar loudspeaker designs for example, perhaps because the high-current power amplifiers required to drive them are so massive and usually tip the scales at well over 50 pounds each.
While planar speaker designs require massive power amplifiers, large but efficient speakers such as the Kef 104/2 can be driven nicely by a 70 watt-per-channel, 40 year old, small and relatively light Audionics of Oregon CC-2 (The Audionics of Oregon CC-2. More distortion, more better.) with aplomb. Why?… In part due to the high slew rate of this little beauty but also a synergy of sorts. Where specifications fail, listening tests come into play (listening tests vs. test measurements). Being far more subjective, it is the only way to be certain you have a good match for your listening room and music tastes. As such, demo your chosen power amplifier at home when ever possible. Failing that, try to audition it powering exactly the same speakers you own in a listening room that matches those in your home as closely as possible.
More techy details can be found at: http://www.sengpielaudio.com/calculator-AmplifierLoudspeakerAndOhm.htm
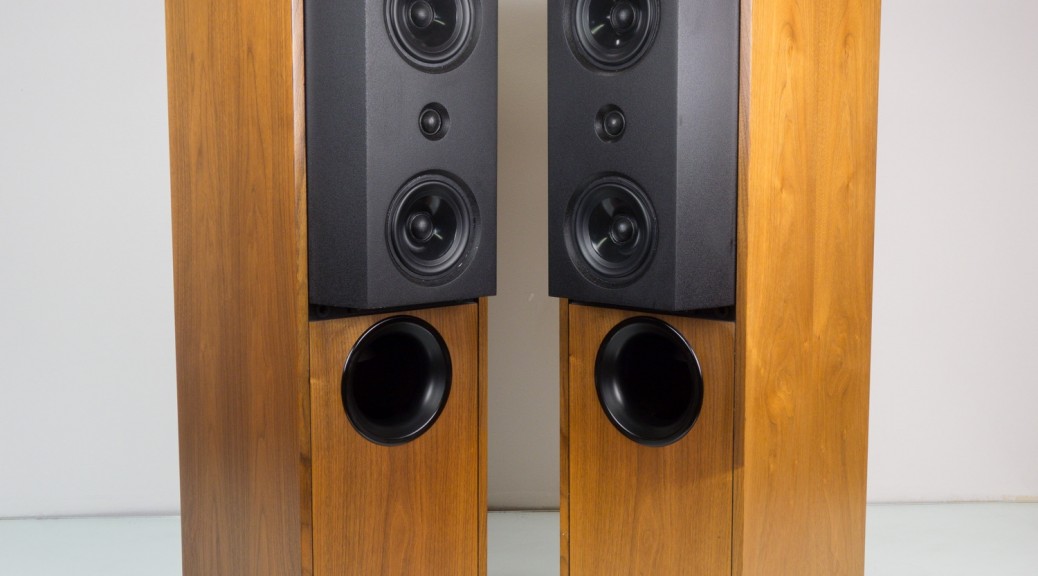
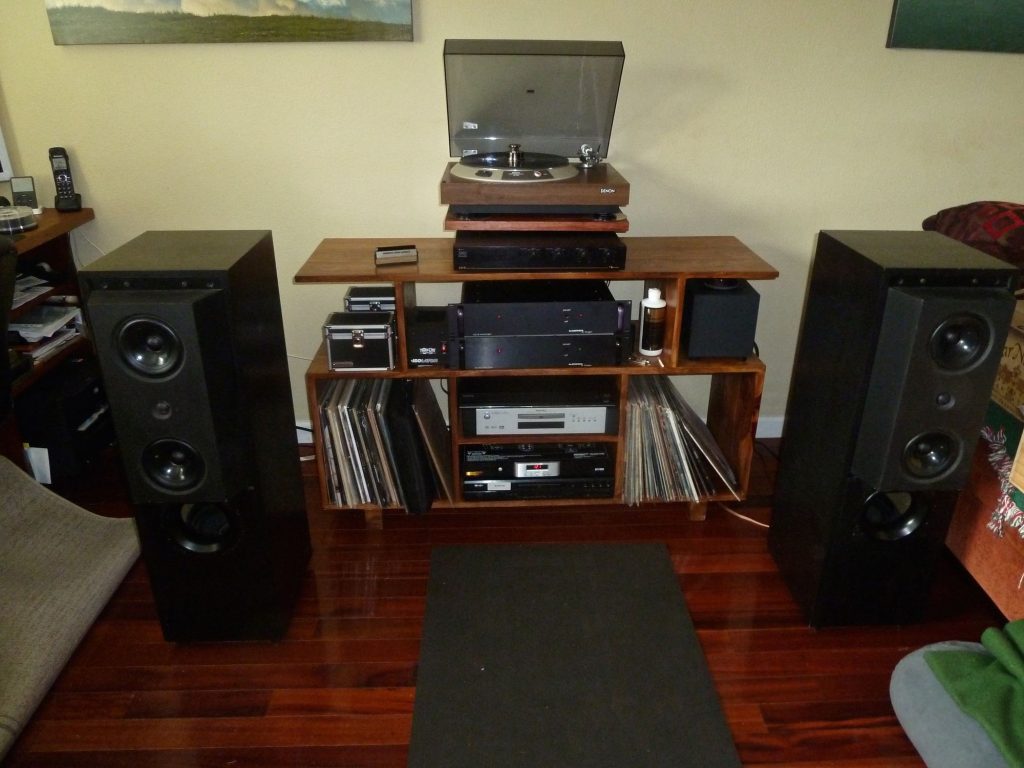
What can I say. I purchased these speakers off Craig’s List on Maui and talk about a “gem in the rough”! I am very, very happy with them, especially the more I play them. So much so that I’m on the hunt for another pair for Canada. They are something worthy of growing into. I found them early on in my return to my love for high end music reproduction, so they started out playing SACDs coupled with a nice warm Marantz preamp and an utterly competent vintage SAE power amp. They immediately started to reveal the weaknesses in my system in other areas, such as that of my SACD player’s DACs (Op Amps are holding back my digital quest).
At the risk of using superlatives, the 104/2’s are visceral in the best sort of ways, vs. the analytical qualities of “Maggies” (In a nutshell, the big Maggies (3.7Rs) are a fantastic speaker, but are very dependent upon room acoustics). It seems strange to call these seemingly mutual exclusive qualities both good, but they are! All I can say if you seek perfection in the plucking of a string as part of an acoustic performance, go for the Maggies. But if you want to rock your world like you are at a live show of your favourite classic rock band, the 104/2’s will absolutely steal the show every time.
When setting these up, it was immediately apparent that my room is by far my biggest limitation (Why do speakers need to be matched to room acoustics?…). Very early on I discovered a dramatic improvement in imaging by not toeing them in (as you do most speakers) and much tighter bass just by moving the them about 6” further out from the rear wall. My room is gonna resonate at around 75 Hz no matter what, since the “long” dimension is 15 feet long. But there are still ways to work with that, especially with an acoustic suspension vs. bass reflex design. Interestingly, the 104/2s are neither. They are about the most clever design to get exemplary bass out of a relatively small cabinet I’ve ever seen. The key to their success is two vertically firing woofers that combine their output to a port of exactly the same diameter as the B110 mid-range drivers, a design Kef calls “Coupled Cavity Bass Loading”.
The CC-2 powering the Kef’s is a marriage made in heaven (after all, the designer of the CC-2 was working alongside Lynn Olson who was designing speakers spec’d with Kef drivers). As a side note, the CC-2 is also a perfect match for the 15 ohm LS3/5As I built in Canada (What is it about the Roger’s LS3/5A?…). How do I know this?… I listened to them together back when they came out in the 70s – another audiophile magic combination (Why do power amps need to be matched to speakers?…).
So shortly after I got my first pair of Kef 104/2s (The venerable Kef 104/2) I did some tweeter surgery as all the forums say the ferro fluid in the T33s should be toast due to age. Well, all I’ve gotta say is don’t believe everything (or much of anything) you read in the forums and trust your ears. I thought they sounded fine but did it anyway and it made no difference what-so-ever.
Having said that, the Kef T33 tweeter is undoubtably the weak link of the 104/2s and I have no idea why Kef didn’t utilize the far better T27s of Rodgers LS3/5A fame (What is it about the Roger’s LS3/5A?…). In any event, I subsequently upgraded to a new Vifa equivalent that upped the ante for the clarity of the high frequencies and mates perfectly to the obsolete T33’s specifications. It also fits nicely in the 104/2’s cabinets without major modifications.
So I just listened to NIN (Digital distortion in a purely analog signal path.) “Hurt” on vinyl. This is a song I know very, very well. One of my all time favs. I finally got my vinyl signal path dialed in so I broke out the record, which I’ve kept sealed for years. Put it on the record cleaning machine then on the turntable with the Denon 103R (The formidable Denon 103 vs. 103R low output moving coil phono cartridges – is there really a difference?…) tracking the grooves. I had great expectations which it met and exceeded, even over the SACD copy which I’ve listened to a lot. But what amazed me is just how fundamentally different it sounded, like I’m hearing this cherished song for the first time. Sure… it makes sense since I’d never before heard a purely analogue version. But still… amazing really. As a side note, Johnny Cash did an amazing rendition of this NIN classic, found here:
Trent Reznor of Nine Inch Nails is an enigma. He plays with all sort of digital gear and tools to create his music and distort guitar riffs so they are “just so”, Then he records the end result on 2″ analogue tape. Drop the needle on a faithfully released vinyl version of Pretty Hate Machine or The Downward Spiral and you will likely be surprised by the sound quality from what is mostly digital sources (though there are still plenty of pure analogue sources in the mix). So how can music that was produced in the 16 Bit digital era of the 90s, have digital sources, and yet sound so good?…
The answer is deceivingly simple. Digital wasn’t the recording method, but rather the source of the music itself. Then Reznor went to traditional analogue recording methods to create the master tapes. This sounds counter-intuitive, but it really isn’t. Unlike Daniel Langois, who recorded the analogue sources from U2’s sessions on 16-Bit DAT tapes, thereby destroying the sound quality forever, Reznor created his music mostly in the digital domain then faithfully recorded it on high quality analogue master tapes. Digital distortion was his favorite creative medium, but he obviously recognized the inability of the 16-Bit digital tape format to faithfully record his digital compositions.
NIN is a very progressive band in all respects. What’s interesting is how progressive they were by refusing to adopt the “latest greatest” digital technology that reared it’s ugly head in the music industry during the era of their greatest popularity – 16-Bit Digital Audio Tapes (DATs) (The “Dark Ages” of High End Audio). If you listen to any of their music, past or present, you can immediately tell it was recorded in the analogue domain.
By their own design, NIN creates a very interesting mix of controlled distortion. Trent Reznor talks a lot about how his form of artistic expression is in the realm of distortion. Other “old school” bands incorporated distortion into their music of course. Just listen to any live performance of The Who and you will hear intentionally created analogue distortion all over the place, often created by destroying electric guitars on stage. But Trent Reznor has taken the concept to an entirely new level by utilizing computers to create, control, and refine it digitally.
What’s fascinating is that, with the revival of vinyl records (The new (old) gear coming out), NIN’s albums are now available and faithfully reproduced from the original analogue tapes on vinyl. So… for the first time in history, we get to hear his intentional/artistic, digitally created distortion faithfully reproduced with an all-analog signal path. How cool is that?!
You will hear me speak of “reference recordings” a great deal in this blog. These are go-to recordings I use to compare and contrast sound quality when evaluating new gear and/or tweaks I’m making to an existing system, room, speaker placement, etc.
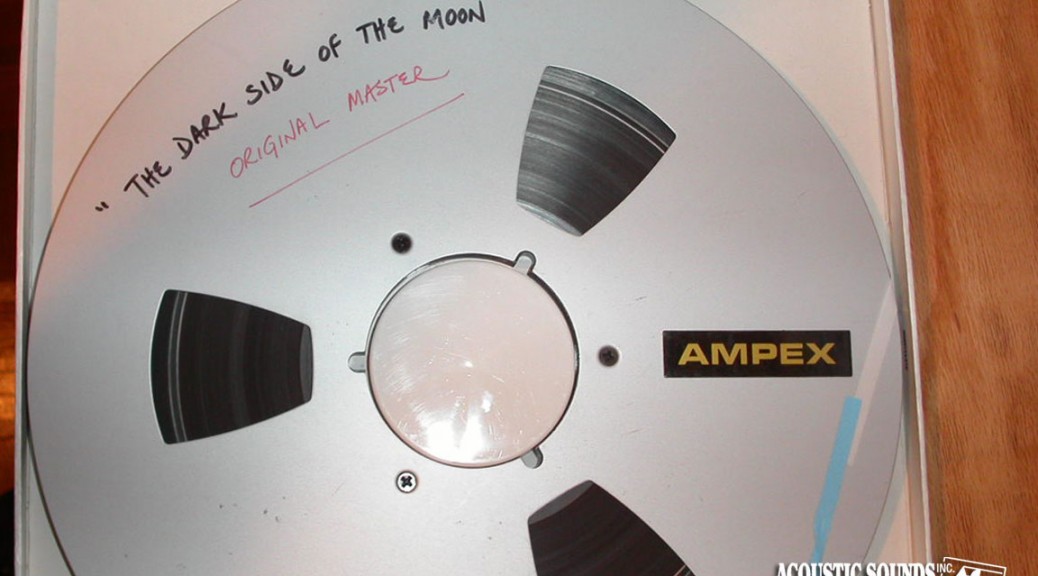
My reference recordings have a few things in common, such as phenomenal dynamic range and a large variety of instruments and nuances of musicality. They are typically recorded by the most fastidious sound engineers in a fashion that provides reproduction as close to the source as possible, though there are also some “happy accidents”. With precious few exceptions, they are fully analog recordings. Which mean’s they are vinyl records (side note – some exceptional recordings were released from the original analogue master tapes directly to reel-to-reel analogue tapes, but these were the exception rather than the rule).
I also have a few digital reference recordings, and they offer the best sound quality I’ve yet heard from the medium, such as: Blade Runner Soundtrack from Vangelis (DSD), Whites Off Earth Now by The Cowboy Junkies (DSD), and a sample track from Blue Coast Recording called “Cali” (Direct to DSD).
The Blue Coast reference is an obvious candidate since they went to great lengths to go from purely acoustic sources in an ideal studio setting captured by some of the best microphones ever made (rare and hand-crafted by Didrik) directly to a native DSD master file. No PCMing or digital mixing. Just the original goods. No more, no less. But this left me wondering why the other two digital recordings were so good…
A little research showed that, due to budget constraints, Whites Off Earth Now was originally recorded directly to analogue master tape in a garage using a single ambisonic microphone. This is far harder for the band to perform, sort of like the Direct to Disc (If one format is better than another, why doesn’t the music always sound better?…) titles offered by Sheffield Labs back in the 70s, This was one of the happy accidents where their low-budget recording method resulted in a raw and visceral quality that would have been lost in an expensive recording studio. And thank goodness they couldn’t afford a professional sound engineer using Pro Tools digital mixing and editing software that would have PCMed all over their original analogue goodness. Then Mobile Fidelity Sound Labs later did their digital magic by carefully transferring the music directly to DSD from these original master tapes (once again, no digital mixing). On a good system that is properly set up, it really does sound like you are there in the garage with the band. Sometimes less is more. This is clearly one of those times.
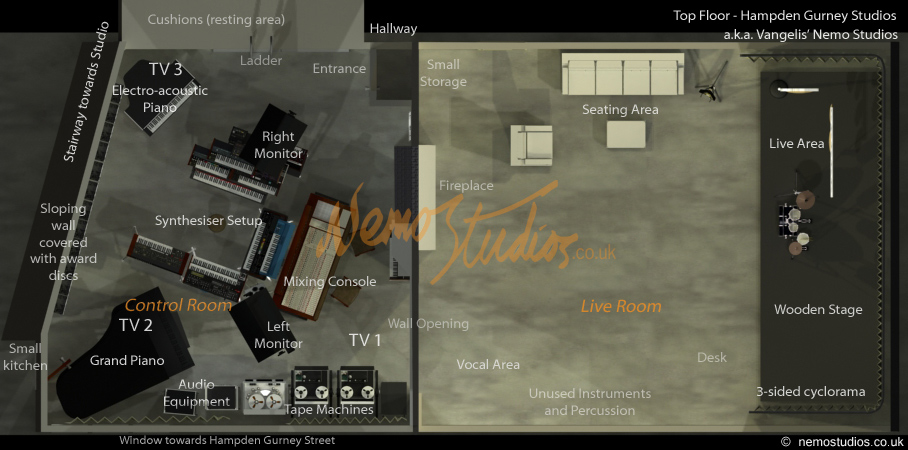
As for the Vangelis Soundtrack, there were many deliberate coincidences. The first was the use of purely analogue tape for the recordings of both the instruments themselves and the synthesizer tracks. “The control room was equipped with two types of tape machines, each dedicated to a certain function in the recording process. The first was a multitrack tape machine capable of recording 24 parallel audio tracks into a 2-inch-wide magnetic tape. The multitrack tape allowed the individual instruments from a performance to be recorded into discrete audio tracks. This gave flexibility during mixing, as each audio element could be treated separately for panning, gain or other fine-tuning. Vangelis’ multitrack tape machine was the Lyrec TR-532, the same tape machine he used to record his solo albums and his film score to Chariots of Fire. The second type of tape machine in Vangelis’ control room was a ‘tape master’ machine that allowed the final mixed work to be produced onto a 2-track quarter-inch master tape.”
Vangelis’ studio used to record the Blade Runner Soundtrack had analogue tape machines to record the original master tapes, shown at the bottom of this illustration.
And a (thankful) lack of digital manipulation as evidenced by this quote, “While creating music in a multitrack tape studio environment offered immense opportunities for adjusting the recorded performance, it lacked many of the convenient tools that arrived with later technologies, such as mixing desk automation, SMPTE time-code for synchronisation and much of the digital facilities that swept the sound-recording and film production studios in the late 1980s and beyond.” While I view these factors, combined with Audio Fidelity’s (https://audiofidelity.net/about-us) careful transfer directly to DSD, to be the essential reason the quality and nature of this recording survived in the digital age (The “Dark Ages” of High End Audio). there was a great deal more that also went into the perfectionism of Vangelis. More on that can be found here (where excerpt quotes were taken): http://www.nemostudios.co.uk/bladerunner/
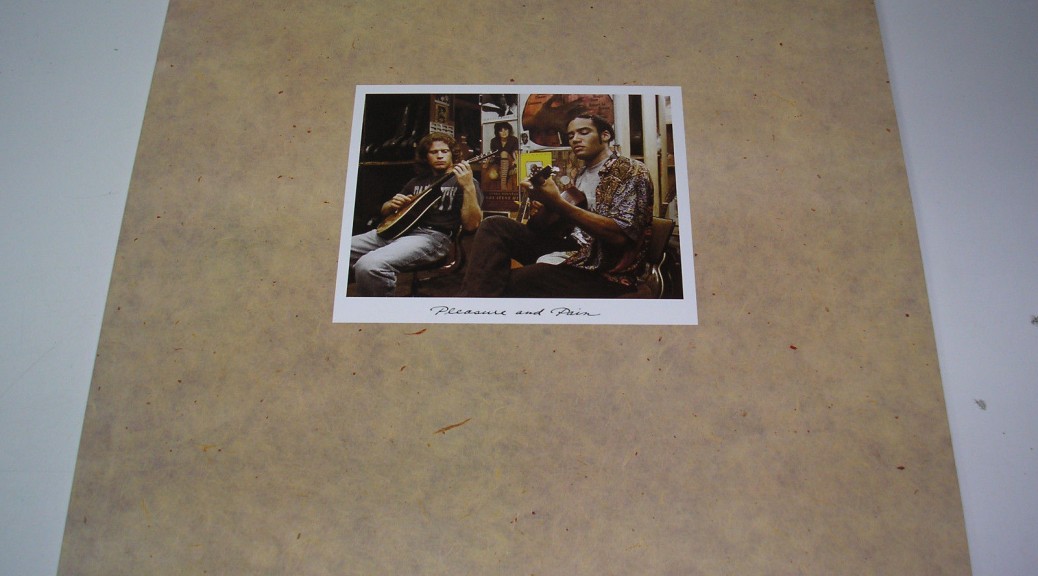
Most of my vinyl reference recordings have been “old friends” for decades, but every now and then I drop the needle and find a new one. Most notable recent additions are many of the vinyl releases from Nine Inch Nails (Digital distortion in a purely analog signal path.), David Gilmor’s relatively recent release “Rattle That Lock”, as well as a new discovery of Ben Harper’s “Pleasure and Pain” by Cardas (Pleasure And Pain Ben Harper & Tom Freund).
The point isn’t for me to share my “reference recordings”, though a short list may be a useful starting point if you share my music taste. The point is for you to find your own. That’s the fun part. As you upgrade your system you will start to notice that your music collection will take on new life and sometimes you’ll find a revelatory change that makes you want to listen to your favorite albums all over again. Very soon thereafter you will find you have discovered your own set of reference recordings. Enjoy the journey!
If you walk into a high end audio dealer’s showroom, notice if they start asking you questions about your music tastes and listening room. If given a chance to and they still just point you straight at their latest shiny new component and ask, “what’s your budget”, walk out. Or… know that you are going to have to work with a very limited knowledge based and/or a profit motivated sales person.
This may sound harsh, but all the shiny objects in their listening room mean nothing as compared to the knowledge of how to set up the gear matched to your room and music preferences (Why do speakers need to be matched to room acoustics?…). I went into a dealer of Martin Logan ESL’s in Calgary and they had a pair of their high end CLX’s (MSRP starts at $25k USD) just a few inches from the back wall in a large listening room, so I said, “let’s pull them out and give them a listen”. The sales person gave me a blank stare in return then said, “why would we do that?” By that time I had already noticed many unaddressed deficiencies in the entire set up, but was incredulous that they were honestly unaware that this fine set of planar speakers needed to be placed well into the room (at least two feet, probably more in this case) in order to image properly. I glanced at the source components available, saw only a Redbook quality CD player, then replied, “never mind”, and walked out. Granted, this particular dealer was more about Home Theatre installations. But, still…
So here’s “the goods” on a few simple (and free) things you can do at home to get the most out of your system (if you have bookshelf speakers you will need floor stands):
For most speakers, start out by setting up an equilateral triangle between your listening chair and your left and right speaker.
Listen a bit, then start to experiment. Look at your speaker manual and see what they recommend. Most speakers like to be at least a couple feet off the rear wall. Many planar speakers need more, some box speakers less. Move your listening position if needed (and possible) to accommodate how far your particular speakers like to be out. Also consider how far your listening position is from the wall behind it. If it’s around five feet or more it can probably be ignored, but less than that and you will have significant room reflections reaching your ears from that wall. If you’re in a rectangular room, be aware of the obvious room resonant frequencies based upon wave lengths that equal the dimensions of the room and therefore correspond to and reinforce specific bass frequencies.
From there, start to experiment with how far the speakers like to be apart from each other. You may be limited by side walls and/or furniture on the sides. As a general rule, most speakers perform best when at least two feet from any side walls. If this isn’t possible for your room, do your best then work on it some more in step six below.
Play around with the toe-in. This drastically effects high frequencies and the stereo image. Most speakers like to be pointed directly at you, but some like to be pointed straight ahead. I was amazed at the difference it made for my Kef 104/2’s (The venerable Kef 104/2) when I discovered they were of the latter variety.
Next experiment with the height of your ears in the listening position. You can do this by sitting up or slouching down. This is one of the easiest ones to dial in because you don’t need to get out of your chair and move things around to do it.
OK… so now that you’ve got your speaker placement as best as possible “as is”, it’s time to work with the room. Consider the following diagram:
Reflection, absorption, and diffusion in various materials.
Your room is likely to be a combination of all three. The first place to turn is any windows and/or mirrors in the room. These are high acoustically reflective materials which will have a dramatic effect on sound quality. If you have a huge glass window on the rear or side wall(s) for example, you will need to decide whether it is enhancing or detracting from sound quality (it’s almost never neutral, especially with planar speakers and a reflective surface on the rear wall). If you have blinds, listen to one of your references (What is a “reference”?) with them both open and closed, If you have no blinds or metal blinds, maybe temporarily hang a blanket and do the same thing. If your system sounds better with the blanket there, you may be able to effect a more permanent solution with fabric blinds that accomplish much the same thing. I’ve seen many, many home theatre installations with a huge flat screen located directly between the two front speakers. Makes sense for HT?… sure. But if you’re also listening to two channel audio on your system you will want to consider the effect this is having on your stereo imaging. It’s almost certainly scattering and destroying it. Solutions include in-wall screen installations with roller blinds or slides that offer a more suitable material for your music listening sessions. It’s difficult (to say the least) to incorporate HT and 2 ch audio into a singular system, but that’s another topic (The most obvious difference between 2 channel audio and 5.1 home theatre.). After working with all obviously highly reflective surfaces, turn to some of the more subtle room acoustics. If you’ve got resonant bass frequencies, try to find ways to break up the wavelength. This can be accomplished by moving furniture or even large plants around. If you have disparate materials on your side walls you may want to find a way to address that with a bookcase to absorb side reflections or glass framed artwork or a mirror to enhance them. Play around and have fun while thinking of all the money you are saving by working with what you’ve already got sitting around the house. However, it’s important to keep in mind the importance of sound proofing for moveable walls in order to minimize noise and disruptions between rooms. There is certainly a more acoustically engineered approach (using sound spectral analysis and expensive acoustic treatment panels), but it ultimately boils down to what sounds best to you anyway. Unless you have a completely dedicated sound room you’re likely working with household furnishings that dramatically effect your sound quality anyway, so why not use them to your advantage? If you’re finding very significant improvements to your sound quality based on this step, you may want to play around with steps one through five again. This isn’t necessarily a linear process. You may even find that after many hours in the listening chair you want to play around with all the above steps again. I’m usually not completely satisfied until I’ve listened to references from all genres of my music collection. That’s why it’s best to wait a while for steps seven and eight. As a side note you may also want to wait to buy high end speaker cables (Speaker Cables) until you’ve got your speaker position nailed down.
Now that you’ve got the optimal speaker positioning based upon all the variables, mark it somehow – perhaps blue tape under the speaker outline on a hardwood floor. I line up mine with the grooves in the hardwood. If you have carpet, get creative.
Finally you will need to figure out the best way to couple the speakers to the floor. For floor-standing models it’s simple, spikes for carpeted floors and rubber feet or spikes on small circular plates (about the size of a penny) for hardwood. This is saved for last since moving heavy spiked speakers around on hardwood floors and protecting them at the same time is a real pain in the ass. And… this only serves to tighten the bass frequencies and therefore has little to no effect on steps one through six above. If you have bookshelf speakers on stands, they won’t have much bass to start with, and even less if they aren’t coupled to the floor somehow. For my LS3/5As (What is it about the Roger’s LS3/5A?…), I found speaker stands with spiked feet that I could fill with sand for mass loading (Acoustic isolation for turntables – to couple or decouple?…). Not as good as a well coupled floor standing speaker, but the LS3/5A was originally designed as a studio monitor. It was only later discovered and adopted by audiophiles as a go-to speaker for high quality sit-down-and-listen music reproduction.
I find that it definitely takes a while to dial in the sweet spot of all the above, but it’s so, so worth it. On Maui I need to move one of my speakers into place each time I sit down to listen to music. Small price to pay (even though it weights 70 pounds). In Canada I’ve been able to locate the Maggies in their “sweet spot” and leave them there without detracting from my living room view and esthetics, at least in my opinion.
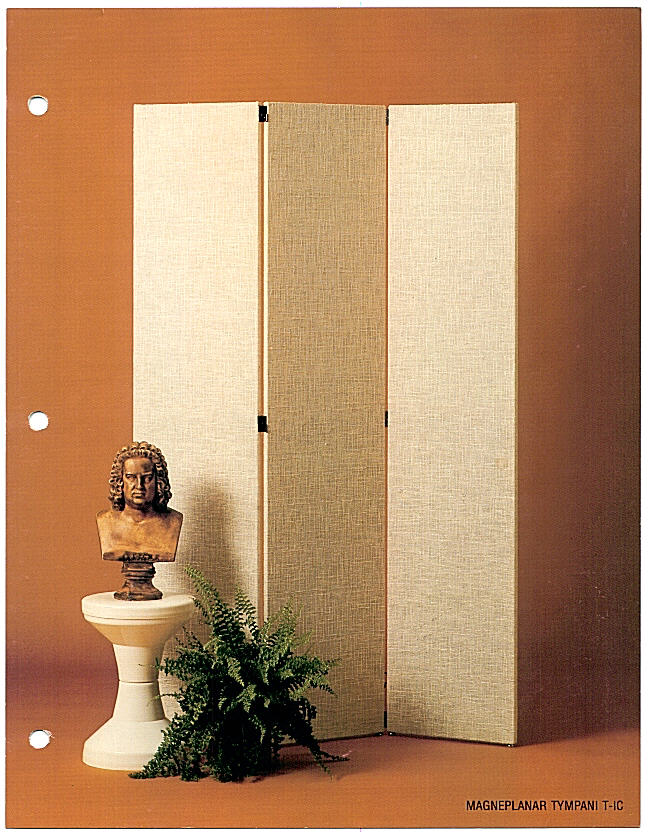
So Magnepans (fondly know as “Maggies”) have been around for 47 years, and I was lucky enough to own a pair of their top of the line (TOTL) Tympani 1Ds 37 years ago now.
The original Mangepan Tympani 1D. A revolutionary loudspeaker to say the least.
I owned those Tympani 1Ds through a transition period in my life that saw them in many, many locales and many different listening rooms. From my cramped teenage bedroom in Portland, Oregon to my even more cramped (and shared, I had an understanding roommate) dorm room at a Vermont ski racing academy to various other dorm rooms and apartment living rooms in Florida during university. The Tympani 1Ds are a prodigious loudspeaker and, even with their three panels neatly folded up, they are over six feet high and weigh over 80 pounds each. So I guess that speaks volumes for how much I loved them – since they travelled with me from Oregon to Vermont to Florida and I’d eat ramen noodles as my main meal of the day before I’d even considered selling them to pay rent.
They are often referred to as “the best Maggies ever made” and I wouldn’t be one to dispute that. My Tympani 1Ds were my “keeper” speakers after years of trading audio gear to pay for university and I finally had to let them go back in 1984 for those last tuition payments. They remain the best sounding speakers I’ve ever owned. But the Martin Logan Sequel IIs I purchased shortly after graduating never had a fair chance since by that time I had sold my vinyl and had converted to CDs and my days as an audiophile looked doomed. But that’s another story (The “Dark Ages” of High End Audio).
So why am I going on about my beloved Maggies when the topic of this post is matching loudspeakers to room acoustics? Well… Maggies send this point home like no other loudspeaker. They are one inch thick panels and, as such, the room is their speaker enclosure (Planars… The room is the enclosure). They require the same amount of care in size and placement in the room as the drivers of typical box speakers do in their cabinets. In spite of this, their three hinged panels (one containing the tweeter, another the midrange, and the third the bass) allowed you to play around with the angles and room reflections and thereby custom configure them to any room like no other loudspeaker I’ve ever owned. I could always make them “work” for the room they were in, albeit they worked better in some rooms than in others.
Magnepan’s newer loudspeakers lack this flexibility and the room can be a total deal-breaker for your chosen model (In a nutshell, the big Maggies (3.7Rs) are a fantastic speaker, but are very dependent upon room acoustics). The first and foremost component in any high end audio system is the room. This can be a good thing as long as you recognize it early on and work with it. If your choice in room is already set, it will determine most of your other components (How do I choose a turntable?). You start with your room acoustics and music tastes then go from there. The rest becomes pretty easy. It’s absolutely critical that you match your speakers to your room. Let me say this again… you must match your speakers to your room, otherwise you are wasting money and chasing your tail.
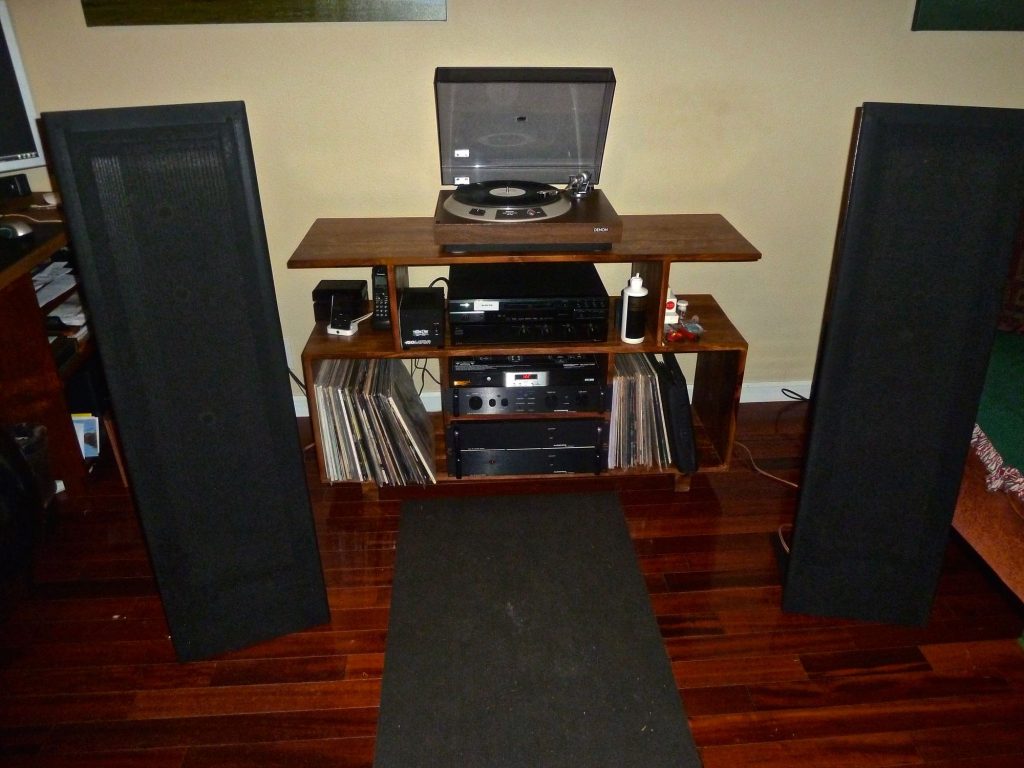
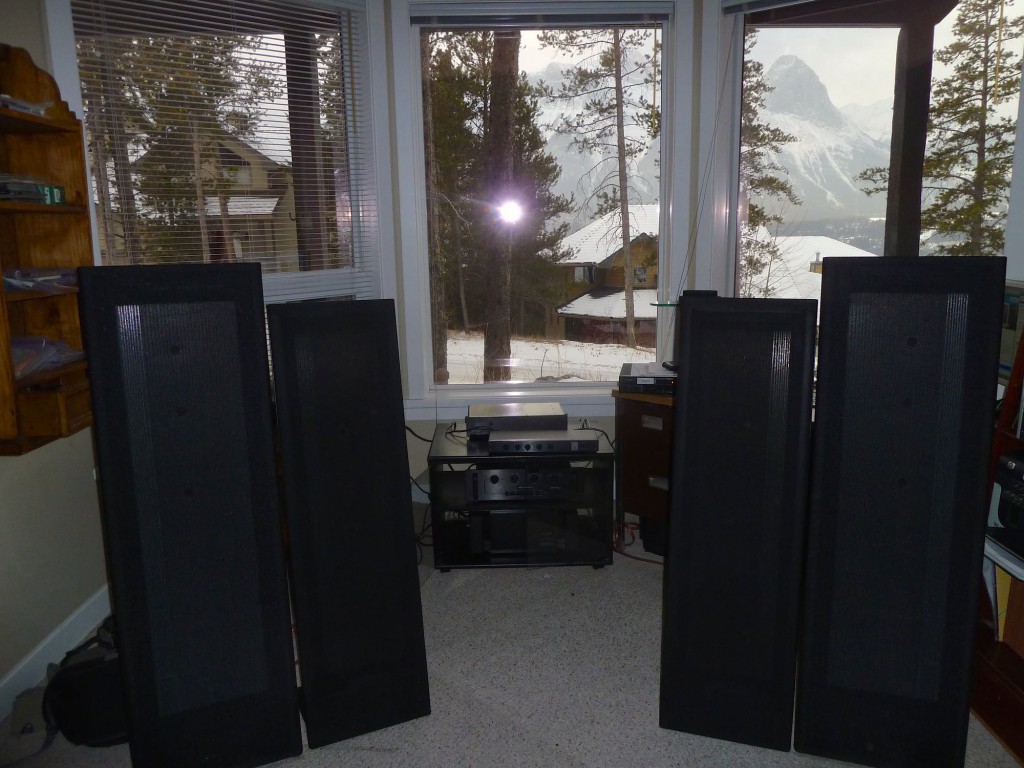
On Maui, my room was far more constricted than in Canada and was by far my biggest limitation. I’ve shipped Maggies to Maui to try them and even their smallest model doesn’t work.
I tried to get Maggies to work in my Maui room to no avail
So instead I found a pair of “box speakers” that match it’s acoustics nicely (The venerable Kef 104/2). Soon afterwards I discovered I could improve the bass quite dramatically by moving the 104/2s just a few inches further out from the wall. My room on Maui is gonna resonate at around 75 Hz no matter what I do, since the “long” dimension is 15 feet. But there are still ways to work with that, especially with an acoustic suspension vs. bass reflex design. Interestingly, the 104/2s are neither. The are about the most clever design to get exemplary bass out of a relatively small cabinet I’ve ever seen.
The Key 104/2s are the most speaker my room acoustics on Maui can handle.
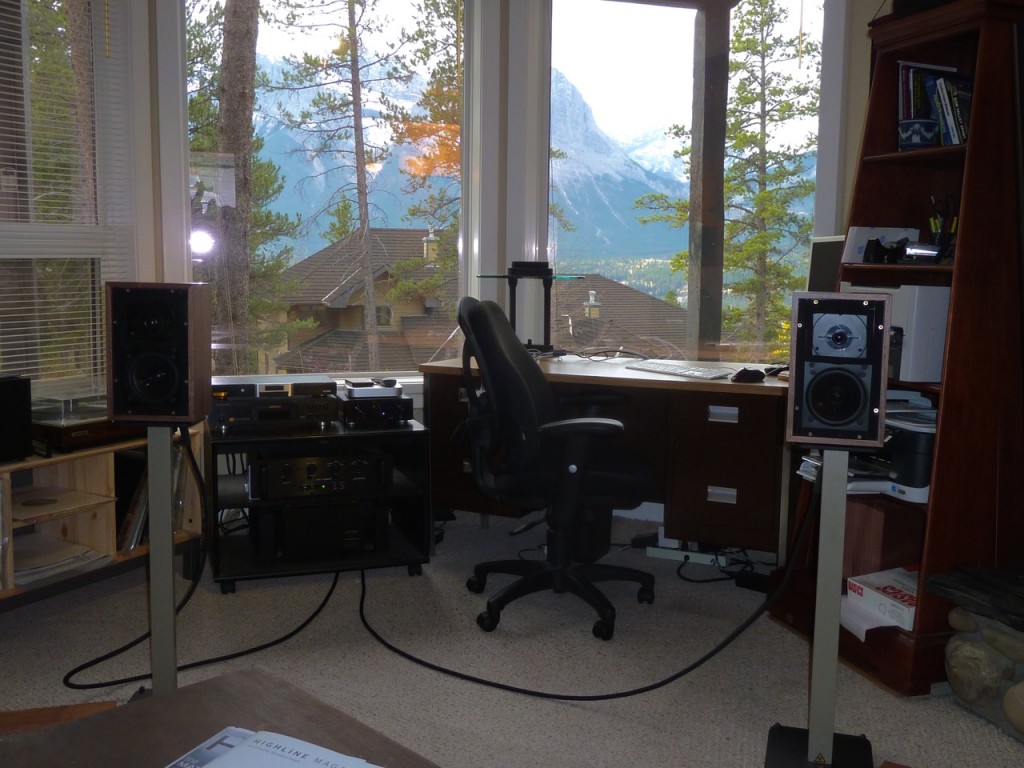
Maggies on the other hand often love acoustically reflective surfaces behind them for imaging (careful with this though), so I have the perfect scenario for them in Canada – sitting out in front of a bay window where I can open or close the blinds to enhance or diminish this effect.
Comparing Magnepan MG-12s and MMGs in my listening room in Canmore.
Far too many listeners fall victim to loving a speaker when they listen to it in the high end dealer’s listening room, then are disappointed when they listen to the same speaker at home. Sure, after a while a seasoned audiophile will get to know their room enough to know if a speaker they listen to at the dealer is likely to work at home, but even then it’s “shooting in the dark” until you are actually sitting in front of them in your listening chair at home. To that end, most high end dealers will let you take a pair of speakers and demo them at home before you buy them. Most will also help to set them up for the in-home demo, but I still recommend experimenting with various positions yourself. Even fractions of inches in placement and/or orientation can make huge differences in stereo imaging and sound quality, especially for high end speakers and even more so for high end planar speakers such as Maggies.
It’s funny, but recognizing the importance of room acoustics usually saves you money on your audio system. Why?… Because you don’t waste money on speakers that are too big or otherwise mis-matched to your room – speakers that often cost more but sound worse than those that are properly matched to your room acoustics (How to upgrade your existing system without spending a nickel.). I’ve gone so far as to email floor plans, room renderings, and room surface descriptions to speaker manufacturers for recommendations. Be picky in your first and foremost high end audio purchase, the right speakers for your room and the types of music you enjoy listening to in it.
But interconnects and speaker wires are in a different league entirely as far as profit margins go, and they generally rely on (often false) marketing claims in expensive ads to sell their wares. Sort of like the car dealer who pushes the high profit margin undercoat when closing the deal, your local high end audio shop will almost certainly pitch some over priced interconnects and/or speaker wires when you go to check out for the purchase of your latest (carefully auditioned) turntable, power amplifier or other significant upgrade to your system.
I call it the “popcorn analogy” in light of the fact that movie theaters wouldn’t be in business if they were simply movie theaters and didn’t have the high profit sales from their concessions of overpriced popcorn, sodas, and candy. Some estimates say that these concessions comprise 85% of their profits: Movie Theaters Make 85% Profit at Concession Stands
While I’m certainly not “dissing” the necessity of quality speaker cables and interconnects, I am suggesting the buyer beware of marketing claims and sales tactics in support of some of their highly inflated profit margins. In fact, you could just as easily degrade your signal path in such fashion as upgrade it (Speaker Cables).
I suggest (as do most others who “tell it like it is”) that you leave your interconnects and cables as your last acquisition in your audio system – after you’ve selected the right speakers for your room acoustics and musical taste, the right recordings and source components to “deliver the goods”, and the right amplifiers for your chosen signal path. The goal for your interconnects and speaker cables is to be neutral. If you suddenly hear a big difference over your basic ones, this is probably not a good thing (even though the high end marketing would like you to perceive it as such) as they are likely adding colouration to your signal path. You are going for purity here, not ketchup on the finest quality steak already cooked to perfection.
Many listeners jump the gun too early on their cable/interconnect purchases since they are frustrated with their inferior sources (either the recordings or the front end playback components) and are looking for a “silver bullet” fix. Let’s face it, it’s far easier to replace cables then an entire music collection. But such half measures only avail further demise of the signal path and are at best shots in the dark attempting to address latent inferiorities and/or mismatches in acoustics (Why do speakers need to be matched to room acoustics?… and Why do power amps need to be matched to speakers?…and The Classically Mis-matched High End Audio System).
The answer is both. The advent of Blu-ray has finally introduced uncompressed audio on home movies. That said Home Theatre (HT) lovers are not sitting down and listening to movies. They are sitting down and watching them and the audio quality is mostly for dialogue and special effects. While the sound effects have certainly improved, Blu-ray as a dedicated musical audio medium was a complete fail (though I have several albums that were released as such on my music server).
I think that there are some home theatre people out there that are beginning to explore the audio quality their elaborate systems are capable of, which can be an easy step since most universal players support SACD. Granted, most won’t know better and use an HDMI interconnect (Just say “no” to HDMI) which is a big “face palm” for audiophiles, but this is still a giant step in a direction that brings audio quality back to the main stream.
Then there is the chicken and egg analogy. The only reason people buy dedicated SACD players (which are expensive since they use an entirely different data sampling method and two lasers) are for their sound quality and to listen to music only. These players don’t even play movies. As such the SACD format stands on sound quality alone, so SACD is certainly not relying on the HT market for it’s existence. Rather, it is relying upon people who like to listen to music and are willing to pay extra for better quality. The SACD market is not built on HT, it is built in spite of it. It is built because people are going back to listening to music and not just sound effects. For what it’s worth, there are no movies that offer SACD quality sound. Doesn’t exist. Doesn’t matter.
Back in the early 1990s I gave up and finally sold my Martin Logan Sequel IIs and Adcom 555’s to drive them since it just didn’t make sense to own that system for playing regular quality CDs. What’s interesting is that I didn’t become interested in digital audio again until nearly 15 years later when I installed a descent Home Theatre and started to experiment by listening to SACDs and DVD-Audio discs on it. I immediately knew these sounded far better than CDs and figured it was time to investigate further (The pecking order of high end audio source formats). So ironically it was the HT system to led me back down the path to sitting down and listening to music again. And… I also fell in love with some of the stunning 5.1 channel mixes (Quadrophonic Sound… Realized.), but that’s a different story.
All dedicated SACD players out there are for the audio market only and most are only 2 ch at that. The exception is a “Universal” player such as many Denon’s, Oppo’s and others. But SACD audiophiles would more likely stick to the 2 ch versions w/o the video circuitry, which can do bad things to audio signal paths. The benefit of the crossover for those who have 5.1 already in place for their HT is that they can play the 5.1 surround mixes that some of the SACDs offer.
Then there’s the MTV generation that got everyone listening to music from their TVs for years. Certainly that did not help audiophiles in any meaningful way I can think of. But… there is still the occasional HT guy that happens to have an Universal player (and probably didn’t even know it plays SACDs when he bought it) and buys an SACD and sits down in front of his HT system (with the video off) and, lo and behold, actually just listens to music again. This convert might be so appreciative of the sound quality their system is capable of that they are… like, I think I’ll get some more of these SACDs and just sit down and listen to music more often. And that’s great! The more the better in fact, it will keep the format alive.
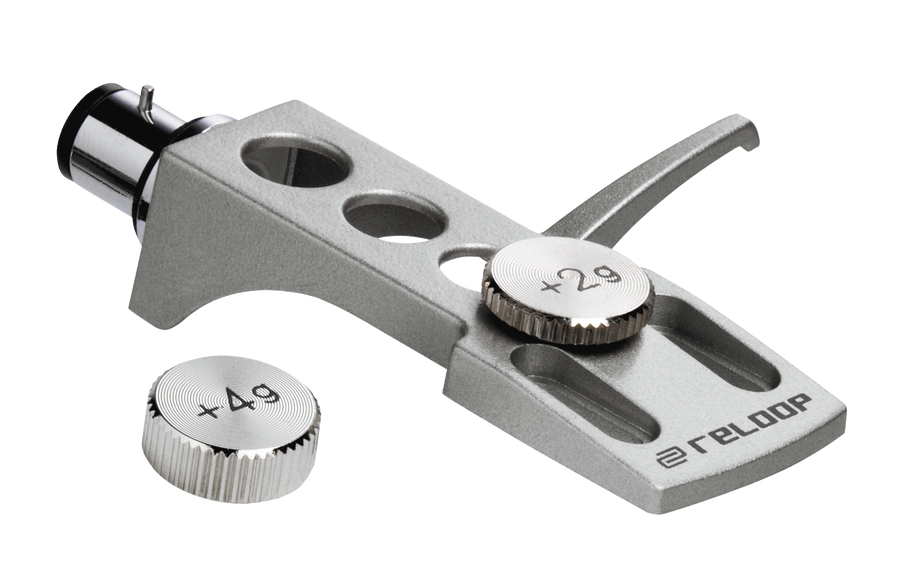
I know this may sound incredibly crude, but we actually used to put a penny (weighs about 3 grams) on the head shell of a turntable to add effective mass to the tonearm when needed to match the phono cartridge compliance (How do I choose a turntable?). Of course, this was suboptimal and more of an interim solution until the proper tonearm for the phono cartridge of choice was found, but it worked amazingly well. So well that some manufacturers offered weight kits for their head shells for this purpose (see photo above).
The trackability of a cartridge is related to the mechanical parameters of the tonearm and stylus assembly. Adding weight to the headshell, and adjusting the counterweight to compensate, increases the effective mass of the tonearm and reduces its resonant frequency. If the resonant frequency is excessively high (e.g., 15-20 Hz, as measured by a test record), the increased mass may improve sound quality by moving the resonance out of the audible range.
So there are lots of vintage turntables to be found on eBay and other reseller sites. They were, after all, the primary way to listen to music until the advent of the compact disc and subsequently MP-3s. Trouble is, precious few will come complete with their original packing materials and without them, great care must be taken for these often delicate relics to ship safely. It’s really not that complicated, but vintage turntables can be intimidating to many, especially the pricey ones. So lets look at some simple steps necessary to ship them safely.
First, many turntables have transport screws. These are much the same as those found in washing machines that secure the tub for transport. They typically secure the power transformer in a similar way, since during operation it is usually hung off some sort of suspension for acoustic isolation purposes. If you don’t have the original transport screws, find some at your local hardware store.
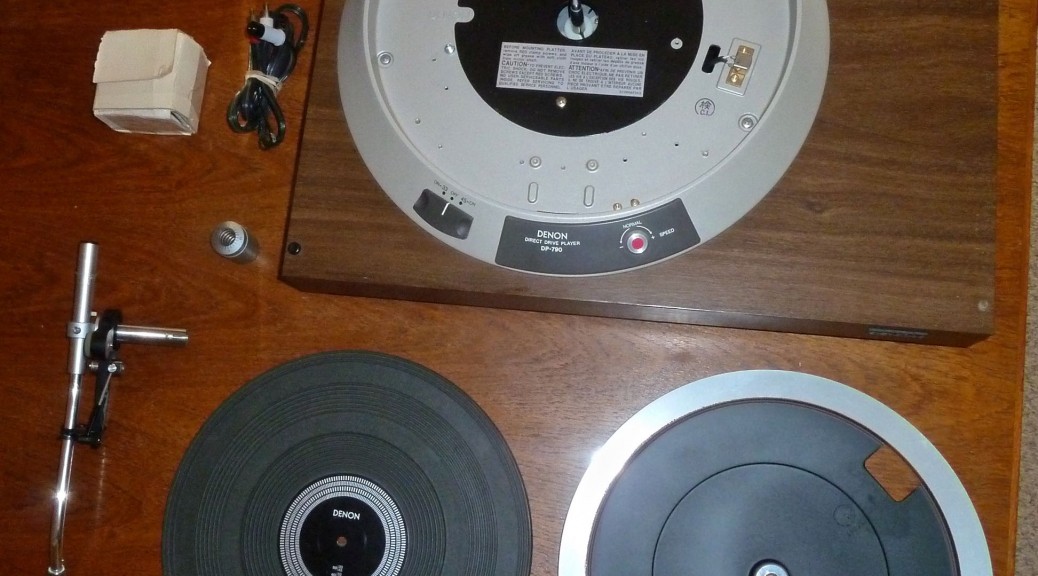
Second, both the platter and the dust cover must be removed and packed up separately. The platter can often be heavy and it should be carefully packed in the bottom of the box in bubble wrap or something similar. The dust cover hinges will almost certainly break or the dust cover will crack where the hinges attach if you ship it attached to the turntable, so remove it and pack it separately. It usually slides off the hinges and can be wrapped individually and packed on top since it’s light and fragile. Be careful, it scratches easily!
Third, place a stylus protector on the phono cartridge and remove the head shell from the tonearm if possible. If the tonearm doesn’t have a removable head shell (many don’t), then remove the phono cartridge from the tonearm and carefully package it separately, in it’s original packaging if you still have it.
Fourth, remove the tonearm from the turntable if possible. Manual turntables usually have an “arm board” that allow you to use different tone arms, often purchased separately. High end manual turntables often allow easy removal of their tonearms, even if they are originally sold complete with the turntable (see the Denon in the photos), then remove the counterweight and pack these parts separately as well. This is the best way to protect these delicate parts, but it won’t be possible with automatic turntables. But… automatic turntables are contrary to high end audio reproduction anyway so are best avoided. But… if you have one and need to pack it you probably won’t be able to remove it’s tonearm.
Fifth, pack your plinth, being careful with any isolation feet or springs it may have. If you have a “sprung” turntable (Acoustic isolation for turntables – to couple or decouple?…) you most certainly will need those transport screws to hold everything in place or your turntable will likely arrive with tweaked springs at best and in pieces at worst.
Finally, take all these parts that are packed individually and double box them. This will result in a very large box for the size of your turntable, but it’s the only way to ship it safely. If you have the original packaging, you will notice the manufacturers found clever ways to keep the packaging small, like insets in the styrofoam for the platter and/or tonearm, but you won’t have this luxury.
I’ve successfully shipped two turntables this way, both Denon direct drive models that came complete with Denon tonearms. One was transported as checked luggage on the airline and the other I coached the seller how to pack and successfully shipped across Canada via Canada Post.
So, after having the Acoustic Resarch SP-9 (I may be a purist, but…) in my system for about a week, then the Threshold FET Nine (Threshold FET 9 Preamplifier) for about a week, I finally did an A/B comparison into my Maggie MG-12s – which are frigging PERFECT for my room (w/o tweeter attenuation) driven by the Nak PA-7. The front end was reference quality vinyl and both preamps got proper warm-up times.. The Acoustic Resarch SP-9 beat the FET Nine hands down (for my speaker/room combo anyway). Subtle, but very significant differences. Still need to do the A/B of the line stages with an SACD source, but the phono stage of that Acoustic Research is pure magic.
I know this sounds complicated, but your turntable decision is ideally based on your choice of phono cartridge, which in turn is based on your speaker selection, which is completely based on your room acoustics. At least this is the case when you start going for audiophile quality sound. That’s why when I’m asked, “What’s the best turntable for my budget?” my answer is always, “That depends”. It’s impossible to take any portion of a high-end audio system out of context and make recommendations. Optimizing for many variables then matching components is the path to audio nirvana. The most fixed variable is typically the room. So that, along with musical taste, are usually the starting points.
My room on Maui is a perfect example, where I have a very tight space combined with limited options for speaker/listener placement. Therefore, room acoustics are my biggest limiting factor. I’ve tried and simply can’t get planer loudspeakers like Maggie’s to work. And I never will short of renovating to add more room and therefore more options, which I plan to do.
On the other hand, my Kef 104/2s (The Venerable Kef 104/2) are awesome for my room on Maui. This is especially true once I figured out to pull them a few inches further into the room to avoid the reinforcement of the frequency associated with the depth of the room and not to toe them in… at all. But my Kef 104/2s likely wouldn’t sound as good in my room in Canada, which has very different dimensions and surfaces.
My listening room in Canada is not only larger, but is also far more flexible in regard to speaker/listener positions. After a great deal of positioning and experimentation, my Magnepan (Maggie) MG-12s perform all the magic they are supposed to, though they are the largest Maggies I can fit without room acoustics having a detrimental effect (In a nutshell, the big Maggies (3.7Rs) are a fantastic speaker, but are very dependent upon room acoustics). So I know by now you’re probably thinking, “But I asked about turntables, why go on about speakers?” I’m getting there.
So the reason you need to discover what speakers work best with your room acoustics and music tastes before you can choose a turntable is due to phono cartridge selection. The loudspeakers and the phono cartridge are the two main transducers in an analog signal path (It’s all about reducing mass for the transducers) and as such, they need to be matched to each other as much as possible.
Moving coil phono cartridges, for example, have some inherent characteristics that will show themselves on nearly all loudspeakers, but they really shine when mated with similarly low-mass speaker designs such as planars. Conversely, cone and/or box speakers might like a moving magnet phono cartridge better. Or… a better way of thinking of it is the incredibly fast transient response offered by a high-end moving coil phono cartridge may be lost on a high-mass speaker design that simply can’t keep up, so why add the extra expense (especially when you factor in the cost of a pre-preamplifier or step up transformers).
So by now you probably figure I’ve moved on from describing loudspeakers to describing phono cartridges, but still not answering the question about turntables. Here’s why. Some phono cartridges are very picky about what kind of tonearm you run them in. The Denon 103R is perhaps the most demanding phono cartridge in that regard and absolutely requires a very low compliance tonearm in order to perform properly. So what’s tonearm compliance, you may ask?
Think of it like the chassis of a car. If you have a very stiff suspension (and the cantilever of the Denon 103 is very stiff indeed) and a very light chassis the springs are going to push the chassis around when the wheels hit bumps and the car will get thrown all over the place. That’s exactly what happens when you put a Denon 103R (or any other phono cartridge that requires a low compliance tonearm) into a low mass (i.e. high compliance) tonearm… it throws it around, big time. So much so you may be lucky if the needle even tracks the groove at all. Even if it does it will sound terrible. Conversely a low compliance tonearm will push a high compliance phono cartridge stylus around, having the same negative effect.
So I’m finally getting to turntable selection. You want to determine what phono cartridge you are running before selecting a tonearm (and turntables typically come with tonearms) or risk a major compliance mis-match. Of course, you could first select your tonearm from the high-end ones that are sold separately then choose your turntable based on your tonearm selection, which many audiophiles do. But if you’re already that far down the rabbit hole I’m likely preaching to the choir.
Now that you know whether you are looking for a turntable with a high compliance or low compliance tonearm, how do you shop for what you’re after. Unfortunately, even amongst the high end offerings, very few present day turntable manufactures specify it. But here’s where common sense can prevail. If it looks massive and therefore designed for low compliance phono cartridges, it probably is. Conversely if it looks low mass and obviously designed for high compliance phono cartridges, it probably is. And… if it looks light only because it is cheaply made with no consideration for phono cartridge compliance what-so-ever, it probably is.
Unfortunately. modern turntables with retail price tags under $1k mostly fall into this last category. Don’t get me wrong, the vinyl revival is a beautiful, exciting movement. But I’ve come to realize that it’s genesis is not due to a demand for quality, but rather due to far more insidious motivations on the part of the music industry (The new (old) gear coming out). To that end, there will be a barrage of turntable offerings that have little to do with sound quality and far more to do with selling records again.
So what is one to do?… Well, modern day, audiophile quality turntables start at around $5k and for that amount you can find several viable options. Even in that arena many turntables are missing the essential tonearm compliance mark. They build quality turntables that get bigger as they get more expensive. To that end, one may pay far more for a bigger turntable that has a 12 inch tonearm vs. a 9 inch tonearm, only to have spent more for inferior performance with their selected phono cartridge. I honestly don’t know how this can be lost on the modern day audiophile world, but it often is.
Or one can go vintage, back to a time when phono cartridge compliance was accounted for, resulting in several offerings, a good example is the Infinity Black Widow tonearm for high compliance.
The Infinity Black Widow. A good example of a low mass, high compliance tonearm.
Or if looking for a low compliance tonearm one could shop for the likes of a Fidelity Research FR-66S.
The Fidelity Research FR-66S. A good example of a high mass, low compliance tonearm.
That said, it’s pretty easy to eye up the offerings of vintage turntables and judge by the design and size of the tonearm which camp it’s in. Most turntable manufacturers of that era (The “golden age” (of vinyl)) went one direction or another and it’s immediately apparent.
Oh yeah… then there’s the question of direct drive or belt drive turntables. That’s another can of worms, covered in this post:
I remember like it was yesterday the first time I heard a pair of Rogers LS3/5As, property set up on stands well away from all walls of a well dimensioned listening room. Get in the sweet spot, close your eyes, and you simply won’t believe your ears. Their imaging was so good that you will swear the speakers are far bigger than they are since the soundstage is so expansive. It’s like a magic trick. To this day if they were set up with a curtain hiding them, you could lift that curtain revealing these very small studio monitors to stares of disbelief and dropped jaws. I guarantee it.
I first built a pair of the acoustic suspension design Rogers LS3/5A’s using Kef T-27 and Kef B-110 drivers back in 1978, which is 37 years ago as I write this. I built those speakers for around $150, buying the drivers wholesale, rummaging around for top quality crossover components, and building the cabinets from scratch in a primitive home work-shop. I paid very close attention to the quality of the crossover components, selecting mylar capacitors in matched pairs for tolerances and even had the inductors (coils) hand-wound.
Only the very finest components are selected for the crossovers
The crossovers were assembled onto a “project” peg board since printed circuit boards for the LS3/5As weren’t available separately until much later. It was an attempt at the time to upgrade and tweak the original design but I dropped the ball on building the cabinets strictly to the BBC’s specifications, an aspect of design that I underestimated at the time. As such the final product ultimately fell short of the original LS3/5As made by Roger’s.
Back in 1978 the LS3/5As retailed for $400 a pair, which was top dollar for a small bookshelf speaker. They are now collectable and I’ve seen them used on eBay from $4k to $6k, depending on their condition, serial numbers, and authenticity. They were widely licensed with several variants subsequently released, the most prominent of which was from Falcon Acoustics.
So pretty early along my path back to high end audio I stumbled upon a pair of Kef T27 tweeters, scavenged from Kef speakers that were nearly 40 years old (An Edmonton audio-venture (names changed to protect the guilty)), grabbed them, and thereby committed to building a pair of LS3/5As again.
I brought those Kef T27s to Maui, thinking I’d build the LS3/5As there with some Kef B110 drivers I planned to scavenge from a salvage pair of Kef 104/2s that had been given to me. When I went to remove those B110s from the cabinet it became immediately obvious there was something very wrong. In fact, the B110’s Kef used in their 104/2s was integrated into the cabinet, rather than bolted onto the baffle. I soon realized that it was impossible to remove the B110s from their integrated and filled cabinet without destroying them, so back to Canada my cherished T27s went.
Nearly a year passed, I found a good deal on a perfect pair of stands for my future LS3/5As, but still all I had were tweeters and stands. Finally I got motivated, purchased a Falcon Acoustics (from England) kit for everything but the T27s, ordered a soldering iron and rosin core solder, and got started. I was further delayed by incorrect parts arriving, reordering… the usual DIY kind of stuff.
Then one day I was staring at everything I needed laid out on my kitchen table and thought, “today is the day, I’m gonna be listening to these tonight.”
All the parts (except the T27 tweeters) to build a pair of Rogers LS3/5As
There were a few puzzles along the way, per usual, but perseverance prevailed. I checked and double checked everything. The first time I built a pair of these I fried my T27s by not properly stripping the insulation off the inductor wire prior to soldering. I finished one and hooked it up and much to my delight everything seemed (and sounded) in order. So I finished the other one and put them both on the stands I had already purchased and filled with sand for mass loading (sand is plentiful when you live on a golf course… sand traps ;-). Then I tweaked positioning for my sweet spot and played some background music for a few hours to loosen them up.
The Rogers LS3/5As set up properly – on stands with plenty or room all around the to breathe.
Then, finally… 37 years after I built my first pair, I got to listen to the famous LS3/5A again. I was afraid nostalgia might have gotten the better of me and my fond memories would be squashed by the “absence makes the heart grow fonder” syndrome. Not so… So not so.
Everything I remembered fondly about these babies came alive when I put on my reference recordings (What is a “reference recording”?). First and foremost, figging unbelievable sound staging, that’s their strongest suit. But soon thereafter I started to hear the subtleties in the high frequencies and the amazingly solid mid bass. These are never gonna defy the laws of physics and produce low bass, but what’s there is so good that it doesn’t feel like you’re missing much. And… did I mention the sound staging?.. They definitely seem to defy the laws of physics in that department.
So my Kef 104/2 reference speakers (The venerable Kef 104/2) share the same B110’s (two per speaker in fact) but in those speakers their duty is regulated to mid frequencies and they perform flawlessly. But the 104/2s have a seemingly inferior T33 (Trust your ears… (not the forums) handling the high frequencies. I have to wonder why Kef would have sold their best T27 tweaters to Rogers for the LS3/5As then subsequently handicapped their own reference speakers with the T33s (the one’s in my 104/2s are now replaced with Vifa’s designed to the same specs)?
Are the T27s really that much better or did the Rogers engineers hit it out of the park with their crossover design?
The crossovers for the LS3/5As are a big part of what makes them so magic.
Or did the BBC engineers somehow play a role in the magic of the LS3/5As?… Or, as is so often the case, it’s not any one of these things but the synchronicity of all of them that culminated in the sublime?
I don’t think these questions have ever been answered, though they have certainly been voiced by audiophiles world wide. That’s how good the LS3/5As are. For my part I not only don’t know but, and this is one of the only times you will hear these three words from this curious audiophile, “I don’t care”. What counts is that I now have a pair sitting on stands in my living room that will share time in Canada with my Maggies, depending on what flavor of greatness I’m in the mood for.
So Stax has been making headphones, or earspeakers as they prefer to call them, since 1960. That’s right… 55 years and counting as I write this. They have been the de-facto standard ever since, and most still consider them to be the best you will find if you need to throw some “cans” on your head. Interestingly, their technology has changed very little since their inception, which is why I’ve also included them in the “vintage” category, even though I purchased a pair that were manufactured in 2014.
They are still manufactured exclusively in Japan and if you want a pair you need to purchase from a dealer who imports them or import them yourself. I purchased the 4170 system, which ships complete with a tube headphone amplifier and the SR-407 headphones. But with Stax, nothing is as it seems and the headphones are actually mini electrostatic speaker panels (hence the terminology of “ear speaker”) and the headphone amplifier is not just an amplifier but also provides the high voltage these electrostatic panels need in order to produce music.
These ear speakers offer what is arguably the finest transient response, imaging (more on that later) and detailed frequency response available in a pair of “headphones”. Interestingly but not surprising, they also lack emphasis in the bass department, just as similar planar loudspeakers also lack it.
I’ve never been a fan of listening to music on headphones and was hoping these “ear speakers” might change that. I’ve always maintained that any high-end audio system starts with the room, and room acoustics are the single-most important “component” therein (Planars… The room is the enclosure and In a nutshell, the big Maggies (3.7Rs) are a fantastic speaker, but are very dependent upon room acoustics). I’ve met many listeners who seem content to listen to audiophile quality music on headphones but, much to the chagrin of my neighbors, I’ve never been one of them.
Unfortunately these Stax didn’t change my mind. No matter how you slice it there is absolutely no “sound stage” with headphones. They simply can’t project a stereo image in front of the listener wearing them so all the “imaging” happens between your ears and it feels and sounds like that. Not to mention that they are never gonna vibrate your listening chair.
Filling a room with music is a double-edged sword, in that room acoustics can very dramatically enhance or detract from the listening experience. But when properly set up nothing beats it. I can only speculate that those who prefer headphones likely have nearly impossible rooms to work with (which almost none are if loudspeakers are selected for the room – Why do speakers need to be matched to room acoustics?…) or their systems aren’t set up to take advantage of the room acoustics.
Another detracting factor of listening to music on headphones is the far greater potential for hearing damage, especially with an electrostatic version such as the Stax. It’s far easier to exceed the threshold to try to get better quality out of them. I noticed my ears ringing after a short session of listening to them at what I considered moderate listening levels by loudspeaker standards and haven’t worn them since. Try as I may, since it would be far more convenient with headphones, I’d rather just wait for opportune times to sit down in front of my loudspeakers.
I just committed one of the greatest sins ever in the world of audio amplification. I replaced both the 3 amp fuses in the output phases of my 39 year old Audionics of Oregon CC-2 power amplifier with fuses rated for 4 amps. Either channel would blow a fuse randomly, not constantly on just one side as one would suspect of faulty circuitry. The saying “you gotta know the rules before you can break them” comes to mind, and I’ll let you know if I eat these words later on.
So why would I so such a thing, you may ask? Well, I know these amplifiers very well. When in high school, I worked summers at Audionics of Oregon assembling them, so not in an electrical engineering capacity by any stretch but I still got to know a great deal in this small manufacturing operation just by hanging out with the engineers at lunch and chatting with the service technicians on breaks. The venerable CC-2 is a fine, reliable power amplifier. It’s achilles heel has always been its relative intolerance for driving low impedance loads, it simply wasn’t designed with such design precepts in mind. It’s a high slew rate amp, and that makes in the perfect match for my Kef 104/2 box speakers (The venerable Kef 104/2). But, my Kef’s run at the moderately low nominal load impedance of 4 ohms, which is less than optimal for my CC-2 power amps.
But… I used to drive a pair of far lower impedance and far more demanding Magneplanar Tympani IDs (post) with CC-2s. I even bridged them into mono on occasion, which taxes the power amplifier’s low impedance capabilities even further. But I found far greater benefit from the luxury of owning two CC-2s was to drive my Maggies passively bi-amped (Why bi-amping isn’t always what you may think). Did I blow fuses?… Yep, plenty. The CC-2 is known for having a very conservative fuse rating. Why?… AofO had a terrible failure rate on their previous generation PZ-3 power amplifiers. So much so that they were losing money due to the warranty returns. So I think the conservative fuse rating of the CC-2 was a sort of “knee-jerk” reaction to their history with the PZ-3.
I honestly can’t remember if I put higher rated fuses in the output phases of my CC-2s back when I first owned them in the 70s, but I’d be very surprised if I didn’t. If a fuse blows immediately when you power up your amplifier, you have a serious problem. If, however, your are happily enjoying your music at your usual listening levels w/o clipping and your amplifier heats up and eventually blows a fuse, you aren’t looking at an immediately catastrophic fault, but a far more insidious one.
I know from experience that it’s normal for my CC-2s get crazy hot (almost like a Class A amp) and they love it that way. All day, every day. My theory is that the fuses amperage rating varies with heat and as the fuses heat up their amperage rating goes down and they eventually blow. That’s my story and I’m sticking to it 😉 And, I’ve got a spare CC-2 should I blow a transistor or two, which aren’t so easily replaced as fuses are. That’s why I bought a couple CC-2s – because parts would be neigh on impossible to find and I know I’ll never find a better (sound quality wise) modern day replacement to drive my Kef’s, at least without a price tag well into 5 digits.
I’ve blown my share of power amps in my day. And I recently blew two sup-par vintage amps driving my Kef’s before I picked up the CC-2s. Back in the 80s I owned a Harmon Kardon Citation series power amp (which was built like a tank) driving a pair of Dalquist DQ-10s and came out of the shower to discover the cross-over network was in flames. I confess, I do like to crank it and yes I was guilty of cranking the music in the living room to listen to while in the shower.
It was far too late for my beloved DQ-10s (I would own a pair of those again in a heartbeat if I had the room for them), and the Citation was also toast. I wasn’t really in the mood for any DIY tinkering at the time, so I called the insurance company and they covered the smoke damages to thehouse (new paint and carpet), packed up the amp and speakers, hauled them away, and told me to replace them with pretty much anything comparable I wanted. I later got a check in the mail refunding my deductible, which told me they had successfully subrogated and had been paid back from either Harmon Kardon or Dalquist due to a manufacturing defect causing the fire, which surprised me.
While I don’t crank music in the living room to listen to in the shower anymore, I do love to crank it when I’m in the listening chair, especially classic rock. I know when my amp is breaking a sweat and when it’s not. I’ve pushed my CC-2s to the point where they are too hot to even place my hand on them, but I know they are OK. When they blow fuses randomly at moderate listening levels I also know they aren’t at fault, the (under rated) the fuse is.
This album was produced and recorded by George Cardas in one take on March 15, 1992 in Upland, California using a Cardas Differential Microphone, a Cardas Hexlink Golden 5-C Cable, and a Studer A-80 Tape Recorder. It is indisputably one of the ultimate vinyl reference recordings of late, and I must confess that I’ve been remiss on my review since I added it to my vinyl collection.
Why?… Well, every time I throw this gorgeous slab of heavy weight vinyl on my turntable it mis-tracks. So, I suppose I’ve planted my head firmly in the sand since I’ve gone to such great lengths in setting up my turntable that it pains me to hear mis-tracking, no matter what recording. And this is the only record I’ve ever heard mis-track. Does this mean there’s something wrong with the recording? Umm… a tempting deduction but unfortunately not the case. Rather, there is so much right about this recording that even my finely tuned turntable/tonearm/cartridge combination can’t quite handle it. Keep in mind that the tonearm was chosen specifically for the demanding compliance requirements of the best phono cartridge I’ve ever heard, the Denon 103R moving coil (The formidable Denon 103 vs. 103R low output moving coil phono cartridges – is there really a difference?)…. And, I’ve gone to painstaking lengths to isolate the my chosen Denon direct turntable properly (Denon DP-790W turntable review). So the observed mis-tracking isn’t due to oversight.
Fact is, this recording has such extraordinary dynamic range that it will certainly find the Achilles heel in any fully analog system. It only mis-tracks on a couple songs, and even then only on very brief transients, and the rest of the time it’s one of the most amazing recordings you’ll ever hear. It has such presence that if you close your eyes you would swear Ben Harper is in the room with you, plucking his guitar and serenading with amazing harmonizing vocals.
So, to be honest, I had been avoiding this recording (and review) until I could solve the mis-trackng. After some tweaking of stylus force and anti-skating I’m finally listening to it tracking perfectly as I write this. Yes, this recording is so amazing that I need to recalibrate my tonearm and cartridge for it! But it’s so worth it, and my tonearm settings will go back to where they were for the rest of my vinyl collection as soon as I lift the needle.