Category Archives: Analog Pages

OTARI MX-5050 B2II REEL TO REEL

I’ve been into high end audio since the mid 1970s, just a teenager at the time.  I had numerous reel to reel tape decks through my home stereo business at the time, and always marveled at their ability to faithfully record any audio source, whether live or from vinyl records.

I’ve been into high end audio since the mid 1970s, just a teenager at the time.  I had numerous reel to reel tape decks through my home stereo business at the time, and always marveled at their ability to faithfully record any audio source, whether live or from vinyl records.

Nearly 50 years later, the time came to get “back in the game” and pick up a serious, prosumer deck and in my search I stumbled upon the folks at Reel To Reel Heaven (www.reeltoreelrestoration.com).  We chatted a great deal and became friends due to our shared passion long before I pulled the trigger and purchased one of their fully restored Otari MX-5050BII-2 machines.  Ryan and Ozzie have been absolutely fantastic in regard to customer service and their depth of knowledge is impressive.  Being able to chat with Ozzie directly about setup and calibration has proved invaluable.  The unit was meticulously packed for safe transport to Maui, Hawaii and arrived in perfect condition.  Their attention to detail was immediately evident and I can’t wait to get this deck into the studio with some local bands and start showing them why tape is (still) king.  

It’s a real crap shoot out there in the used reel to reel tape deck market, in regard to the condition of the machine you might be buying and how much work it may require, as well as proper packing and shipping methods to get it to you safely.  Working with Reel to Reel Heaven (www.reeltoreelrestoration.com) took the guess work and uncertainty out of my purchase and they back their machines 100% with amazing customer service.  I’m so happy I went with them to get a restored, reliable machine into my hands to start pursing my passion again, recording music!

It’s a real crap shoot out there in the used reel to reel tape deck market, in regard to the condition of the machine you might be buying and how much work it may require, as well as proper packing and shipping methods to get it to you safely.  Working with Reel to Reel Heaven took the guess work and uncertainty out of my purchase and they back their machines 100% with amazing customer service.  I’m so happy I went with them to get a restored, reliable machine into my hands to start pursing my passion again, recording music!

Record Cleaning

Who else remembers the original Discwasher setup?  A great brush with a wood handle that contained a small bottle of the record cleaning solution inside it.

The original Discwasher record cleaning system.

I can’t tell you how many vinyl aficionados  who, when speaking of their original record collection have proudly stated, “I took great care of my vinyl, I always cleaned it with the wood brush with the little red bottle inside”.  While this is better than no cleaning at all, it pales in comparison to using a proper record cleaning machine.  Why?  One word: vacuum.

Without a vacuum record cleaning machine all you’re really doing is pushing the dirt around in the grooves and hoping some of it sticks on the brush.  While the original Discwasher brush was particularly good at extracting and retaining what dirt and grime it was able to find in your grooves (beware of imitations that came later, the material of the brush itself pales by comparison to the original Discwasher), it still begs the question of it’s fans, “How often did you clean the brush itself?”  Unless the answer is “Every time” it’s a fail and what was mostly happening was the sharing of the dirt and grime with other records in your collection.  And properly cleaning the brush was no easy task, even with the brush supplied to clean the brush.  Which of course leads to the question, “How often did you clean the brush that cleans the brush?”  Point is, the dirt and grime never really gets removed without fastidiously cleaning brushes every time a record is cleaned.  And even then, the brush itself isn’t extracting the dirt and grime from the record grooves by vacuuming them, but rather by using the stiff bristles of the brush itself and friction and is therefore less efficient and harsher on the vinyl record itself.

I must confess that in my early days of high end audio I was guilty of using a Discwasher, much to the ultimate demise of much of my record collection.  I was a teenager and the thought of spending nearly as much for a record cleaning machine as for my turntable instead of, well… buying more records, was a difficult one to get my head around.  But without proper vacuum cleaning right from the start, even before the first time playing a record (yes, records ship with residue, dirt, and grime straight from the factory, usually left over from the pressing process itself), the irreparable damage has already begun.  Fact is, once the needle hits that tiny spec of dust, dirt, or grime in the groove for the first time, it tends to implant it there, making it that much more difficult to remove the next time the record is cleaned.

So the only way to go for an analogue audiophile, or even just avid record collector, is a vacuum record cleaning machine such as the one show in my Canada system below.

The venerable VPI HW-16.5 Record Cleaning Machine

It’s not a complicated machine, just a platter, vacuum tube, and a couple of switches; but they still aren’t cheap with retail prices starting at $500 and rapidly going up from there.  The VPI 16.5 shown above is still sold, unchanged and retails for $899.  The key to satisfactory results is a high torque motor so you can press fairly hard with the brushes and a high powered vacuum system to remove all that dirt and grime you’re breaking free.  I experimented with cheaper ($250 USD), hand-driven record cleaning machine on Maui, the Record Doctor V shown in the photo below, but found it cumbersome to use and difficult to get good results with.  This was mostly due to the inconsistent speed due to manual operation combined with the fact that I only had one hand free to apply fluid and brushes to the surface of my vinyl.  And, it was such a PITA to use that I found myself not cleaning my records with it before every play, which is step one to record care.

The manually operated Record Doctor Model V

I later replaced it with a great little machine for the money (retails for $500), the Okki Nokki Model RMC.  It has a high torque motor, strong vacuum, and reversible operation which I’ve never viewed and essential but hey, it can’t hurt to stroke your vinyl in both directions.

The Okki Nokki Model RMC record cleaning machine

You can spend a great deal more money on record cleaning machines, but all they offer for your extra hard-earned cash is more automation such as wands that apply fluid for you, fixed brushes that spread fluid and others that clean, extra vacuum tubes and fixed brushes on the bottom side so you don’t have to flip the record, and quieter motors (all the machines above are very noisy).  All of these niceties are nonessential if you know how to properly clean a record with one of the machines above.  So… how is that accomplished?  More on that in the next blog.

Digital distortion in a purely analog signal path.

Trent Reznor of Nine Inch Nails is an enigma.  He plays with all sort of digital gear and tools to create his music and distort guitar riffs so they are “just so”,  Then he records the end result on 2″ analogue tape.  Drop the needle on a faithfully released vinyl version of Pretty Hate Machine or The Downward Spiral and you will likely be surprised by the sound quality from what is mostly digital sources (though there are still plenty of pure analogue sources in the mix).  So how can music that was produced in the 16 Bit digital era of the 90s, have digital sources, and yet sound so good?…

The answer is deceivingly simple.  Digital wasn’t the recording method, but rather the source of the music itself.  Then Reznor went to traditional analogue recording methods to create the master tapes.  This sounds counter-intuitive, but it really isn’t.  Unlike Daniel Langois, who recorded the analogue sources from U2’s sessions on 16-Bit DAT tapes, thereby destroying the sound quality forever, Reznor created his music mostly in the digital domain then faithfully recorded it on high quality analogue master tapes.  Digital distortion was his favorite creative medium, but he obviously recognized the inability of the 16-Bit digital tape format to faithfully record his digital compositions.

NIN is a very progressive band in all respects.  What’s interesting is how progressive they were by refusing to adopt the “latest greatest” digital technology that reared it’s ugly head in the music industry during the era of their greatest popularity – 16-Bit Digital Audio Tapes (DATs) (The “Dark Ages” of High End Audio).  If you listen to any of their music, past or present, you can immediately tell it was recorded in the analogue domain.

By their own design, NIN creates a very interesting mix of controlled distortion.  Trent Reznor talks a lot about how his form of artistic expression is in the realm of distortion.  Other “old school” bands incorporated distortion into their music of course.  Just listen to any live performance of The Who and you will hear intentionally created analogue distortion all over the place, often created by destroying electric guitars on stage.  But Trent Reznor has taken the concept to an entirely new level by utilizing computers to create, control, and refine it digitally.

What’s fascinating is that, with the revival of vinyl records (The new (old) gear coming out), NIN’s albums are now available and faithfully reproduced from the original analogue tapes on vinyl.  So… for the first time in history, we get to hear his intentional/artistic, digitally created distortion faithfully reproduced with an all-analog signal path.  How cool is that?!

A penny for your vinyl… (perhaps)

I know this may sound incredibly crude, but we actually used to put a penny (weighs about 3 grams) on the head shell of a turntable to add effective mass to the tonearm when needed to match the phono cartridge compliance (How do I choose a turntable?).  Of course, this was suboptimal and more of an interim solution until the proper tonearm for the phono cartridge of choice was found, but it worked amazingly well.  So well that some manufacturers offered weight kits for their head shells for this purpose (see photo above).

The trackability of a cartridge is related to the mechanical parameters of the tonearm and stylus assembly. Adding weight to the headshell, and adjusting the counterweight to compensate, increases the effective mass of the tonearm and reduces its resonant frequency. If the resonant frequency is excessively high (e.g., 15-20 Hz, as measured by a test record), the increased mass may improve sound quality by moving the resonance out of the audible range.

How do I choose a turntable?

I know this sounds complicated, but your turntable decision is ideally based on your choice of phono cartridge, which in turn is based on your speaker selection, which is completely based on your room acoustics.  At least this is the case when you start going for audiophile quality sound.  That’s why when I’m asked, “What’s the best turntable for my budget?” my answer is always, “That depends”.  It’s impossible to take any portion of a high-end audio system out of context and make recommendations.  Optimizing for many variables then matching components is the path to audio nirvana.  The most fixed variable is typically the room.  So that, along with musical taste, are  usually the starting points.

My room on Maui is a perfect example, where I have a very tight space combined with limited options for speaker/listener placement.  Therefore, room acoustics are my biggest limiting factor.  I’ve tried and simply can’t get planer loudspeakers like Maggie’s to work.  And I never will short of renovating to add more room and therefore more options, which I plan to do.

On the other hand, my Kef 104/2s (The Venerable Kef 104/2) are awesome for my room on Maui.  This is especially true once I figured out to pull them a few inches further into the room to avoid the reinforcement of the frequency associated with the depth of the room and not to toe them in… at all.  But my Kef 104/2s likely wouldn’t sound as good in my room in Canada, which has very different dimensions and surfaces.

My listening room in Canada is not only larger, but is also far more flexible in regard to speaker/listener positions.  After a great deal of positioning and experimentation, my Magnepan (Maggie) MG-12s perform all the magic they are supposed to, though they are the largest Maggies I can fit without room acoustics having a detrimental effect (In a nutshell, the big Maggies (3.7Rs) are a fantastic speaker, but are very dependent upon room acoustics).   So I know by now you’re probably thinking, “But I asked about turntables, why go on about speakers?”  I’m getting there.

So the reason you need to discover what speakers work best with your room acoustics and music tastes before you can choose a turntable is due to phono cartridge selection.  The loudspeakers and the phono cartridge are the two main transducers in an analog signal path (It’s all about reducing mass for the transducers) and as such, they need to be matched to each other as much as possible.

Moving coil phono cartridges, for example, have some inherent characteristics that will show themselves on nearly all loudspeakers, but they really shine when mated with similarly low-mass speaker designs such as planars.  Conversely, cone and/or box speakers might like a moving magnet phono cartridge better.  Or… a better way of thinking of it is the incredibly fast transient response offered by a high-end moving coil phono cartridge may be lost on a high-mass speaker design that simply can’t keep up, so why add the extra expense (especially when you factor in the cost of a pre-preamplifier or step up transformers).

So by now you probably figure I’ve moved on from describing loudspeakers to describing phono cartridges, but still not answering the question about turntables.  Here’s why.  Some phono cartridges are very picky about what kind of tonearm you run them in.  The Denon 103R is perhaps the most demanding phono cartridge in that regard and absolutely requires a very low compliance tonearm in order to perform properly.  So what’s tonearm compliance, you may ask?

Think of it like the chassis of a car.  If you have a very stiff suspension (and the cantilever of the Denon 103 is very stiff indeed) and a very light chassis the springs are going to push the chassis around when the wheels hit bumps and the car will get thrown all over the place.  That’s exactly what happens when you put a Denon 103R (or any other phono cartridge that requires a low compliance tonearm) into a low mass (i.e. high compliance) tonearm…  it throws it around, big time.  So much so you may be lucky if the needle even tracks the groove at all.  Even if it does it will sound terrible.  Conversely a low compliance tonearm will push a high compliance phono cartridge stylus around, having the same negative effect.

So I’m finally getting to turntable selection.  You want to determine what phono cartridge you are running before selecting a tonearm (and turntables typically come with tonearms) or risk a major compliance mis-match.  Of course, you could first select your tonearm from the high-end ones that are sold separately then choose your turntable based on your tonearm selection, which many audiophiles do.  But if you’re already that far down the rabbit hole I’m likely preaching to the choir.

Now that you know whether you are looking for a turntable with a high compliance or low compliance tonearm, how do you shop for what you’re after.  Unfortunately, even amongst the high end offerings, very few present day turntable manufactures specify it.  But here’s where common sense can prevail.  If it looks massive and therefore designed for low compliance phono cartridges, it probably is.  Conversely if it looks low mass and obviously designed for high compliance phono cartridges, it probably is.  And… if it looks light only because it is cheaply made with no consideration for phono cartridge compliance what-so-ever, it probably is.

Unfortunately. modern turntables with retail price tags under $1k mostly fall into this last category.  Don’t get me wrong, the vinyl revival is a beautiful, exciting movement.  But I’ve come to realize that it’s genesis is not due to a demand for quality, but rather due to far more insidious motivations on the part of the music industry (The new (old) gear coming out).  To that end, there will be a barrage of turntable offerings that have little to do with sound quality and far more to do with selling records again.

So what is one to do?…  Well, modern day, audiophile quality turntables start at around $5k and for that amount you can find several viable options.  Even in that arena many turntables are missing the essential tonearm compliance mark.  They build quality turntables that get bigger as they get more expensive.  To that end, one may pay far more for a bigger turntable that has a 12 inch tonearm vs. a 9 inch tonearm, only to have spent more for inferior performance with their selected phono cartridge.  I honestly don’t know how this can be lost on the modern day audiophile world, but it often is.

Or one can go vintage, back to a time when phono cartridge compliance was accounted for, resulting in several offerings, a good example is the Infinity Black Widow tonearm for high compliance.

The Infinity Black Widow. A good example of a low mass, high compliance tonearm.

Or if looking for a low compliance tonearm one could shop for the likes of a Fidelity Research FR-66S.

Fidelity Research FR-66S
The Fidelity Research FR-66S. A good example of a high mass, low compliance tonearm.

That said, it’s pretty easy to eye up the offerings of vintage turntables and judge by the design and size of the tonearm which camp it’s in.  Most turntable manufacturers of that era (The “golden age” (of vinyl)) went one direction or another and it’s immediately apparent.

Oh yeah… then there’s the question of direct drive or belt drive turntables.  That’s another can of worms, covered in this post:

Turntables – Direct Drive vs. Belt Drive

Why I prefer analog preamplifiers that lack tone controls

The Audio Research LS-3 Preamplifier (shown above) not only lacks tone controls of any kind, but it also incorporates a “direct” switch that bypasses the balance and selector switches as well, leaving only the volume control active.  Audio Research has been in the high end audio game since 1970 and has been at the very top of the amplification food chain for nearly 45 years.  They go to great lengths to fully preserve the integrity of analog signal paths, even in the necessary RIAA phono stage (see I may be a purist, but…).  As far as I know, they haven’t provided tone controls on their preamplifiers since the SP-3, released in 1972.  Why?..  Tone controls are, by definition, a degradation of an analog audio signal path.

In fact, any circuitry that is “incidental” to the task of amplification is a degradation of the signal path, and very little is essential.  This doesn’t mean that what’s there isn’t important, but what’s not there is just as important.  A volume control is necessary, as is a selector switch of some kind, phono stage circuitry for vinyl, and in most cases a balance control – both of my listening rooms require an increase of about 2 or 3 decibels in the right channel for proper sound staging, and source components are rarely perfectly balanced between left and right channels.

My Denon 103 phono cartridge (The formidable Denon 103 vs. 103R low output moving coil phono cartridges – is there really a difference?…) shipped with the left and right output voltages individually measured, and I discovered the lucky coincidence (even before I checked the hand-measured specifications) that the right channel output is just enough higher than the left to perfectly balance out my room acoustics (right channel output = 0.42 mV, left channel output = 0.39 mV).  But that was just that, a lucky coincidence and it could have easily gone the opposite way, making a balance control absolutely essential (or swapping out the left and right channels and thereby reversing the sound stage).

Each Denon 103 moving coil phono cartridge is individually tested for output levels and frequency response and ships with the corresponding data sheet.

Nearly all Japanese providers of high end audio components in the late 1970s and early 1980s took an opposite approach – the more tone controls and signal manipulations the better since you could use them to create a “flat” frequency response at your listening position in the room.  Of course very few listeners used these controls to this end, but rather boosted bass and treble to compensate for inadequacies in either their sources, amplification components, or loudspeakers.  Most Japanese components of that era even had a “loudness” control that performed the boosts (corresponding degradation of the signal path) at the flip of a switch.  One look at this Sansui integrated amplifier made from 1970 to 1973 tells the story (Doing a little research on vintage Sansui for a customer…).

The Sansui AU-555 Integrated Amplifier has a prolifieration of tone controls and other circuit modifications.

And who else remembers the elaborate “graphic equalizers” that became popular shortly thereafter?…  Lots of lights and sliding controls to insure “proper” degradation of your signal path.

A typical graphic equalizer.

And, perhaps even more offensive to audiophiles, the original DBX 3BX signal processing unit that propurted to somehow, magically, create a delay in your 2 channel system (no 5.1 surround sound here) that simulates the acoustics of a concert hall… seriously?!

The Original DBX 3BX Signal Processing Unit

I was never a fan, and opted out but was definitely in the minority at the time.  Don’t get me wrong, some of these units have a place in pro-audio for live performances in venues with acoustics that vary drastically from location to location, but that’s not how these units were being marketed when first released in the early 1980s (the DBX 3BX came out in 1982).  They were “engineered” and sold to the home audio consumer market, and even some high end audiophile retailers began to adopt them.

Not to mention trashing your analog signal path, I also view the corresponding lights very distracting to the listening experience.  I even go so far as to apply black tape over any unnecessary lights on my components (which is all of them – even clipping lights on power amplifiers assuming one can hear when their amp is clipping).  Some manufactures recognize this and allow the option to extingish such lights (thank you Marantz DSD DAC), and some would rather make sure their logo or other bright (and sometimes even flashing) lights are prominent.  Not to bash anyone here, but anyone who’s owned Emotiva gear is fully aware of the “Emotiva Blues” – their crazy bright blue lights, some incorporating their logo and not all of which can be extinguished.  Ok, so I’m bashing.  I could bash Emotiva all day on many counts, but I suppose they are filling a modern-day niche in the mid-fi market.

Difficult room acoustics can be handled in many other ways, certainly without modification of the analog signal path and most of the time without even resorting to expensive room treatment accessories (see How to upgrade your existing system without spending a nickel and A free upgrade for your planar speakers).  I admit I’m a purist and listening to music is a personal endeavor and as such some may prefer drastic alterations to their signal path and accompanying flashing lights.  If that’s the case I would respectfully suggest, however, not over-spending on source components, amplifiers, or loudspeakers since the extra cash for very high end audiophile gear is spent to fastidiously accomplish exactly the opposite.

The formidable Denon 103 vs. 103R low output moving coil phono cartridges – is there really a difference?…

The famous Denon DL 103 low output moving coil (LOMC) phono cartridge was originally designed for professional broadcast use in 1962.  Production has continued uninterrupted since then.  That’s right, 53 years and counting.

Why?…  It’s an amazing cartridge with unparalleled transient response.  It’s a fussy player, very fussy.  It demands proper tonearm compliance (i.e. high moving mass) and rated at just 0.39 mV output it’s also very demanding of even the best moving coil phono stages or regular ones coupled with step up transformers or pre-preamplifiers.

So how has this fussy cartridge, dedicated for the broadcast industry that has left it and all other phono cartridges far behind, survived and prospered all these years?  “The proof is in the pudding” is a phrase that comes to mind.  This exemplary moving coil phono cartridge was adopted by audiophiles very shortly after it’s release.  It’s sort of like the Quad ESL loudspeaker when it first came out, immediate legendary status.  Now, 53 years later, you can still purchase a Denon 103 for around $175 street price, making it the bargain of all time for phono cartridges, bar none.  It even ships with an individually plotted frequency response curve and individually measured left and right channel output levels.  When I visited Zu Audio in Ogden, Utah; a high end audio company doing modifications for the Denon 103, the owner said he’s been out of stock for months.  When I inquired as to why, he replied, “I think the engineer doing the frequency response graphs got behind”.  Ha, I love it!

Each Denon 103 moving coil phono cartridge is individually tested for output levels and frequency response and ships with the corresponding data sheet.

Of course, you can add anywhere from $500 to $2k for quality step-up transformers to couple the Denon 103 with a regular moving magnet (MM) phono stage, or spend around $20k for a Pass Labs phono stage that will handle the low output of the Denon 103 with aplomb, but this legendary phono cartridge won’t seem like such a bargain anymore.  Especially considering that modern turntables with tonearms capable of handling the compliance requirements of the Denon 103 start at around $5k and quickly escalate to $30k.

So how can a budget audiophile bask in all the goodness the Denon 103 has to offer?…  Vintage gear.   You can purchase a Nelson Pass moving coil phono stage dressed up as a Nakamichi preamplifier for around $500 (How to get a moving coil phono stage for free) and vintage Denon direct drive turntables complete with low-compliance tonearms capable of handling the 103 also start around $500 (Denon DP-790W turntable review).  Of course, you need to know your vintage gear and assess for bulging capacitors, fried resistors, blown transistors, etc (The vintage “crap shoot”).

The Denon 103 moving coil phono cartridge shown on the left, and the 103R shown on right.

So all that said, let’s go back to the original topic, the Denon 103 vs. the Denon 103R.  With a street price of around $275, the 103R was a “no brainer” when shopping for my vinyl-oriented Maui system and I definitely wanted to give it a try – I had never heard it before since it was released in 1994.  It is marketed as a “6N” cartridge.  Why?…  Because the copper in its moving coils is rated with a purity of 99.9999%.  Too funny.

The bottom line is the 103R has even lower moving mass (It’s all about reducing mass for the transducers) than the 103 and a correspondingly lower output voltage of around .25mV vs around .39mV for the original 103 (remember, these are individually tested and measured for every hand-made Denon 103 leaving the factory in Japan).  Plus the 103R has some nice gold lettering on it, dressing it up nicely, but the cartridge body remains identical to the original 103.

When it came time to purchase a phono cartridge for my digitally-oriented Canada system, I figured why not get an original 103 and listen and compare it to the 103R on my Maui system prior to bringing it north of the border.  Everything is less expensive in the USA vs. Canada anyway, but that’s another topic.

So into the tonearm of my Denon direct drive TT my new 103 went, temporarily replacing my beloved 103R.  I promised myself to give the 103 at least 50 hours of break-in prior to any evaluations, and even left it in the run-out groove of some albums to loosen it up.  But, that proved completely unnecessary.  I found myself sitting down and enjoying the 103 immediately.  Whenever I dropped the needle I wanted to jump into the listening chair and enJoy.  Even at low levels, this cartridge sings.  Even more so for it’s higher output levels.  Let’s face facts, signal-to-noise ratios are going to improve as output levels in the coils increase, that’s just common sense.  Any pre-preamplifier or step-up-transformer has the opportunity to add noise, and the greater the amplification of that device, the more noise.

After listening to the original Denon 103 LOMC for a couple weeks, I don’t feel compelled to replace it with the 103R… at all.  Maybe if I did blind A/B testing and I really tried to hear a difference, I could.  Or, maybe not.  I kind of feel like if I need to go to those lengths than what’s the point?   I’d be loosing the forest through the trees and no longer just loving the music I’m listening to (Losing the forest through the trees?…).

Don’t get me wrong, I’m not “dissing” Denon at all here.  If anything, I applaud their efforts to improve on perfection.  I fell in love with their 103 LOMC cartridge in the late 70s, playing it with in a Decca tonearm on a Techniques SP-10 MkII deck into Magnepan Tympani 1D planar loudspeakers.  And now, 37 years later I’m still in love with it.  Either the 103 or the 103R can follow the grooves on my vinyl any day, all day.  They are both “giant slayers” in my book.  And, corrected for inflation, they both sell for far less than when they were originally released.

The Nakamichi PA-7 power amplifier

I’ve lusted after this power amplifier ever since it came out in 1988.  It just looked so damn sexy.  It originally retailed for $1,595 which isn’t a lot by today’s standards but certainly was back then, especially for a recent college grad trying to get ahead in San Francisco.   So I never owned it and instead settled on the lessor Nelson Pass design in the form of the Adcom GFA-555II to power my Martin Logan Sequel IIs at the time.  Well, I ultimately ended up with two GFA-555s powering those Sequel IIs and still wasn’t satisfied, but that’s another story (It’s all about reducing mass for the transducers).

So fast forward 26 years and I’m on the hunt for an appropriate  power amplifier for my chosen Maggie MG-12s.  This baby had been on Kijiji (Canada’s Craig’s List) for a few weeks for exactly half the original retail price, not bad 26 years later but still a friggin bargain for anyone comparing it to present new offerings.  But it was in Edmonton, a 3.5 hour drive from Canmore.   I ultimately decided to make the trip to have a look at the PA-7 as well as a couple other vintage high end audio components, which I also purchased (An Edmonton audio-venture (names changed to protect the guilty)).

So what first caught my attention about the PA-7 was it’s gorgeous build quality and industrial design, a fine example of industrial art (thank you Nakamichi).

The Nakamichi PA-7 power amplifier - amazing circuity topology and components meet gorgeous industrial design.  Beauty and the (high current) beast.
The Nakamichi PA-7 power amplifier – amazing circuity topology and components meet gorgeous industrial design. Beauty and the (high current) beast.

I can remember like it was yesterday the first time I set eyes on this baby.  It’s mesmerizing and belongs in a museum of industrial design.  Let’s face it, brute strength power amps aren’t usually a thing of beauty, but this one is truly “beauty and the beast”.  Everyone already knows that Nakamichi made it’s name on the very best quality home audio cassette decks in the late 1970s.  So they had cash to burn, and wanted to become a major player in the high end audio market, which was dominated by US designers and manufacturers.  So what do they do?…  They recruit Nelson Pass (of Threshold) as a “hired gun” and combine his designs and circuit topology with their deep pockets and efficient production techniques.  The result?…  What is essentially a Threshold power amplifier but way better looking and less than half the price.

They were supposed to just license his STASIS technology, which combines the benefits of Class A amplification without the drawbacks (runs stupid hot = very low reliability) into a hybrid Class A/Class AB power amplifier with optical bias.  Well, they didn’t just license STASIS.  Rather, the first generation of the PA-7 is a direct copy of the equivalent Threshold amp.  A lawsuit ensues, then Nakamichi releases the PA-7II with an altered design providing 25 more WPC (watts per channel) and a higher price tag.  But everyone knew then and knows now that the original PA-7 was, “the one to get”.  As a side note I also sourced a Nakamichi CA-5A pre amp of the same era which was also designed by Nelson Pass and executed by Nakamichi for my Maui system (The Nakamichi CA-5A preamplifier).

I found an interesting review on the now legendary PA-7 in Tone Publications, an online magazine I’d never heard of but certainly agree with the author’s findings.  It’s interesting, since he ended up pairing the PA-7 with an Audio Research SP 9 Mark II preamp and a pair of Magnepan loudspeakers, just as I did.  It all makes perfect sense in retrospect.  I found myself there by time spent in the listening chair, not reading reviews, much as I suspect he did…

http://www.tonepublications.com/old-school/nakamichi-pa-7-amplifier/

Time for new tonearm cable?

So anyone who’s read a bit in this blog knows that I prioritize and match when it comes to optimizing my signal path, whether it’s analog or digital.  The first priority for me is the quality of the music (i.e. recordings) then shortly after that the quality at the opposite ends of the signal path which is the transducers, meaning the phono cartridge for analog (The formidable Denon 103 vs. 103R low output moving coil phono cartridges – is there really a difference?…) and the speakers (It’s all about reducing mass for the transducers), which are of course dependent upon room acoustics (Why do speakers need to be matched to room acoustics?…).

Following that comes the amplification of the signal path, and finally the interconnects used between the various stages to accomplish this.  When I purchased my vintage Denon direct drive turntable (Denon DP-790W turntable review) the tonearm cable was an obvious candidate for replacement.  Not only was it 40 years old but even when new it was of average quality at best by today’s standards.

In my discussion of interconnects (a couple good examples of fact vs. fiction in the high end audio world) you will note that I’ve found great sound quality from quality interconnects selling for under $50.  And, I’m hard pressed to hear an improvement when spending more than that, even when listening to my reference recordings (What is a “reference recording”?).  But… one look at this original Denon tonearm cable will tell you it was sub-par, even by those standards.

Original Denon 5 pin DIN tonearm cableAnd thus began the quest to find a suitable replacement.  Unfortunately, being firmly planted in the realm of modern high end audio due to the fact that I’m seeking an esoteric tonearm cable, I was lost in a quagmire of highly overpriced options (ranging from around $500 and up to $2k) claiming to, once again, defy the laws of physics and perform some sort of voodoo magic on any music played (Speaker Cables and The quest for some bang for the buck in interconnects and speaker cables).

Enter the DIY cable market.  Yes, I could buy the materials and make the cables myself, but I figured there must be someone out there who is way better at it and doing just that for resale, and thus the eBay search began.  Of course, this search was exasperated by the fact that my tonearm used a five pin DIN connection, circa 1970s.  The first “homemade” set I purchased for around $60 used Belden cable and Cardas terminations (including the five pin DIN) so should have done the job nicely, but unfortunately they had untenable hum so back they went.  I kept poking around on eBay to no avail until I started looking internationally and then… bingo, I found a couple options.  So I pulled the trigger on the Canare tonearm cable shown below and couldn’t be happier.

Zero hum and noticeable sonic improvement immediately, even prior to burn in.  These are simply gorgeous handmade cables that sound every bit as good as they look.  You can see and feel the quality of the craftsmanship, and the attention to detail is suitably reflected in their sound quality.

CanareTonearmCable-Straight-Construction

Even when the package showed up, all the way from the UK, I could tell this guy was a meticulous craftsman by the packaging and hand written labelling.

Oh yeah, and the price?…  Great value at $85 plus $6 priority shipping from England.  And when I finally upgraded my turntable in Canada to a Denon direct drive, I purchased another one (custom length this time) to replace it’s original tonearm cable as well.


Turntables – Direct Drive vs. Belt Drive

Ok, so first let me say that you can ask ten different audiophiles this question and you will likely get ten different versions of why they think one or the other is best.  I suppose I’ve developed an equally biased opinion, so I’ll tell you why I’m biased in advance.

Over my my 35+ years in this endeavour, I’ve owned countless turntables.  Unfortunately, I’ve never owned an uber high-end belt drive turntable.  All the belt drive turntables I owned were middle-of-the-road high-end quality, the likes of Garrard, Marantz, Dual, BIC (anyone who remembers those will also remember just how crappy they were), and… Thorens.  I saved Thorens for last since I know that’s gonna ruffle the feathers of some of their fans, but I’m sorry I’ve just never owned one that I considered capable of top-notch audiophile quality music reproduction.

Enter the Techniques SP-10 MkII into my world at age 17 and the peak of my vinyl obsession at the time.  I had a summer job at Audionics of Oregon building amplifiers and somehow managed to acquire an SP-10 MkII at the same time I had a set of the TOTL (top of the line) Magnepan Tympani IDs (some consider this the best speaker they’ve ever made, or anyone’s ever made, to this day) and the best amplifiers of the day to drive them.

What a deck the SP-10 MkII was!  It was the first time I really heard my vinyl sing.  I suppose it was the first truly high-end turntable I owned and it was revelatory.  I combined it with a Decca tonearm and started with a Decca phono cartridge, later entering the world of LOMC (low output moving coil) cartridges with the Denon 103 and a pre-preamplifier I built myself  It was a dual mono design using, get this… two 9 volt batteries as a power supplies, one for each channel (a pre-preamp uses very little power, allowing me to get away with that approach).

It’s like so many things in life, there’s only one “first time”.  So I’m not gonna dis belt drive turntables here.  I’m sure there are many fine examples, I’ve just never had the pleasure to hear one.  What I have experienced from the belt drive turntables I’ve owned is unstable speed control (most of them run off a syncrounous motor, which means the speed of the platter is determined by the AC frequency of the power outlet on your wall), amazingly unstable sprung platforms that visibly  bounce around, especially with records that are punched off center (not uncommon, at all), and noticeable wow and flutter due to the nature of the drive mechanisim.

So higher end belt drive turntables have external speed boxes and implement elaborate acoustic isolation schemes other than a set of four cheap metal springs.  But, we’re talking about some serious cash to get into that game, easily $10K+ these days.  Even back in the 1970s, belt drive turntables that really took advantage of the format were several orders of magnitude more expensive than their direct drive equivalents.  I picked up a used SP-10 MkII for a few hundred bucks and couldn’t have been happier, dodging a multi-thousand dollar bullet to get into the “best of the best” turntable realm.

Ironically, after 30+ years, direct drive turntables are making a come-back and vendors such as VPI are now calling them the new “reference” and the new price is $30k+.  It seems like everything I loved about high-end audio in the 1970s is coming back, but with a price tag over 10 times the original, even correcting for inflation.  So do they think we forgot how they sang the praises of belt drive turntables for so many years and are now offering direct drive turntables at exorbitant prices as something new?

While I understand the theoretical draw backs of direct drive turntables, such as potential motor noise reaching the stylus, I’ve never heard them.  Whereas I can hear a mid-fi belt drive turntable mishandling vinyl across a room.  That’s why when it came time to get back in the game I choose a direct drive Denon turntable from the late 1970s, and not even their TOTL model (since most of those were automatic).  I’ve had to work with it’s grossly inadequate acoustic isolation scheme (no mass loading) but after a great deal of tweaking and DIY (do it yourself) trail-and-error, I’d be hard pressed to find a better sounding deck for my Maui system at any price, be it direct drive or belt drive.  Check out my review and comments at Denon DP-790W turntable review.

Why Tape Hiss is Music to My Ears

So I’ve been hearing a familiar sound on some of the very best repressed quality vinyl recordings of music from the 70s…  Tape hiss.  It shows up in the quiet passages of familiar albums and is a very distinctive and welcome sound.

Welcome, you may ask…  why would it be welcome?  The answer is that it means when they remastered the album for the re-release they left it in the analog domain, and didn’t ruin it with digital mixing, which would make it easy to remove the hiss of course, along with much of the music.

And…  the corollary is also true.  I’ve been very disappointed in some of the “digitally remastered” vinyl re-releases, such as The Cure’s “Disintegration” (What a pity) and Elton John’s “Goodbye Yellow Brick Road”.  I’m not familiar with the original vinyl release of “Disintegration”, but I am certainly familiar with the MFSL (Mobile Fidelity Sound Labs) Original Master release of GBYBR and I’m here to tell you…  digitally remastering it for the 40th anniversary edition to vinyl totally rained on the parade.  Look for the original from the 70s (complete with tape hiss in the quiet sections, along with all the goodness on the original tapes) or just go get the SACD and have fun with the 5.1 surround mix, which is fantastic!

Opps! your phono cartridge

This is a really interesting article (to me anyway) about polarity. Back in the 70s we used to “opps” (reverse) only one channel of our phono signal polarity at the cartridge then reverse it back at the same channel at the speaker terminal. It therefore put once channel 180 degrees out of phase with the other through the entire, fully analog signal path until it got to the speakers.  It was purported to speed up the amplification circuits. May have been smoke and mirrors  or not, don’t remember, just remember doing it…

Click here to open article on polarity in new tab.

How to get a moving coil phono stage for free.

Step up transformers (SUTs) and pre-preamps for low output moving coil (LOMC) phono cartridges can easily exceed $1k, but that’s part of the beauty of some vintage gear of a certain era when moving coil (MC) phono cartridges were popular, manufacturer’s almost  threw in the MC phono stage for free.  There are many variants from the late 1970s and early 1980s, including offerings from some of the major Japanese players of the day such as Yamaha, Nakamichi, Sansui and Sony.  The Nakamichi CA-5A (The Nakamichi CA-5A preamplifier) is unique in that it incorporates a USA designed phono stage (schematic shown above), but is manufactured by Nakamichi.  Which translates to a Nelson Pass MC phono stage nearly thrown in for free, which is exactly why I acquired it.

Doing a little research on vintage Sansui…

I had a friend interested in this integrated amplifier, the Sansui AU-9500 and I passed it off as yet another mediocre amplifier of the era.  But my knee-jerk reaction to it was kind of bugging me so I did a little more research on this baby and even examined the circuit topology from the schematics (Circuit topology, why less is more).

Upon further investigation, this looks to be one of the best integrated amps the era offered and quite possibly the best integrated amp Sansui ever produced, hence the strong following.   This amplifier was released when the owner and founder of Sansui (Khosaku Kikuchi) was on a quest to offer the best solid state amps in the world and this was his “no holds barred” TOTL (top of the line) flagship integrated model.  In that respect it is a brilliant piece of audio history, probably why my friend was so drawn to it.

This amplifier was released from 1972 to 1973 only, and Khosaku Kikuchi subsequently retired in 1974.  Although circuit design may have progressed in later Sansui integrated amps, it remains highly doubtful that sonic qualities improved, especially if such circuit designs implemented high negative feedback loops in the “THD wars” of the time (The THD wars. Why lower distortion often doesn’t equal better sound quality).  In fact, the rather high THD of .1% on this model actually bodes well for its musicality and sonic potential.  I doubt they subsequently made an integrated amp with better build and/or sound quality.  And Khosaku Kikuchi’s goal to make solid state sound like tubes was certainly an admirable one, though that wasn’t really realized until the MOSFET amps of the early 80s came out, with the exception of the high slew rate/low TIM Audionics of Oregon CC-2 driving certain speakers (The Audionics of Oregon CC-2. More distortion, more better.).

The Japanese and US approach has traditionally been polar opposite in regard to the “less is more” or “more is more” approach, and Sansui obviously believes that by adding more tone controls you can achieve better sound quality.  Hence the elaborate tone controls on the AU-9500, while US designers were going the opposite direction.  Of course which is better is purely subjective, as are all things high-end audio.  I am of the later camp and prefer not to have any tone controls at all, even just the usual “bass” and “treble” (Why I prefer analog preamplifiers that lack tone controls), which is the main reason I choose the Nak CA-5A (The Nakamichi CA-5A preamplifier) over the Nak CA-5A II.  I’ve always found graphic equalizers, that became so popular in the late 70s, to be flashy tone suckers.  But once again that’s just one guy’s subjective opinion.

It’s worthy to note that Japanese owned and operated Nakamichi contracted an American (Nelson Pass) as a hired gun for their circuit designs when they endeavoured to provide the world with the best amplifiers of the era in the early to mid 1980s, following their huge success in the cassette tape business.  His circuit designs have always been extraordinarily simple, so that’s an indisputable indicator of where the chips ultimately fell, as are nearly all the modern high-end audio components that followed.  I consider the Nakamichi amplifiers designed by Nelson Pass to be the best of both worlds from that era – fantastic circuit topology combined with Japanese build quality and stunning industrial design (The Nakamichi PA-7 power amplifier).

So the main concern I would have in regard to the Sansui AU-9500 would not be in regard to sound quality or its ability to drive just about any speakers desired, but rather due to its age combined with its complexity combined with the difficulty of finding places to get it competently serviced and it’s weight to ship.  I would consider it a roll of the dice and while it may run another 40 years, I seriously doubt it.

As a side note the AU-9500’s direct coupled design is a rather bold move, indicative of their emphasis on utmost sound quality at that time.  What it means is that without DC servo protection to shut things down in the event of a DC power fault feeding the speakers, it will destroy them in very short order.  It probably has a DC servo  protection circuit somewhere, but I couldn’t locate it on the schematics.  The direct coupled design omits DC filter capacitors on the output stage due to their potential to adversely effect sound quality, which I find ironic given the proliferation of what I consider to be unnecessary circuitry in the circuit design to begin with.

I initially had concerns about the early 70s AU-9500 possibly being behind the design curve that came in the late 70s.  But as previously noted, the high THD figure, coupled with the fact that they even mentioned TIM distortion in their specs, tells me that they were “on it” (in a good way) and trying hard to avoid that “first-generation transistor sound”, which makes sense as it was one of their stated objectives, to have a “tube-like” sound.  I found this interesting since I thought Robert Sickler at Audionics of Oregon was one of the first amplifier designers to look at how negative feedback adversely effects sound quality and strove for high slew rate (What is “Slew Rate” and why does it matter?…)/low TIM distortion amplifier designs.  The entire industry followed his lead, but maybe he was just one of the first American amplifier designers to look at it.  Robert Sickler was also onto MOSFETs way before their time, but Nelson Pass later picked up that ball and ran with it to great effect.

The vintage “crap shoot”

Long story short, vintage electronics can often be a crap shoot, especially if you leave in a remote area, far away from service facilities (like Maui, for example).  But mid-fi modern electronics, with their inferior build (and sound) quality are guaranteed to be crappy – they were designed and built in our “disposable age”.

That leaves a couple options.  Pay exorbitant prices for quality modern gear, which will easily run well into five digits for each component, or try your luck with some extraordinarily high quality vintage gear from the “golden age”.   Don’t get me wrong, vintage gear isn’t for everyone.  I’ve done tweeter surgery (Trust your ears), retro-fitted cabinets to accept spec’d tweeters since the originals are no longer available, blown two power amps beyond repair, and fussed around with isolation platforms for turntables since their original vintage ones are grossly inadequate (Denon DP-790W turntable review).

But for those reasonably handy with a soldering iron and willing to do some DIY modifications and/or repairs, vintage gear can be a veritable gold mine.  And, not all vintage gear requires tinkering, I’ve acquired three preamplifiers from the early 1980s (Nakamichi CA-5, Threshold FET Nine, and Audio Research SP9 MkII) and one power amp from the late 1970s (Audionics of Oregon CC-2) that are all performing just fine without any repairs or modifications what-so-ever.

Beware of over priced vintage gear however.  Marantz had a classic styling that is fetching prices that simply aren’t commensurate with their sound quality compared to other vintage gear of the same era.  Don’t get me wrong, I love Marantz gear and I also love their styling from the late 1970s, but you will be paying extra for that signature Marantz look and feel (see photo above).  If that’s important to you than by all means go for it.  A 1966 Jaguar XKE would totally suck on a race track by modern-day standards but is worth over $140k now since it is so collectable.

While a vintage Marantz receiver isn’t going to “totally suck”, it’s possible to find higher end components from the era at less cost.  And separate components will nearly always out-perform integrated (Integrated amps or separates?).  I used to sell these Marantz units back in the 70s when they were new and they were the bread and butter of my audio resale business (I was 16 years old at the time and worked at Audionics of Oregon after school and summers).

They have outstanding phono stages, great build quality, and descent power plants, were reliable and all wrapped up in very nice packaging with attractive real wood cabinets.  That’s why they have become collectable and some sell for nearly 10 times the prices they did back then, as does a lot of the gear of that era.  And… like so many collectable things, there is nostalgia associated with them and their distinctive styling.


Recording your vinyl to DSD

DSD is sampled at 2.8 MHz.  This is what is used on SACDs and results in similar results to an analog wave form.  The differences between vinyl and SACDs still remains very audible to me though (pros and cons – the pros still far outweigh the cons for me), even on a modest system by audiophile standards.  But I consider both levels of quality, vinyl and SACD non-fatiguing and very worthy of “sit down and listen to music” sessions.  CDs I don’t and I stopped doing it in spite of having a very good audiophile system with ESLs.  The return of quality by virtue of DSD and vinyl are why I’m back into it.

The Korg can record analog sources at 2.8 MHz or 5.6 MHz.  Having a higher sampling rate than SACDs or PCM and leads to many intriguing questions to me.  Could I get even better results recording my quality vinyl to DSD at 5.6 MHz than listening to the same music recorded and mixed to SACD at 2.8MHz, for example (I doubt it).  And… it leads to potentially amazing archival and convenienice possibilities as well.  Travelling to my places with a hard drive is certainly a lot easier than with a collection of vinyl, or buying multiple copies of my vinyl albums so i have one in all places and having multiple turntables, which is the road i figured i’d likely to down but may not have to after all 🙂

I have found that DVD Audio at 192K/24 bit to be very good and a huge improvement over CDs at 44.1K/16 bit.  I have several titles on both SACD using DSD and on DVD-A using 192k/24 bit and have compared them (I’ve got at least a dozen on both formats: SJ Gaucho, Elton John GBYBR, Fleetwood Mac Rumors, etc.) and find I prefer the SACDs but both formats are miles above CDs.  And, every title various according to whiter original master tapes were used, how it was mixed, and how it was recorded.

Remember that with PCM, the bit depth is more important than the sampling rate.  So 24 bit is key (and almost all of them are).  Blu-ray Audio offers 96khz @ 24 bit.  I’ve collected a few of those titles but haven’t listened to them yet since I don’t have a player.   They play on all blu-ray players (that’s their selling point of course) but in order to give them a proper listen i would have to get an audiophile quality one, such as the Oppo.

Nude photos of analog gear usually tell a big part of the story.

The first thing I do when narrowing down what  high end audio gear warrants an “audition” is look at “nude pics”.  By nude I mean with the case off so all the internal circuitry can be seen.  High end analog audio gear is by it’s very nature, comprised of very few but very high end discreet components.  Low end audio gear is typically just the opposite, with overcrowded circuit boards crammed full of tone-sucking, cheap integrated circuits (ICs), undersized transformers, and other cost saving measures.

Of course, “you get what you pay for” is a saying that comes to mind, but with modern high end audio gear it can be a confusing mix.  Although there is (thankfully) a trend back to the “simpler is better” design precepts of vintage gear from the “golden age”, some companies still can’t resist adding a little “flash” and a lot of convenience by adding remote controls, which are perilous additions to any purely analog signal path (Why audiophiles don’t get to have a remote control…).  So an easy way to shop for audio gear when it’s impractical or even impossible to give it a proper listen is to look at nude pics.  Such was the case when I was looking to upgrade my DAC and stumbled upon the Marantz DSD DAC, which I couldn’t be happier with.

Even with digital sources, such as a high-def music server, you will want to maintain the integrity of the analog signal path once the best DAC chosen for the job has made the conversion from digital to analog, and nude pics can go a long way in telling the story prior to listening tests.  One look inside the vintage and collectable Threshold FET-9 pictured above illustrates this point perfectly.  Nothing but the best components very carefully and comfortable laid out in order to implement the circuit topology of the original design objectives.  Threshold even went so far as to put the power supply in a separate chassis in order to further isolate the potential interference from the power transformer.

How can vinyl sound better with all the “pops and clicks”?

Pops and clicks are often not audible during a song on a well-maintained record and should not distract from the listening experience. No evidence exists of a record that is shown to be played back with absolutely no pops or clicks whatsoever. They are introduced at virtually every stage of production, from cutting the lacquer to the pressing to the playback itself. Some pops and ticks are pressed into the record itself.

more later…

The pecking order of high end audio source formats

when i did my vinyl vs. SACD vs DVD-A (i already knew not to bother with CDs, i already know where they stood from years of ginning and bearing it until i gave up and sold my MLs and Adcoms) tests five years ago.  i uncovered on my own exactly the same conclusions that Harley and Lynn have come to.  I went in almost hoping vinyl would lose since i had none of it and had a vast collection of high def digi music.  Within less than an hour of critical listening to music i brought in and know well on a reference quality system it became unecquivacally evident that vinyl still offered the best quality, SACDs second, DVD-As (at 196K/24 bit, not all are) a fairly distant third.  harley endeavors to explain why SACDs are the best digi format.  Lynn just mentions it in passing.

I still love my digi collection.  and one thing they offer that vinyl never did is fantastic 5.1 surround mixes.  quadrophonic, finally realized.

How to spend nothing on stylus cleaning?… Just look in your cleaning closet


So stylus cleaning is an inexact science at best.  Truth is, the entire concept of a diamond needle tracking in a vinyl groove is incredibly primitive at best.  But… if done correctly, it remains by far the most enthralling method to reproduce high quality audio recordings at home.  This is, of course, a big if.  Anyone outside of the Golden Age (post) thinks back upon vinyl records with memories of clicks, pops, and scratches.  And in most cases this was true.  Vinyl records require a great deal of care to faithfully reproduce music with any sort of longevity.  In fact, one can completely ruin a vinyl record forever by simply neglecting to clean it properly before the first time dropping a needle onto it.

So, assuming you are fastidiously caring for your cherished vinyl (post), how do you also care for the needle tracking it.  First and foremost for the care of both you must take great care to set up your turntable/tonearm to so the stylus is properly tracking the groove without excessive force vertically or laterally.  But still, no matter how well you care for your vinyl prior to each drop of the needle, your stylus itself is going to need some care or excessive wear, audio quality segregation, and mis-tracking will ensue.

While there are several companies that will be happy to sell you expensive “snake oil” stylus cleaning solutions promising to change your life in the listening chair forever, the solution is in fact very simple, inexpensive, and just might be already on the shelf of your cleaning closet.

The Magic Eraser is a household cleaning product designed to remove just about any stain on any surface.  Rather than relying upon strong solvents, which could easily damage your phono cartridge should they wick up into it’s delicate coils, it uses a unique molecular structure to strip materials clean of unwanted debris.


Helpful tips – Magic Eraser

Circuit topology, why less is more

Any quick look under the hood of truly high end audio components immediately reveals their design philosophy:  the highest quality of pure, simple, short signal paths w/o tone controls or other things screwing it up. One look at the above photo of the Nakamichi CA-5A preamplifier (The Nakamichi CA-5A preamplifier) illustrates this completely, and also shows off the build quality.  Witness the isolated transformer, simple high quality components, and exemplary design.  No more, no less…

As for the rest of the components?…  I want them to amplify the signal as accurately as possible and other than that get out of the way of the original integrity of the (minuscule!) analog signal path created by my 103R phono cartridge (The formidable Denon 103 vs. 103R low output moving coil phono cartridges – is there really a difference?…) or the (albeit more robust) signal from my very carefully chosen outboard DAC (Marantz DSD DAC)


Acoustic isolation for turntables – to couple or decouple?…

This is a "sprung" turntable
This is a “sprung” turntable

This is a trick question since the answer is often…  both!

Ok, so most audiophiles know that the “big bad wolf” of turntables can be acoustic feedback.  Simply put, this is where the speakers vibrate the floor, walls, air (and hence dust platter) and that vibration gets feed back to the stylus and amplified then sent back to the speakers where it causes more vibrations to be amplified, and so it goes.  You get the idea, the classic positive feedback loop.

This is the “big bad wolf” since if it runs out of control, which undampened positive feedback loops do by definition, it has the potential to destroy speakers and even amplifiers.  So how to you test for this in your all analog vinyl signal path?  It’s really simple.  Place the needle on a record that isn’t spinning and turn up the volume (very carefully!) until you start to hear a howl then immediately back it off from there.  That’s your acoustic feedback threshold.  If this is well above your normal listening levels or not there at all, great you have nothing to worry about.  If it’s within your listening range, you’ve got some isolation work to do.

So most already know that turntables deal with acoustic vibration in one of two ways: acoustic suspension or “sprung” turntable platforms or very heavy and solid plinths that use the physics of “mass loading” to deal with it.


On thing has become obvious, my system rack which consists of an teak shelving unit open on the front and back, is about the worst case scenario for this “component”. Rather than isolate it serves to amplify rumble. This is the type of thing that isn’t glaringly obvious but rather a welcome absence when it is gone.   My solution will most likely be a wall mounted shelf as virtually no rumble can pass from my concrete slab to my wood framing.  A very inexpensive solution available to me since I’m on the ground floor of a dwelling constructed as slab on grade.


“Generally, mass coupling works better for heavy components, and decoupling for lightweight components”, p. 406

I’m lucky since my speakers are sitting right on top of my ground floor slab contributing to fantastic bass.  My challenge is the opposite, to decouple my turntable.

You have several challenges in that department. Biggest is being on the second floor and on top of resonating floor joists. Many people in this situation cross block and other renovations underneath to address this if they are above a basement where the framing is easily accessible.

In your case you need to endeavor to couple your MLs to the sub floor. You have a nearly worst case scenario right now if you are still running them without any feet, not even the ones provided by ML. This is a very important aspect of the speaker design and I’m hoping it has a lot to do with the lacking bass in your MLs…

Granite tombstones wouldn’t be over kill given your room challenges, but any very heavy object will serve to couple to the floor, then just put your MLs, and maybe your power amps, on top of that.  It’s either that or spike your wood floors…  Not. Spikes on a penny will help, but i suspect its a half measure. Try it first, it’s cheap 🙂


Actually, mounting the shelf to the wall went very well.  Too well.  My first instinct was to hang it off the drywall and thereby be more isolated from the studs and therefore the floor where my speakers stand.  So I got some drywall anchors rated for 80 pounds and started down that road.  Hence the two unused holes in the wall you see in the photo, anchors actually, I just left them there.

It became immediately apparent that the dry wall anchors and brackets couldn’t handle the weight of my Denon and the two very heavy wood slabs I’ll be using as an isolation platform: 30 + 9 +9 = 48 pounds.

No worries… I go to Home Depot and get some uber heavy duty shelf support brackets, secure them 3 inches into my studs with 3 x  5/8” lag bolts per bracket, then set the wood platform and Denon on that.  Rock solid.  I could stand on one of those brackets and it wouldn’t sag or pull out from the wall one mm.

So I grab a record (APP I Robot), do my routine, then set the needle down in eager anticipation.  The first thing I notice is what’s not there… No more surface noise.  Gone, dead quiet as the needle touches down and I’m thinking, “Wow… this is gonna be good”.

Then, as the music kicks in I get immediate acoustic feedback.  I had a hand on the volume control and it was a good thing as acoustic feedback forms a positive feedback loop that can rapidly run out of control and start destroying speakers and power amps.  I’m like…  “bummer” as I play with the PFB loop and notice exactly where it starts to run wild and I turn it back down.

So, I almost directly coupled my Denon TT to my speakers through the floor (the Kefs are obviously very well coupled, a very good thing) to my studs to my shelf to my TT.  My teak rack may be creating other vibrations, but it is very effectively sheltering my TT from the “big bad wolf”, runaway PFB.  Oh well, live and learn.  I was planning for my TT isolation method to be three fold – shelf combined with first stage isolation (rubber isolators and a bike tube between the very solid and heavy wood shelves) then finally direct coupling with spikes of the TT plinth to the upper wood shelf, to take the TTs internal vibrations away from the needle.

Stage one, the shelf, clearly isn’t working, by itself anyway.  gotta wait for my spikes, isolation pads, and bike tube to show up before I experiment more.  Until then, it’s back to listening to pretty amazing analog sound quality, with a little cabinet resonance in the mix.  It’s subtle… something you notice more by virtue of it’s absence than its presence.


Spikes are clearly acoustical couplers (that’s why you want them on the bottom of your speakers), so why would I want to couple the upper platform to my TT you may ask?…  Well, by doing so I effectively increase the mass of my TT plinth by 9 pounds whilst the entire thing is isolated.  And, by virtue of their design they act as mechanical diodes (one way valves) to remove any mechanical vibrations from my TT motor away from my stylus (page 406).

The acoustic adventures continue…

More later…

Denon DP-790W turntable review

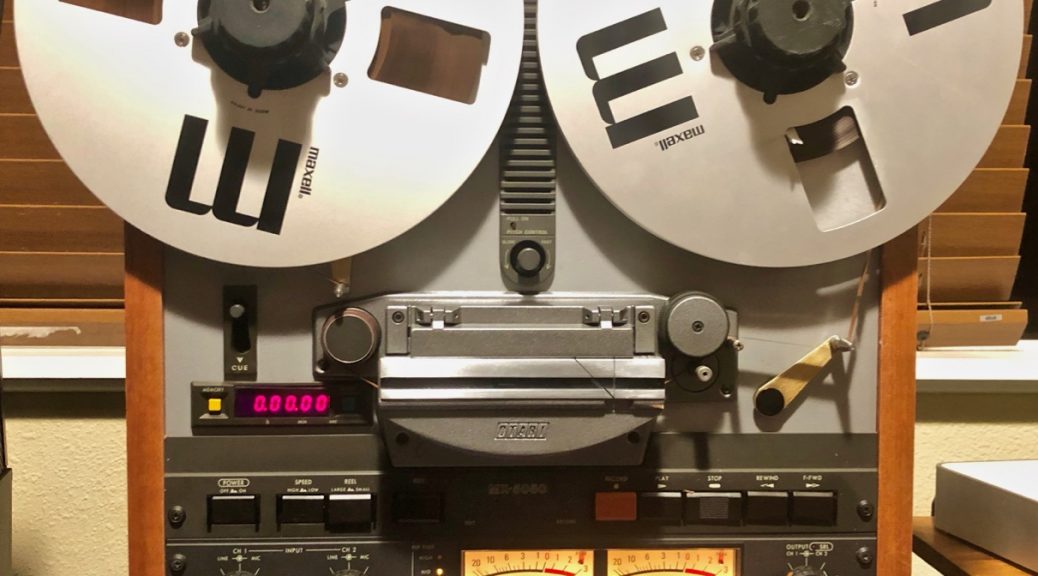
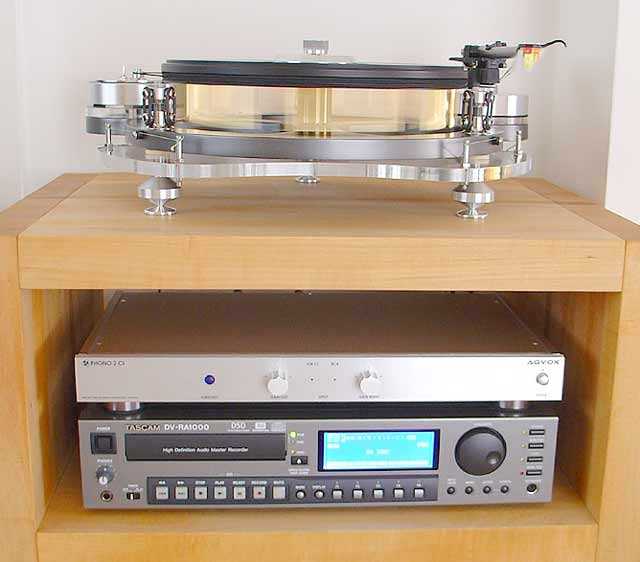
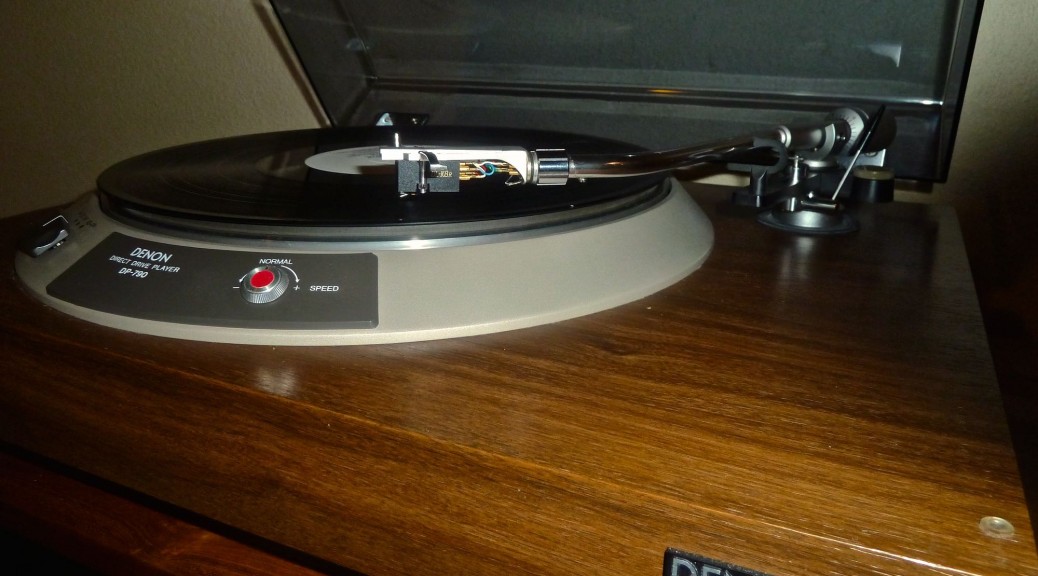
So I’ve owned and cherished this vintage turntable for over a year now.  It’s circa 1978 and I purchased it in absolute mint condition from a very friendly and interested budding audiophile in Calgary.  I drove there in -20 degree weather to go pick it up.

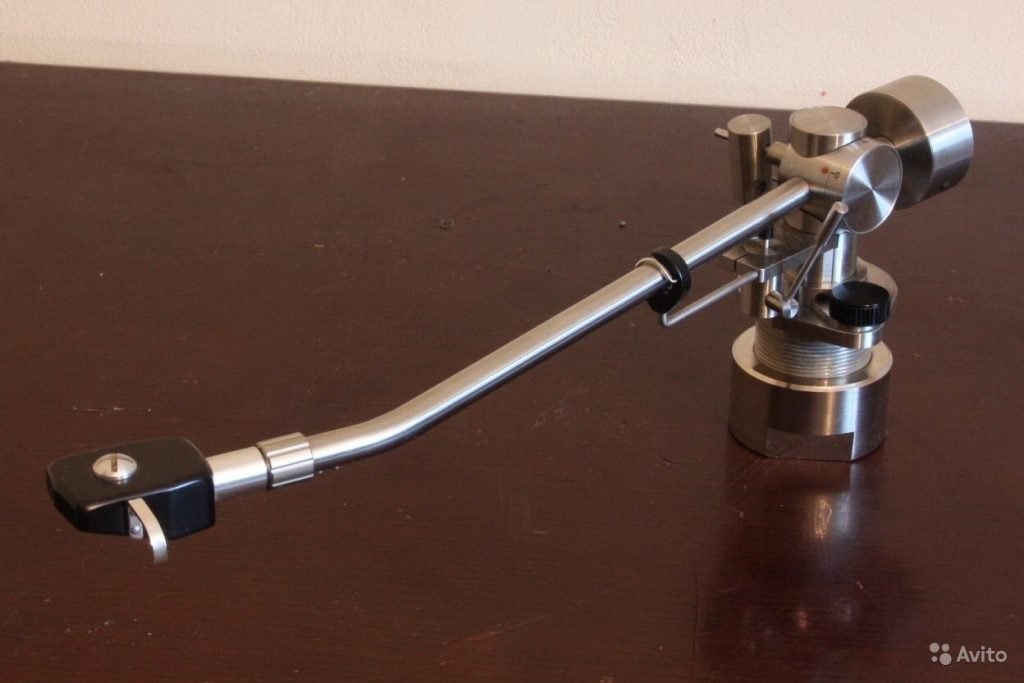
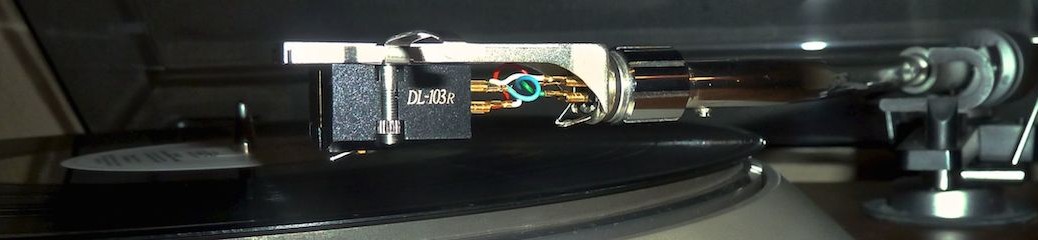
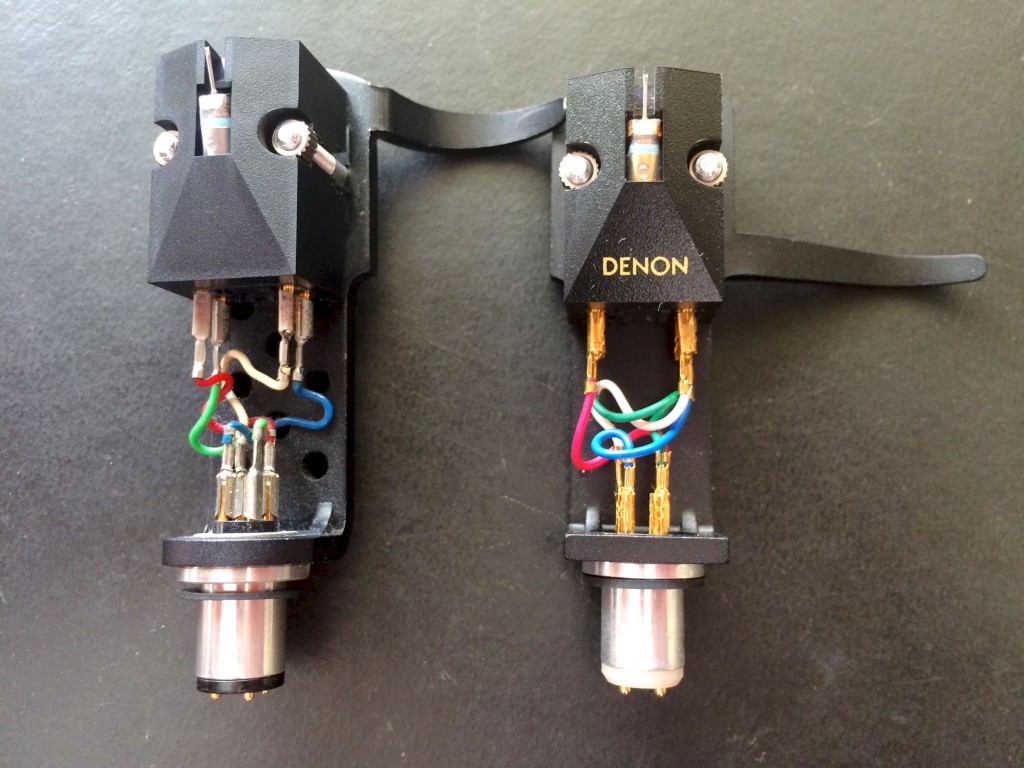
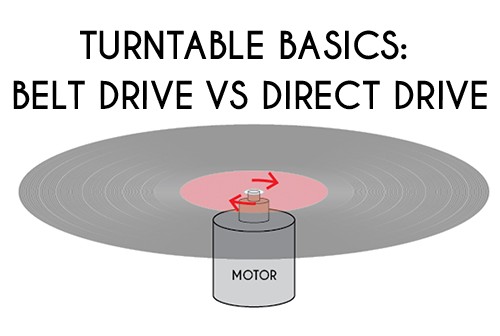
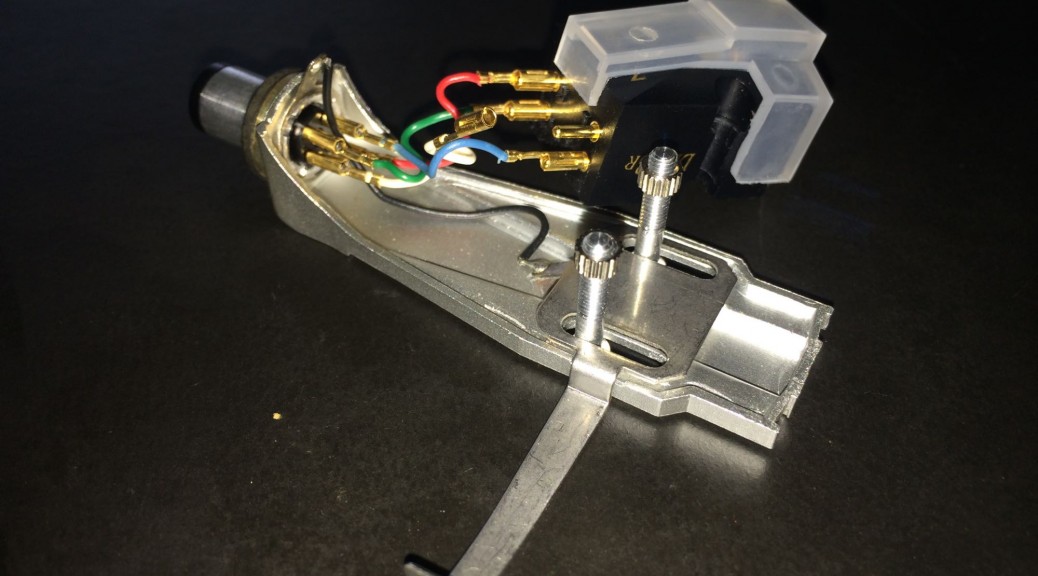
I’ve upgraded the phono cartridge with my beloved Denon 103R.  That is in fact, a big reason I purchased it, since I knew the tonearm compliance is a perfect match for my favourite LOMC (Low Output Moving Coil) phono cartridge.  I’ve also always preferred direct drive turntables to belt driven ones.  Yes, I know that will open a can of worms that I’ll address in another post (Turntables – Direct Drive vs. Belt Drive), but I will always remain an advocate of direct drive turntables ever since owning one of the finest direct drive turntables ever made, the Techniques SP-10 MkII back in the 1970s.  And when searching for a mate for for my Denon 103R matched to the Nelson Pass phono stage found in my Nakamichi CA-5A preamplifier, this was an obvious choice.

I carefully packed it to travel as checked baggage on my flight to Maui (How to pack a vintage turntable) and when I unpacked the box I was pleased that the precautions I had taken resulted in safe passage.  Needless to say, high quality audio gear is neigh on impossible to find on Maui.  So I imported.  

It took me a while to set it all up since it had been years since I had properly set up a turntable.  Azimuth, overhang, accurate stylus force, leveling, VTA, cartridge loading, were all tweeted (How to set up your turntable for your phono cartridge).  Then, I found this otherwise fantastic turntable’s achilles heel.

Virtually all turntables use one of two methods to deal with acoustic feedback (vibrations from the speakers returning back to the phono cartridge to be re-amplified in a positive feedback loop), either suspension (sprung turntables) or mass loading (Acoustic isolation for turntables – to couple or decouple?…), and this one has neither.

The plinth, while solid, is certainly no example of mass loading, but it also lacks any form of suspension.  The only attempt Denon made at acoustic isolation were four grossly inadequate rubber feet.  Thus began a quest that lasted weeks – how to isolate this otherwise exemplary turntable.

It was immediately obvious that vibrations from my “equipment rack” (which is an ordinary teak shelving unit that is almost seemingly designed to mechanically amplify vibrations but I like it’s esthetics and know I can do what it takes to modify ordinary furniture to my needs, right?) would be a deal breaker.  No problem I thought, just hang the turntable off the wall so that’s exactly what I did and expected good results.  Not.

The trouble was the tight bass of my Kef 104/2s was so well coupled to my wood-over-concrete slab floor (coupling is exactly why the bass is so tight) that it transmitted very efficiently and effectively to the wall studs from which my precious turntable was hanging.

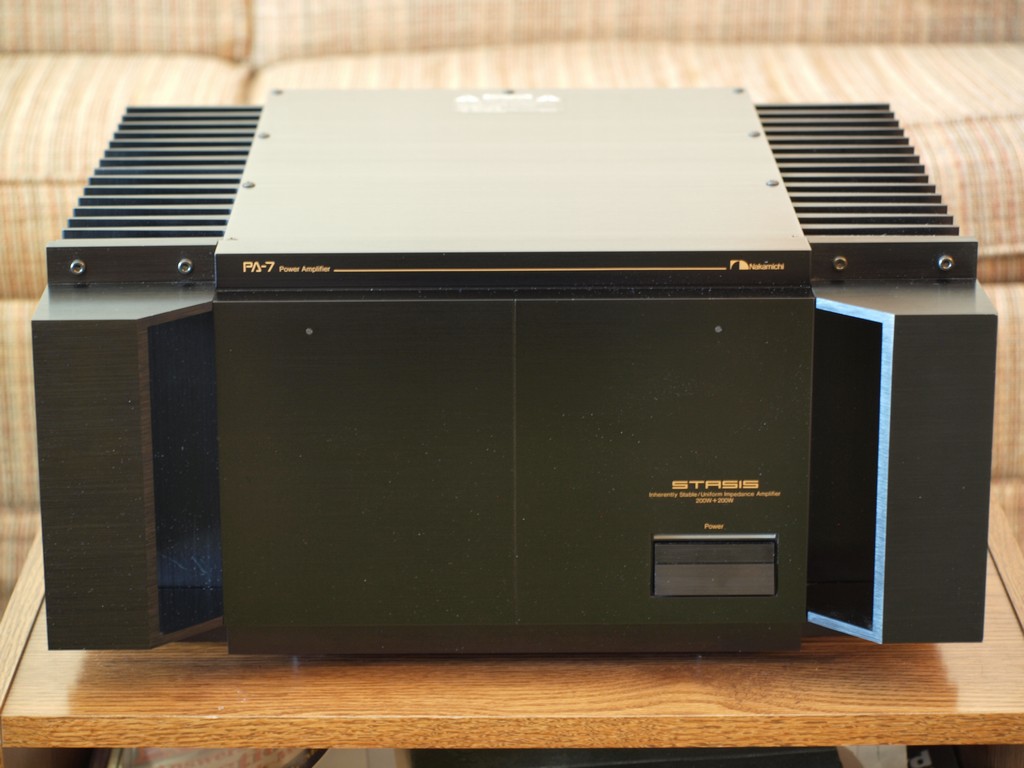
What ensued was a methodical study of acoustic isolation techniques.  I didn’t really want to re-plinth the deck, it is a frigging perfect example of it’s original glory (or lack thereof in the isolation department).  So I experimented with various methods to build an isolation platform for it to sit on.  I started with a couple pieces of the hardest and densest wood I could find (they almost feel like granite they are so heavy) then various methods between them in the form of ball bearings (which virtually eliminate horizontal vibration transfer – they now sit under my power amplifier), bicycle inner tubes (don’t over-inflate or it defeats the purpose), Sorbothane feet, spikes (coupling the extra mass to the plinth), and every combination thereof.

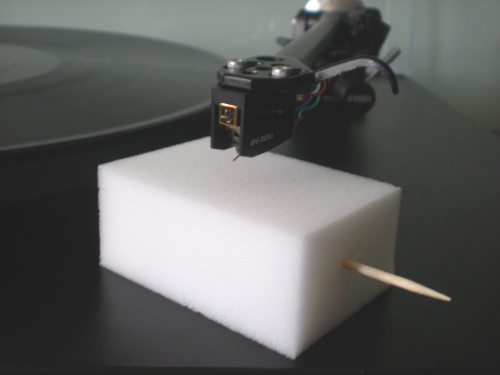
What I ended up with is three (in order to offset them from the four feet of the turntable plinth) Vibrapod cones, stacked into three Vibrapods that are rated for the weight of my turntable between the two massive wood platforms, a bicycle  inner tube directly under the platter assembly with a straw to let it breathe, along with four Sobrbothane feet under the original feet with reasonably good results.

“Reasonably good?!” I’m sure many of you are asking.  Anyone who knows me or reads this blog knows that “reasonably good” is far from good enough.  So the quest continues.  I plan to further experiment with granite slabs and boxes full of sand (Maui beach sand of course) before I feel I have fully exhausted acoustic isolation techniques.  I might still hang the platform from the ceiling but I’m hoping to not resort to such drastic measures.  And that’s certainly part of the fun, discovering what works and what doesn’t.

I presently have the acoustic isolation tamed to where it is below maximum listening levels, but barely so.  If I “crank it” on some of my fav music that, well… I just love to “crank it” on I’m sort of “dancing with the acoustic feedback devil.”  Still… in spite of all my methods.  Under the limits test – phono cartridge sitting on non-spinning vinyl, it is unquestionably still there, and rages out of control a mere notch or two above my maximum listening levels.  Of course, it’s drastically reduced on spinning vinyl since that presents a “moving target” for the positive feedback loop to occur.

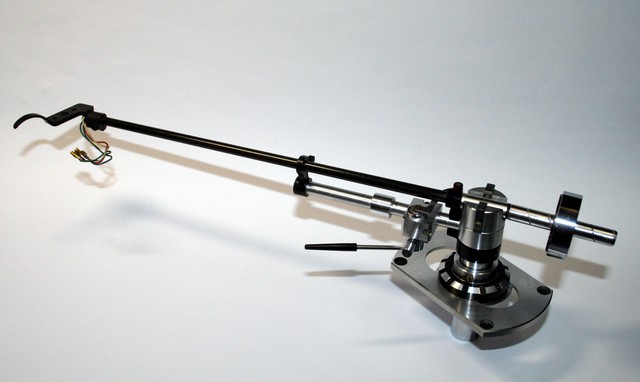
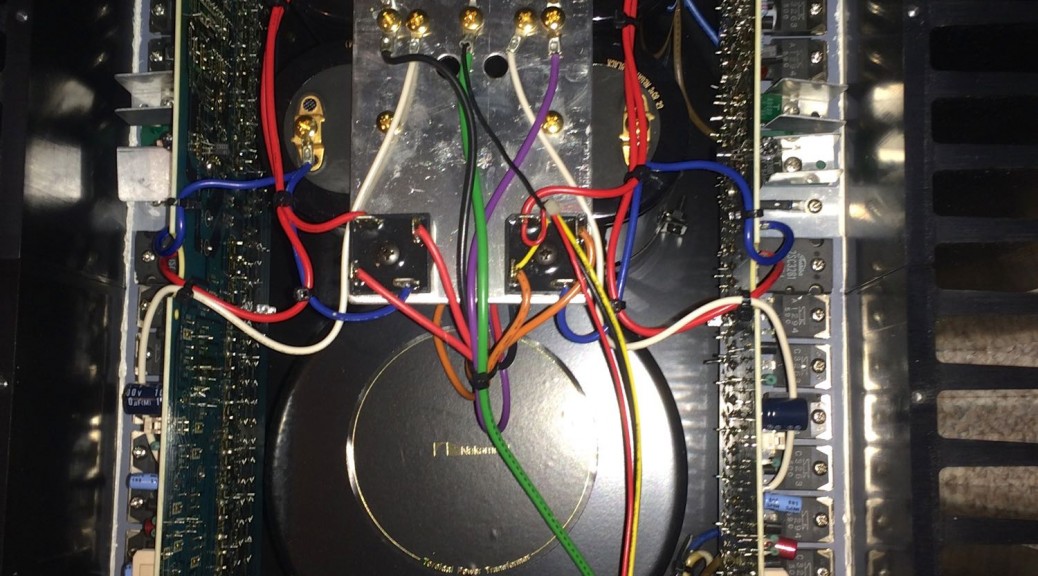
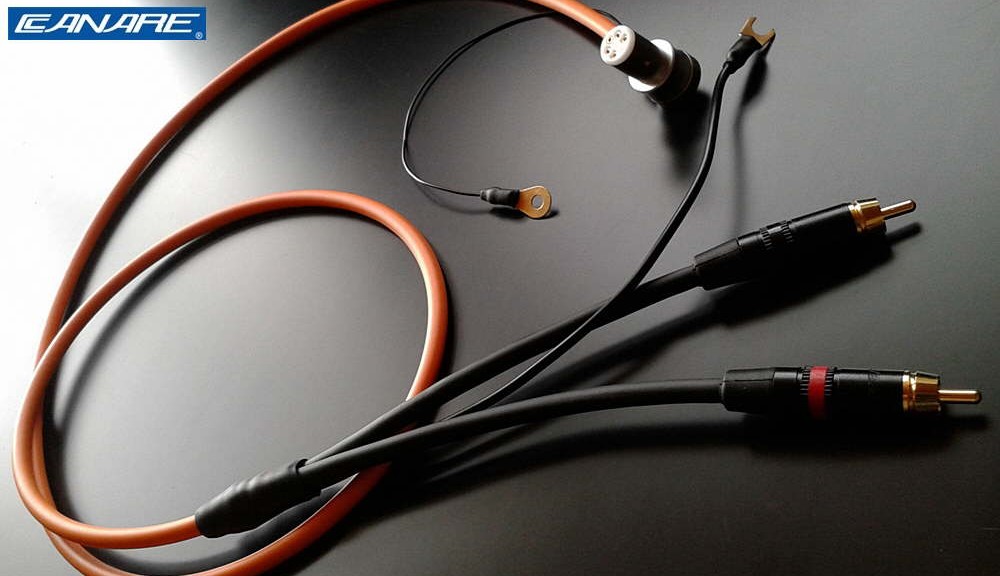
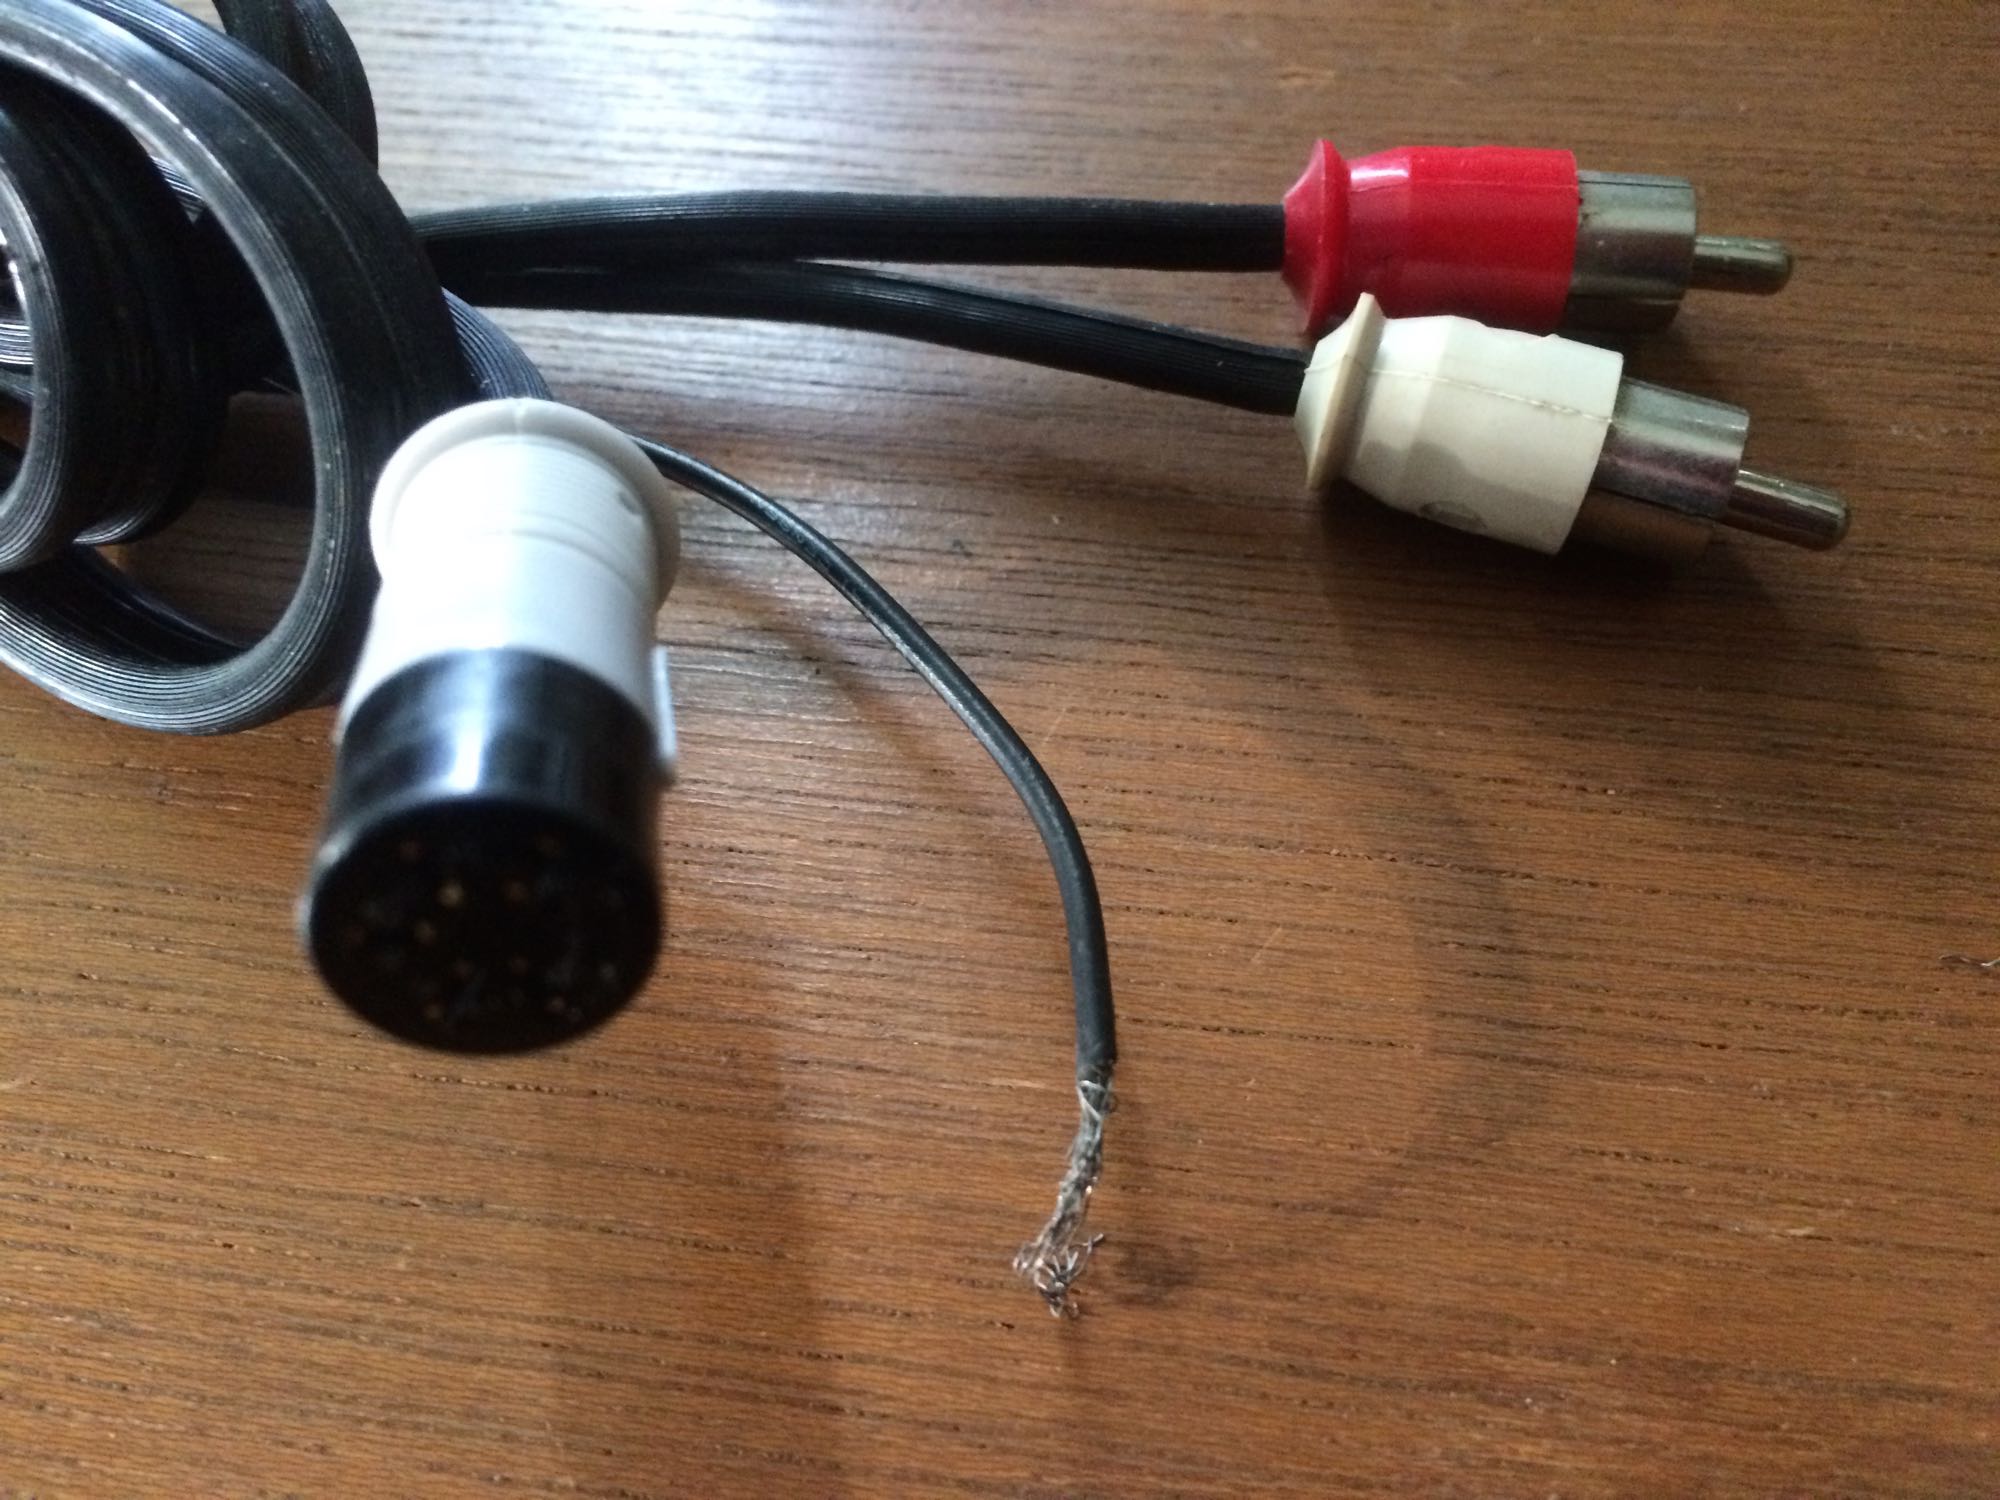
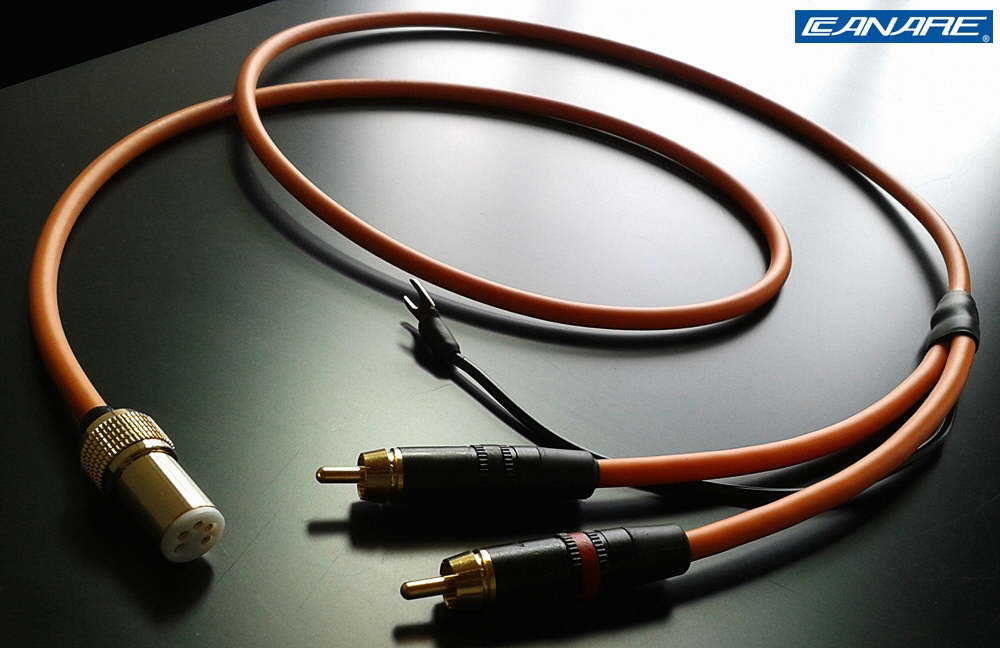
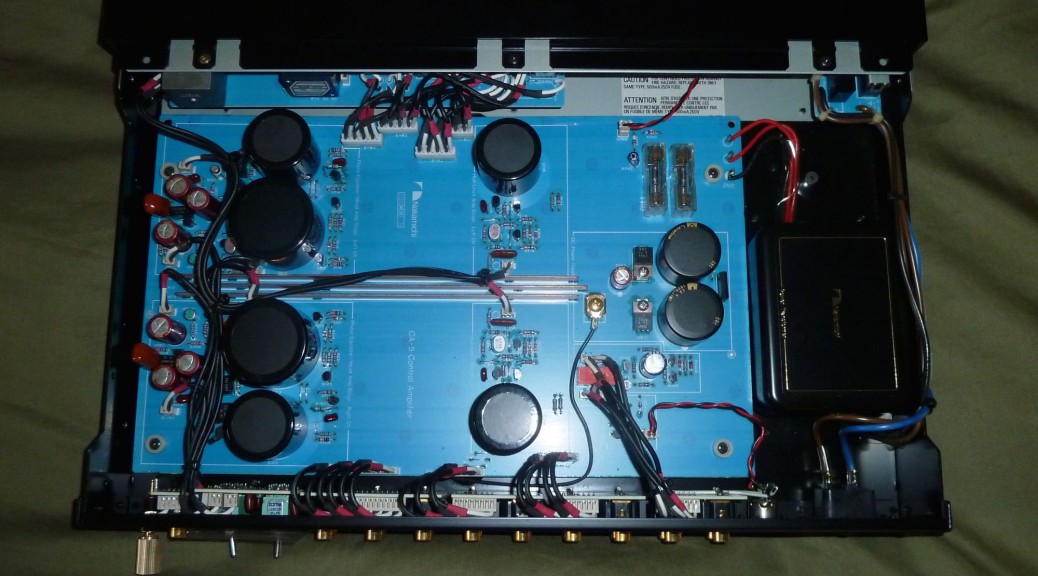
So what started as a turntable review has evolved into a study of acoustic isolation.  As for the rest of the turntable attributes?…  It is the perfect example of everything I love about direct drive turntables: massive platter, precision speed control (not tied to the frequency of the power outlet as are so many of the lessor belt drive turntables), and virtually non-existent wow and flutter.  Also, being that it’s fully manual, the gorgeous tonearm is like a separate component, and shares no circuitry or mechanics with the rest of the turntable.  The now upgraded (Time for new tonearm cable?) five pin DIN tonearm cable connects directly to my Nak CA-5A without electrical or mechanical interference of any kind, which is extremely important to me for obvious reasons.

Of course, this means that this remains a fully manual turntable.  You cue it up by hand and you get up and pick up the stylus at the end of each side of your vinyl or you are serenaded by that methodical clicking of the stylus on the run-out track.  And I wouldn’t have it any other way.  If you’re listening to vinyl you’ve already made the choice of superior sound quality over convenience.  If you play vinyl with an automatic turntable you might as well fire up your music server and indulge in the full-service (and compromises) that automation offers.

Does anyone else remember the turntables that used to stack multiple records to drop onto the platter in succession?…  Just load up a few records and you’ve got a vinyl iPod.  That was how it was done back in the 1970s.  That is, if not getting out the listening chair was more important than sound quality (and preserving your vinyl).

All-in-all, I couldn’t be happier with this turntable.  With Denon’s original direct drive technology, which arguably hasn’t improved since the “golden age” of vinyl, combined with around $100 to $150 spent on my DIY (do it yourself) turntable isolation platform, I have a deck to rivals that of $30k decks today.

Incredulous?…  Yes, direct drive turntables, which I’ve been “singing the praises” of for years are coming back in vogue, and selling for $30k.  Just have a look at VPI’s (a long time advocate of belt drive turntables), newest addition to their product line, a “classic” direct drive turntable starting at $29,999:

http://www.musicdirect.com/p-157642-vpi-classic-direct-drive-turntable.aspx

Postscript: December, 2014:  I’ve used a massive granite slab coupled to the Denon with spiked feet, sitting on a bed of sand in a nice wood box, that sits atop my existing double wood slab isolation platform and have finally accomplished the desired result.  Altogether, it weighs in around 150 pounds, which is hung off the wall by two very sturdy brackets.  Total cost of the modifications?..  Less than $200.  Total cost savings vs. purchasing a modern day equivalent of this turntable?…  At least $5k.