
Ok… So this is a large, complicated topic that I’m tackling here but I’ll try to break it down to the basics without going down too many rabbit holes, many of which can be debated ad-infinitum.
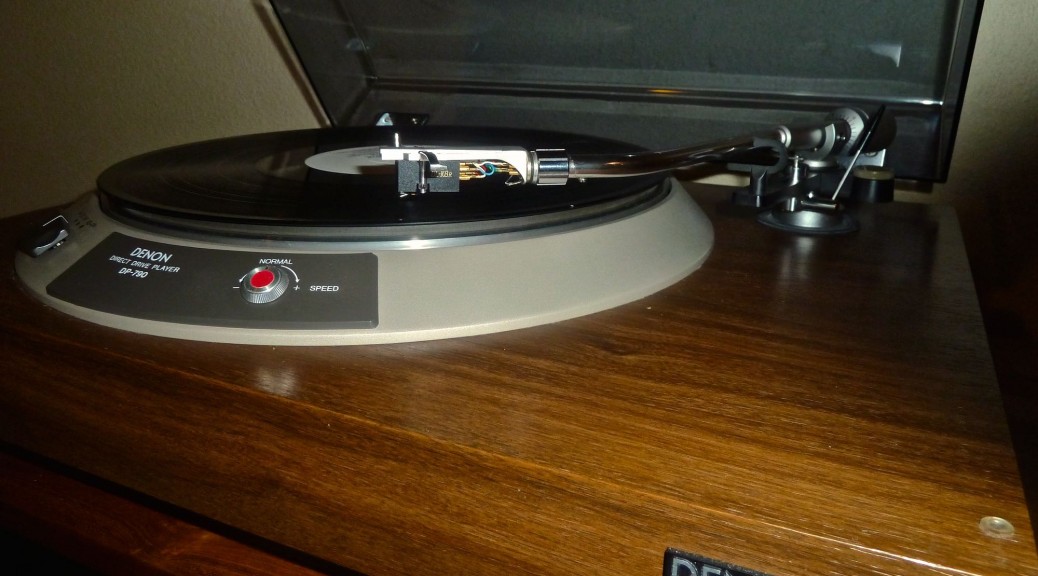
Wether you buy your turntable new or used, vintage or modern it will need to be set up properly for good results. I’ll preface this discussion by assuming you have a reasonably good quality turntable which is capable of the most basic setup options. This isn’t bargain basement territory, but then little found on this blog is. Sure, there are some inexpensive ways to improve sound quality found on these pages (How to upgrade your existing system without spending a nickel.), but most discussions are catered towards high end gear. So if you have recently joined the vinyl revolution (The new (old) gear coming out) with a vintage or modern low-fi turntable, have fun but don’t expect audiophile sound quality just because you’ve got vinyl. And… unless you properly clean your vinyl before every play (yes, including the first one – new records are full of grime from the pressing process) expect any records you buy to be forever lost to audiophile sound quality in rapid order (Record Cleaning). Of course people are having fun listing to records on vinyl again for reasons that have nothing to do with sound quality, which is great. It’s just not the crowd this post is written for.
So any reasonably good quality turntable will provide many ways to set it up for your listening environment and your chosen phono cartridge. Let’s progress from the most common to the more esoteric tasks at hand:
Leveling – Most any turntable will provide methods to level the platter. Variable height feet are probably the most common and simple. Throw a small hardware store level on your platter and keep working it until it’s nearly spot-on level in all orientations. All good? Time to move on.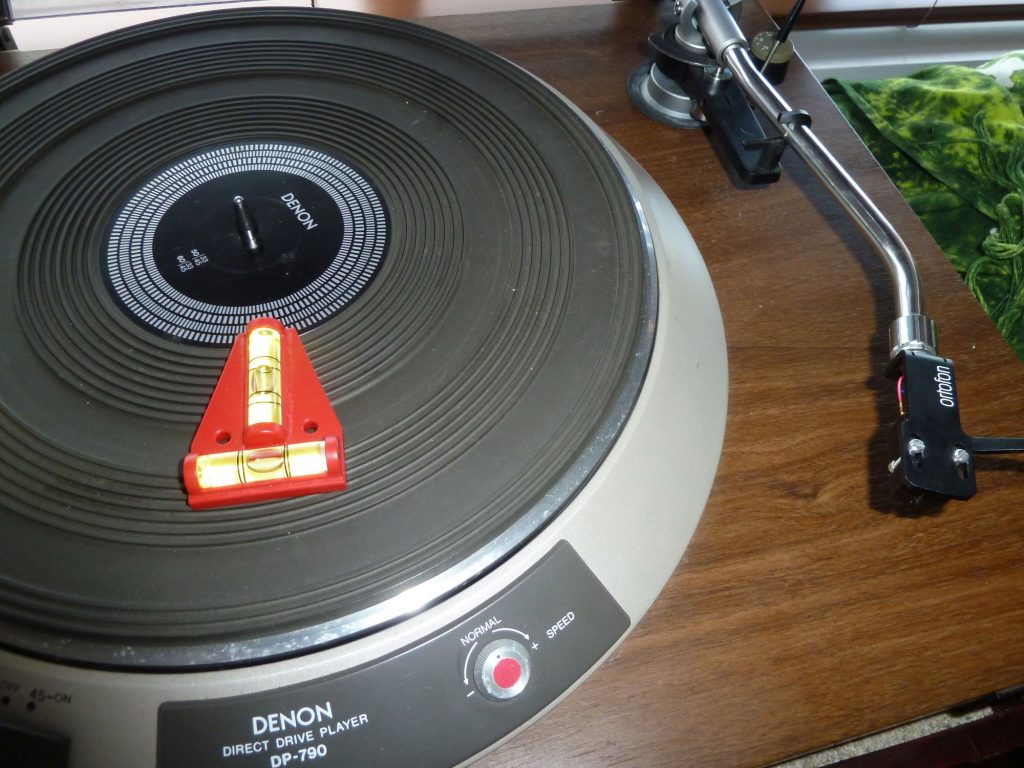
Vertical Tracking Angle (VTA) – To adjust your VTA, you need to find the adjustment on the base (where the arm is mounted to the turntable) of your tonearm that allows you to raise or lower it, as shown here. If there is no adjustment available here, you’re already hitting the limitations of your tonearm/turntable but just might get lucky with with the height it’s fixed at.
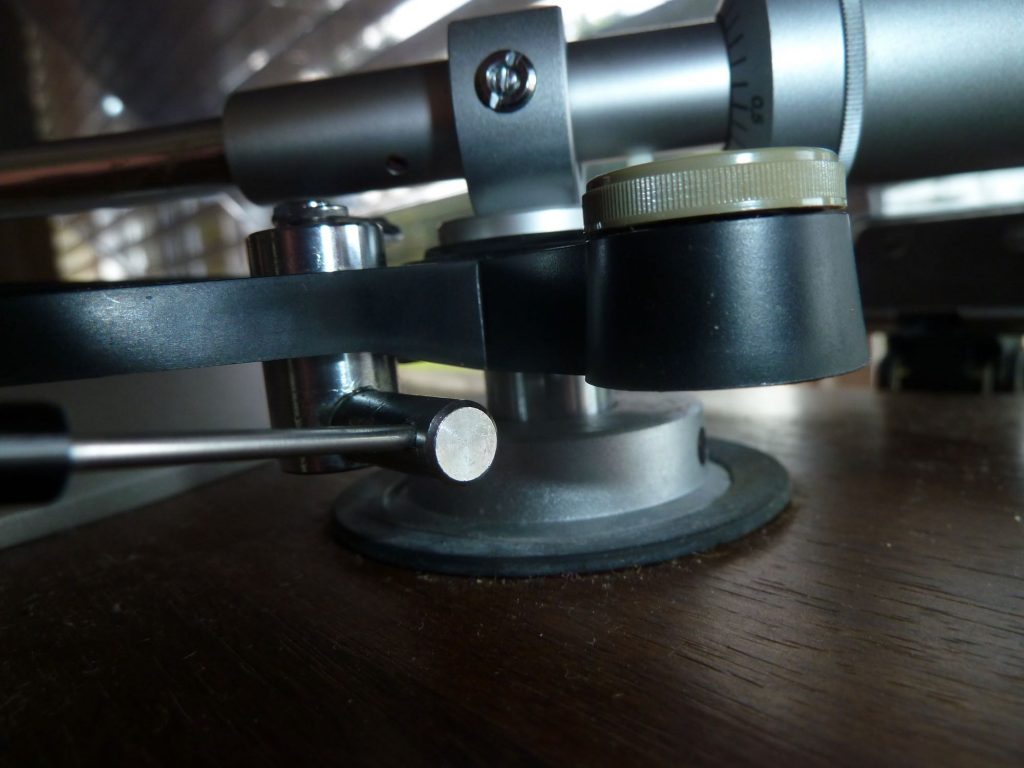
To set up the VTA properly, you want to set it up so the tonearm and cartridge body is as parallel as possible to the surface of a medium thickness record when the stylus rests on it, as show in the photo below.
Stylus Tracking Force – After leveling and VTA, this is the most basic of a turntable’s tonearm functions. Many vintage turntables have tracking force in grams stenciled onto the tonearm counterweight itself and you start by zeroing the tone arm where it is perfectly horizontally balanced and then you dial in the recommended stylus force shown on the counterweight. But I’ve never found this method to be accurate enough and sometimes it’s so far off that it could damage your stylus and/or records so… you’re gonna have to purchase another item for your turntable setup kit – a good quality stylus force gage. I’ve tried the digital ones and find them to be a real pain in the ass since they must be calibrated prior to use, batteries must be replaced, and… yes, recalibrated yet again after doing so.
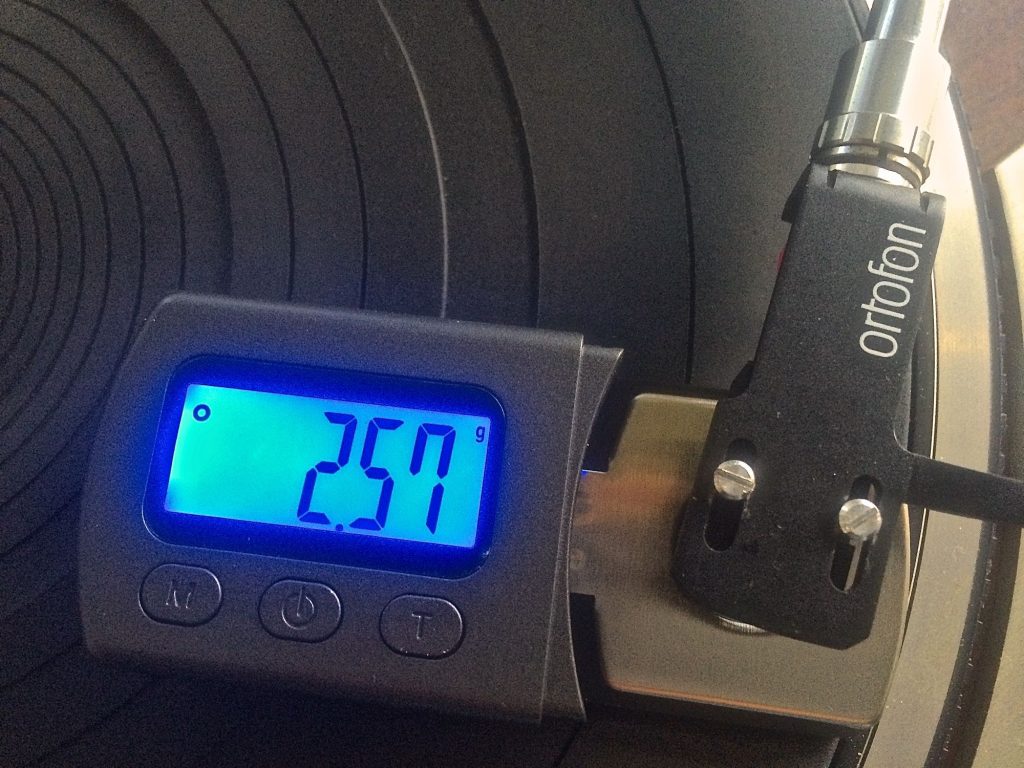
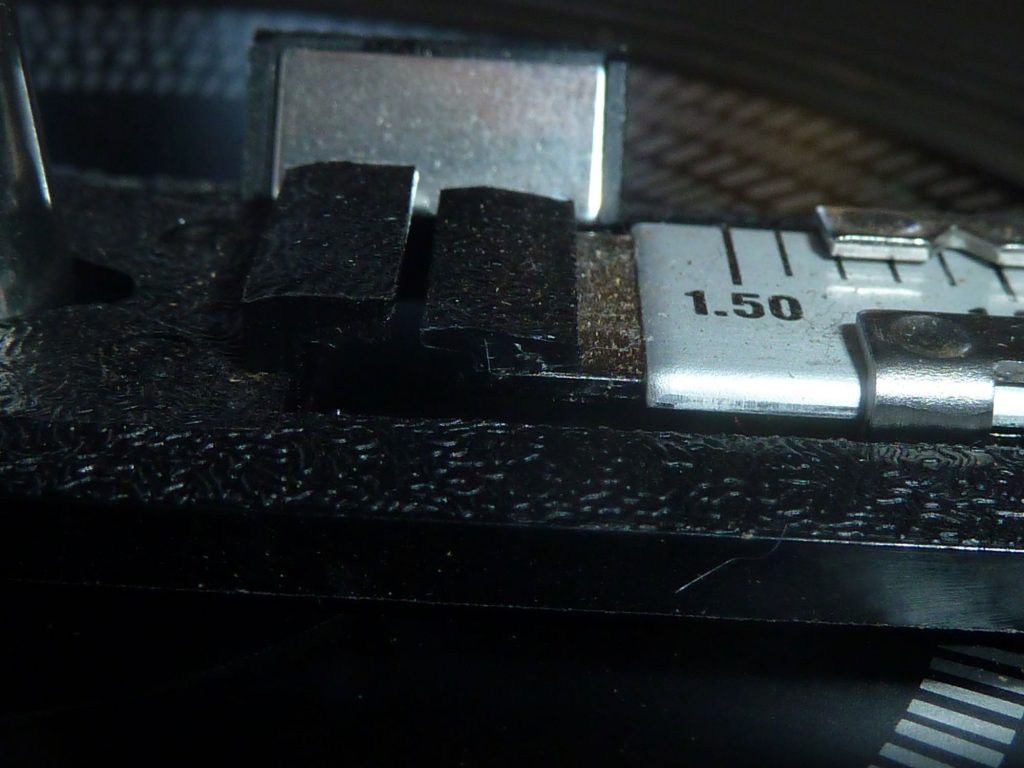
I suppose it should come as no surprise from an analogue guy such as myself that I’m going to prefer the likes of the non-digital Shure stylus force gauge shown below (circa 1972).

I find it to be simple to use, reliable, and infallible. What more can you ask for? Zoomed in photo of the mirror for accuracy shown below, and a youtube video of it’s operation can be found at: https://www.youtube.com/watch?v=qP_YjhGT0SE
Anti-Skating – The force applied (through friction) to the cartridge by the rotating record tends to draw the tonearm toward the center of the record so an equal and opposite force is required to offset it, which is called “anti-skating”. This is usually the easiest one of all since it’s typically applied with a dial on the tonearm and you simply set it to match your tracking force.
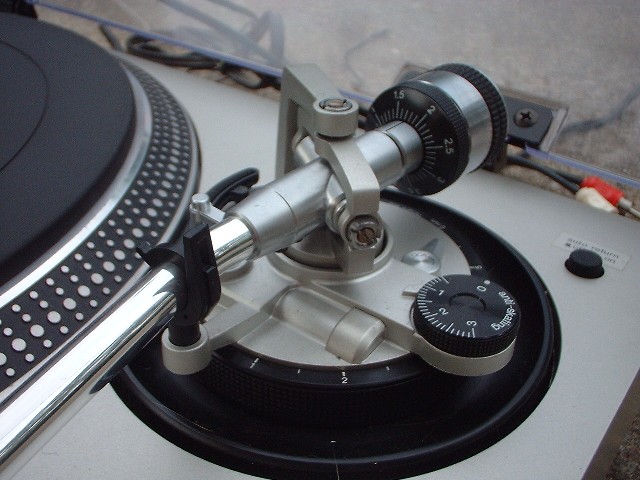
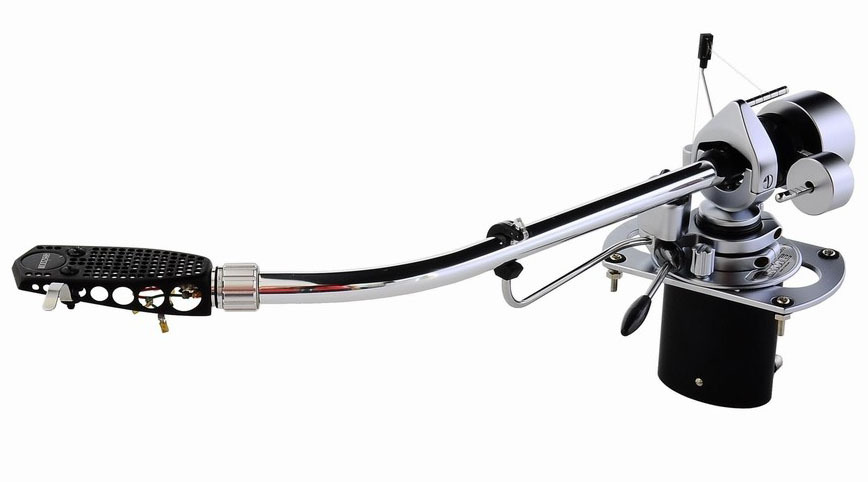
That said, some tonearms, such as the Shure SME 3009 shown below, use a counterweight threaded over different notches to apply the correct anti-skating force. This is one of the best low-compliance tonearms of all time (How do I choose a turntable?), but not for the faint hearted when it comes to setup.
A great way to double check your anti-skating is to find a record with a long run-out groove (or better yet a fully blank record without grooves at all made for this purpose), place the stylus between the well spaced out grooves, and check if it “skates” towards the middle or not. If you are spinning by hand, only check this by rotating the record in the intended clockwise direction as spinning in the reverse direction could damage a delicate audiophile phono cartridge. Of course DJs do this all the time but they have cartridges and turntables designed for that purpose.
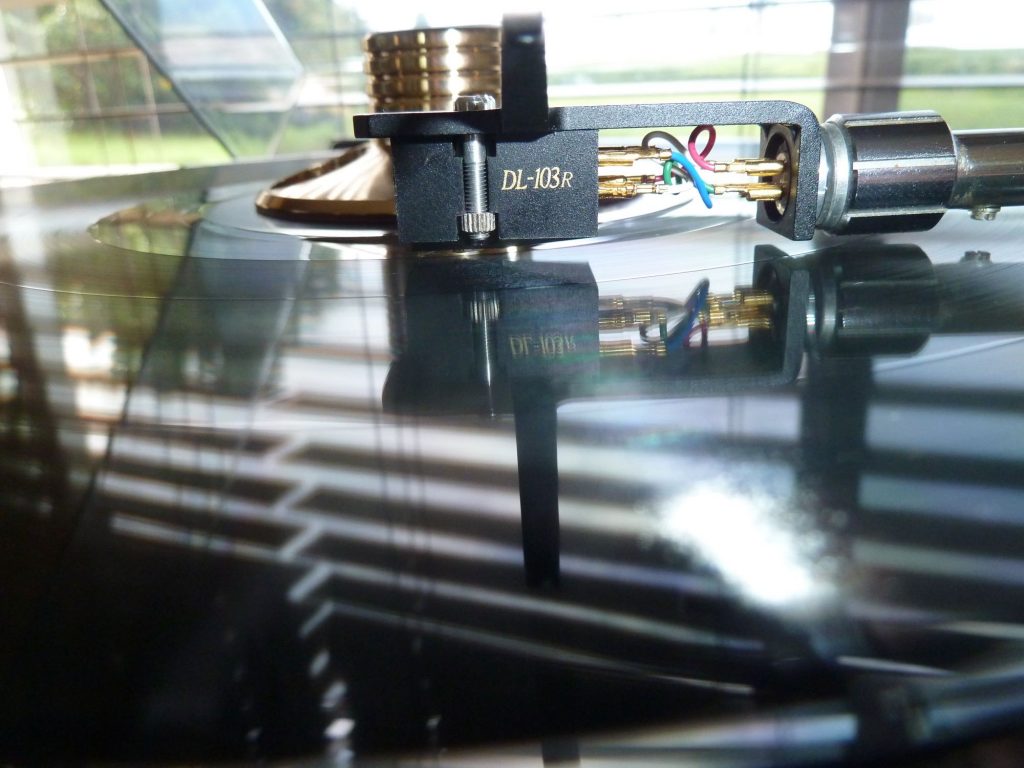
Overhang and Azimuth – OK, so you’re almost done. The last adjustments are deceivingly simple and intuitive, though volumes have been written on both. I’ve combined them here since you typically use the same tool for both, a stylus alignment protractor tool, as sown below.
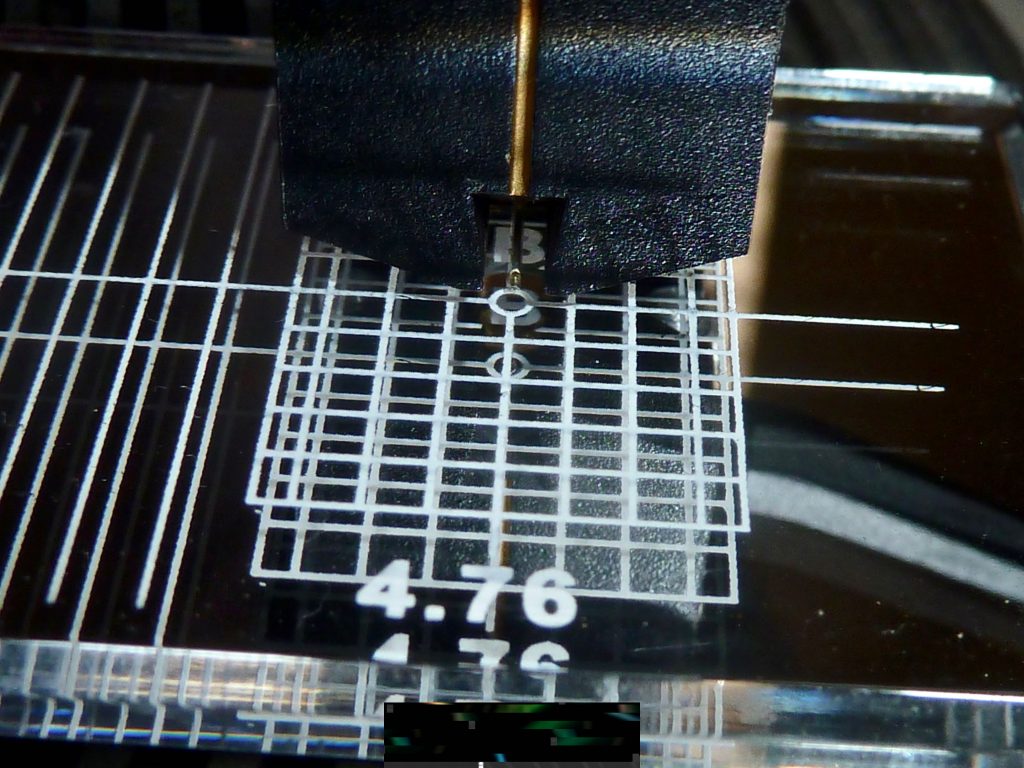
Denon makes this task far easier with it’s squared off cartridge body and vertical line on the front, which is designed for use with just such a tool. For correct offset adjustment, view the cartridge body from the top at the two “null points” shown on the mirrored tool and adjust it in the head shell to be as squared off as possible with the grid. This can be a back and forth process. For correct azimuth adjustment, view the cartridge from the front and line it up to be as vertical as possible with the center grid line, as shown. Once again, easy when you have a vertical line on the front of the cartridge to gauge by.
That’s it! Now go plant your butt in the sweet spot in front of your speakers and reap the rewards of you efforts. Will your cartridge occasionally mis-track? Sure, the world of analogue audio is full of imperfections (Pleasure And Pain Ben Harper & Tom Freund). But when it all comes together it’s absolutely magic and even when things are off a bit, it still walks all over 16-bit digital audio sound reproduction. Every day, all day.